Almost everyone hangs art too high. The instinct is to place it up near eye level while you are standing, but rooms are mostly experienced sitting down, and a piece floating a foot above the sofa looks stranded. Galleries solved this a century ago with a simple rule: the center of the artwork sits at roughly 57 to 60 inches from the floor, the average human eye level, and everything keys off that line. Once you internalize that single measurement and how it adjusts over furniture, hanging art stops being guesswork. This guide covers the height rule, spacing over furniture, gallery walls, and the hardware that keeps it all level.
What is the right height to hang art?
The foundational rule is the gallery standard: position the artwork so its visual center lands 57 to 60 inches off the floor. That range matches average eye level, which is why museums and galleries use it, and it keeps art from drifting up the wall where so many people mistakenly place it. To find the nail position, measure the height of the frame, divide by two to get the center, then add your chosen eye-level number, and subtract the distance from the top of the frame down to the taut hanging wire or hook. That math puts the center exactly where you want it.
This rule holds for art on a blank wall, in a hallway, or up a staircase, where you follow the slope but keep each piece centered to eye level as you climb. The main adjustment is for very tall ceilings or oversized pieces, where you can raise the center slightly so the art relates to the room's scale. In rooms short on natural light, placement near a lamp or sconce keeps art from disappearing into shadow; our guide to brightening dark-room layouts covers lighting art in dim spaces. Resist the temptation to hang higher just because the wall is large; the eye-level rule wins.
How should art relate to furniture below it?
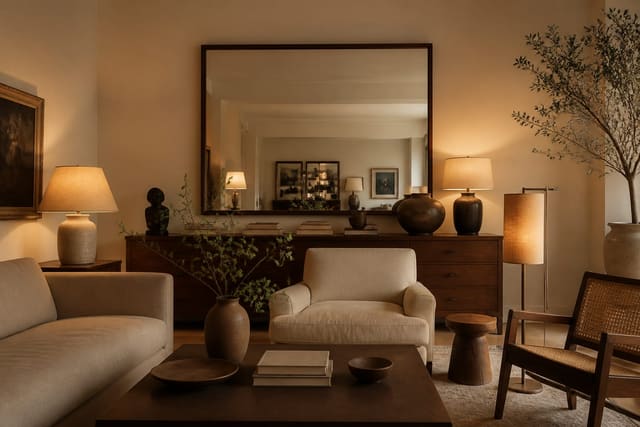
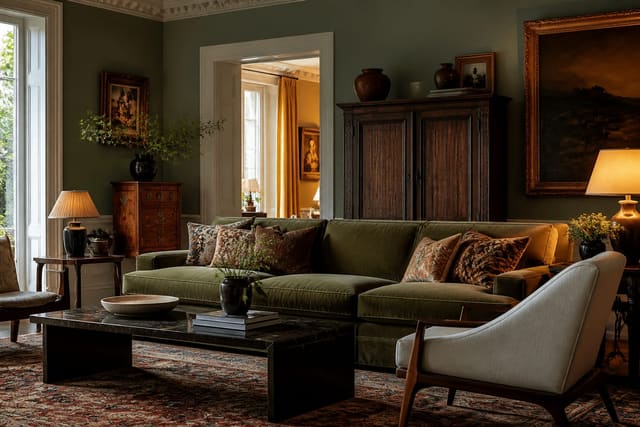
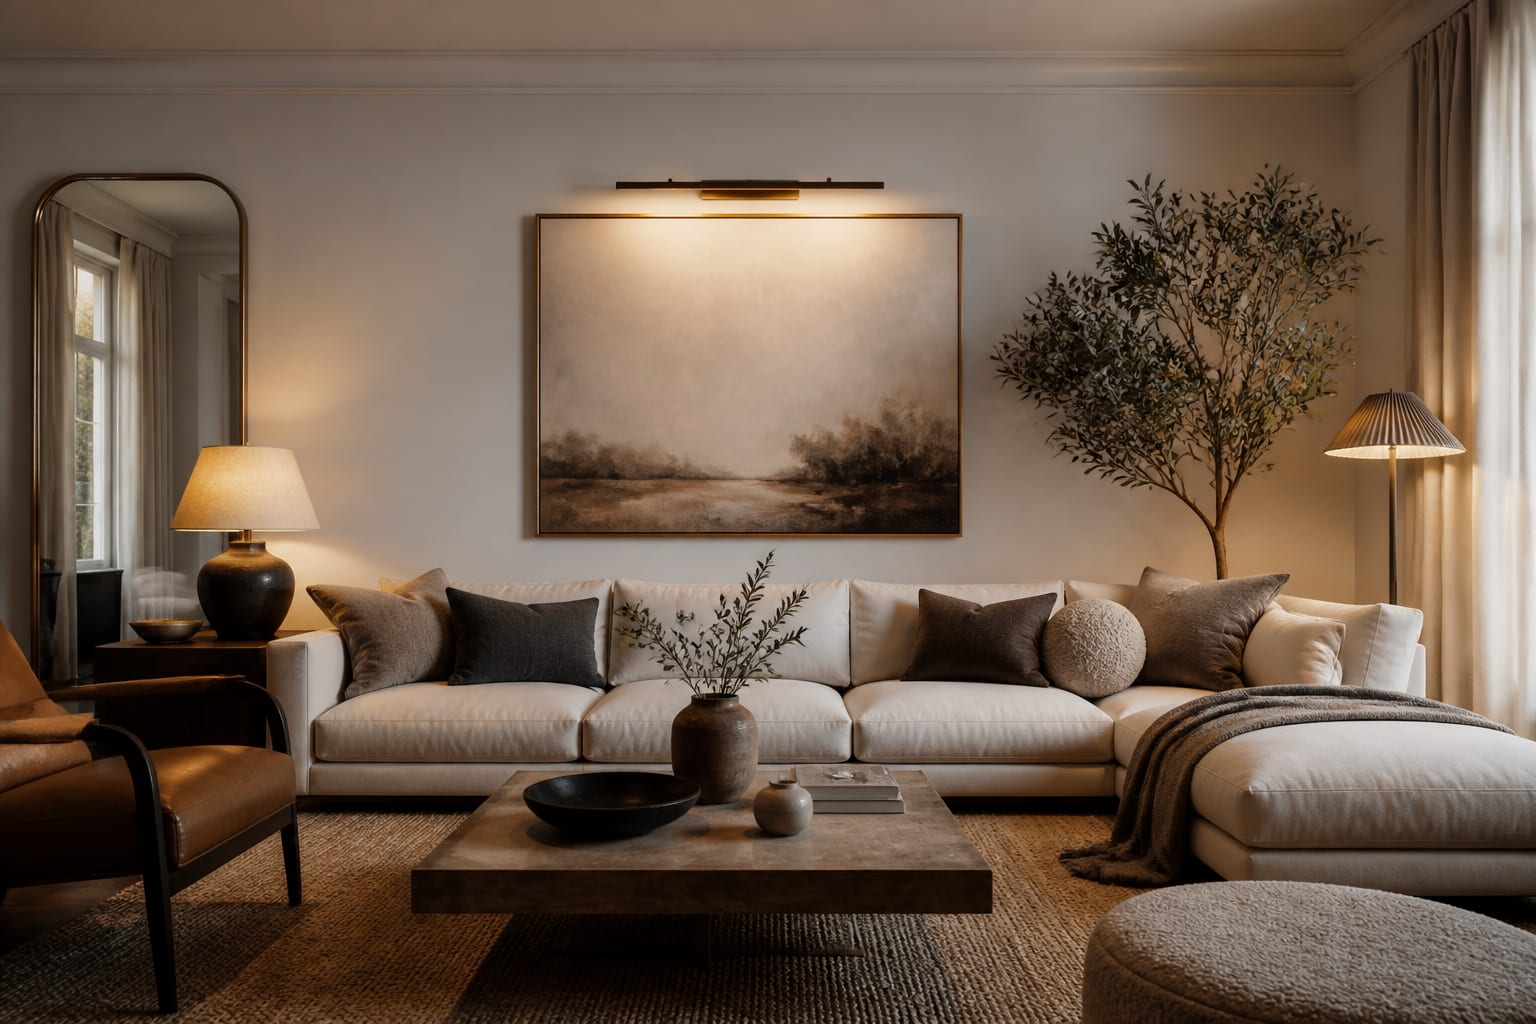
When art hangs over a sofa, bed, console, or dresser, it stops relating to the room's eye level and starts relating to the furniture. The spacing rule here is to leave 6 to 12 inches of breathing room between the top of the furniture and the bottom of the frame. Closer than 6 inches and the art looks like it is resting on the sofa back; farther than 12 inches and it floats disconnected, the most common error in living rooms. Hanging within that band visually ties the art to the piece below so they read as a composed unit.
Proportion matters as much as height. A single piece or grouping over a sofa should span roughly two-thirds of the furniture's width to feel balanced. A 90-inch sofa wants art or a grouping about 60 inches wide; a small 24-inch piece marooned over a wide sofa looks like an afterthought. Over a bed, center the art on the mattress rather than the headboard if they differ, and keep it within the width of the headboard. Mixing art with other elements above furniture works well too; our notes on mixing design styles get into pairing different frames and pieces so an eclectic wall still feels intentional.
How do you plan a gallery wall?
A gallery wall succeeds when you treat the entire grouping as a single large piece rather than a scatter of individual frames. Find the collective center of the whole arrangement and put that center on the same 57-to-60-inch eye-level line you would use for one picture. The grouping then reads as one balanced block on the wall, which is what makes a gallery wall look designed instead of accidental.
Keep the spacing between frames consistent and tight, 2 to 3 inches of gap is the sweet spot, so the pieces feel related rather than drifting apart. Wider gaps make the arrangement look disconnected and sparse. Before you put a single hole in the wall, plan the layout flat:
- Trace each frame onto kraft paper or newspaper and cut out the templates.
- Tape the paper templates to the wall with painter's tape and rearrange until the composition works.
- Mark the nail or hook position on each template, then hang through the paper and tear it away.
- Start from the center piece and work outward to keep the whole grouping balanced.
- Keep all gaps a consistent 2 to 3 inches so the cluster reads as one unit.
This paper-template method saves you from a wall full of extra holes and lets you commit only when the layout looks right. For symmetrical grids, measure precisely; for organic salon-style walls, vary frame sizes but hold the spacing steady.
What hardware keeps art level and secure?
The right hardware is what stands between a styled wall and a frame on the floor. Match the anchor to both the weight of the piece and the wall type. For lightweight frames under about 10 pounds, a single nail or a basic picture hook into drywall is fine. For pieces from 10 to 25 pounds, use two hanging points spaced apart, which keeps the frame level and spreads the load. Anything heavier, or hung on plaster or masonry, needs wall anchors, toggle bolts, or a screw driven into a stud.
Using two points rather than one is the simplest trick for keeping art straight, since a single hook lets a frame tilt every time it is bumped. A picture-hanging strip or a small bumper on the bottom corners also stops frames from shifting. Always check for the stud or use a rated anchor for heavy mirrors and large canvases, because drywall alone will not hold 30 pounds for long. Hang the piece, then check it with a small level and adjust before walking away, so the line is right the first time.
Here are the common mistakes to avoid when hanging artwork: - Hanging art too high, well above the 57-to-60-inch center line, so it floats near the ceiling. - Leaving more than 12 inches between the top of a sofa and the bottom of the frame. - Choosing a piece under two-thirds of the furniture width, leaving it stranded and undersized. - Spacing gallery-wall frames more than 3 inches apart, so the grouping looks scattered. - Using a single hook on a heavy frame, which lets it tilt and slip every time it is bumped. - Skipping wall anchors on a 30-pound mirror hung in bare drywall, which eventually pulls out.
See it first in Re-Design
Deciding what art belongs on a wall, and how big it should be, is hard to judge from a sketch or a measuring tape alone. Upload a photo of your room to Re-Design and preview how different pieces and gallery-wall layouts look above your actual sofa, bed, or console before you commit a nail to the wall. You can re-design the same wall with one large statement piece versus a clustered grouping to see which proportion suits the furniture and the space. Seeing the art at the right 57-to-60-inch height in your real room takes the guesswork out of scale and placement, so you buy and hang the piece that genuinely fits rather than discovering it is too small after the holes are drilled.
Frequently Asked Questions
How high should I hang artwork?
Hang a single piece so its center sits 57 to 60 inches from the floor, which is average eye level and the standard galleries use. Measure the frame, halve it to find the center, add your eye-level number, then subtract the distance from the top of the frame to the hanging wire to find the exact nail position. This keeps art from drifting too high.
How much space should I leave between art and a sofa?
Leave 6 to 12 inches between the top of the sofa and the bottom of the frame. Closer than 6 inches and the art looks like it is sitting on the cushions; more than 12 inches and it floats disconnected from the furniture. Hanging within that band ties the art visually to the sofa so they read as one composed arrangement.
How big should art be above a sofa?
A single piece or grouping should span about two-thirds of the furniture's width. A 90-inch sofa calls for art or a cluster around 60 inches wide, while a small 24-inch piece over a wide sofa looks stranded. Matching the scale to the furniture below is what makes the wall feel proportional and intentional rather than like an afterthought.
How do I plan a gallery wall without extra holes?
Trace each frame onto kraft paper, cut out the templates, and tape them to the wall with painter's tape. Rearrange the paper until the composition works, keeping gaps a consistent 2 to 3 inches, then hang through each template and tear the paper away. Center the whole grouping on the 57-to-60-inch eye-level line and work outward from the middle piece.