Good bathroom lighting comes from three layers working together, not one fixture trying to do everything: vanity light for faces, ambient light to fill the room, and accent light for mood and depth. The single overhead fixture most bathrooms ship with throws shadows straight down, hollowing out eyes and making shaving or makeup a guessing game.
My read is that vanity lighting is where the whole room is won or lost, because it is the light you use on your own face every day. So I fix the vanity first with light at eye level, then add ambient and accent layers to make the room feel finished rather than functional.
Fix the vanity light first
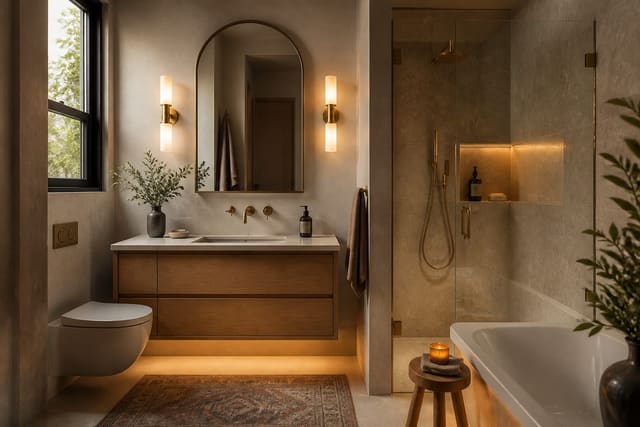
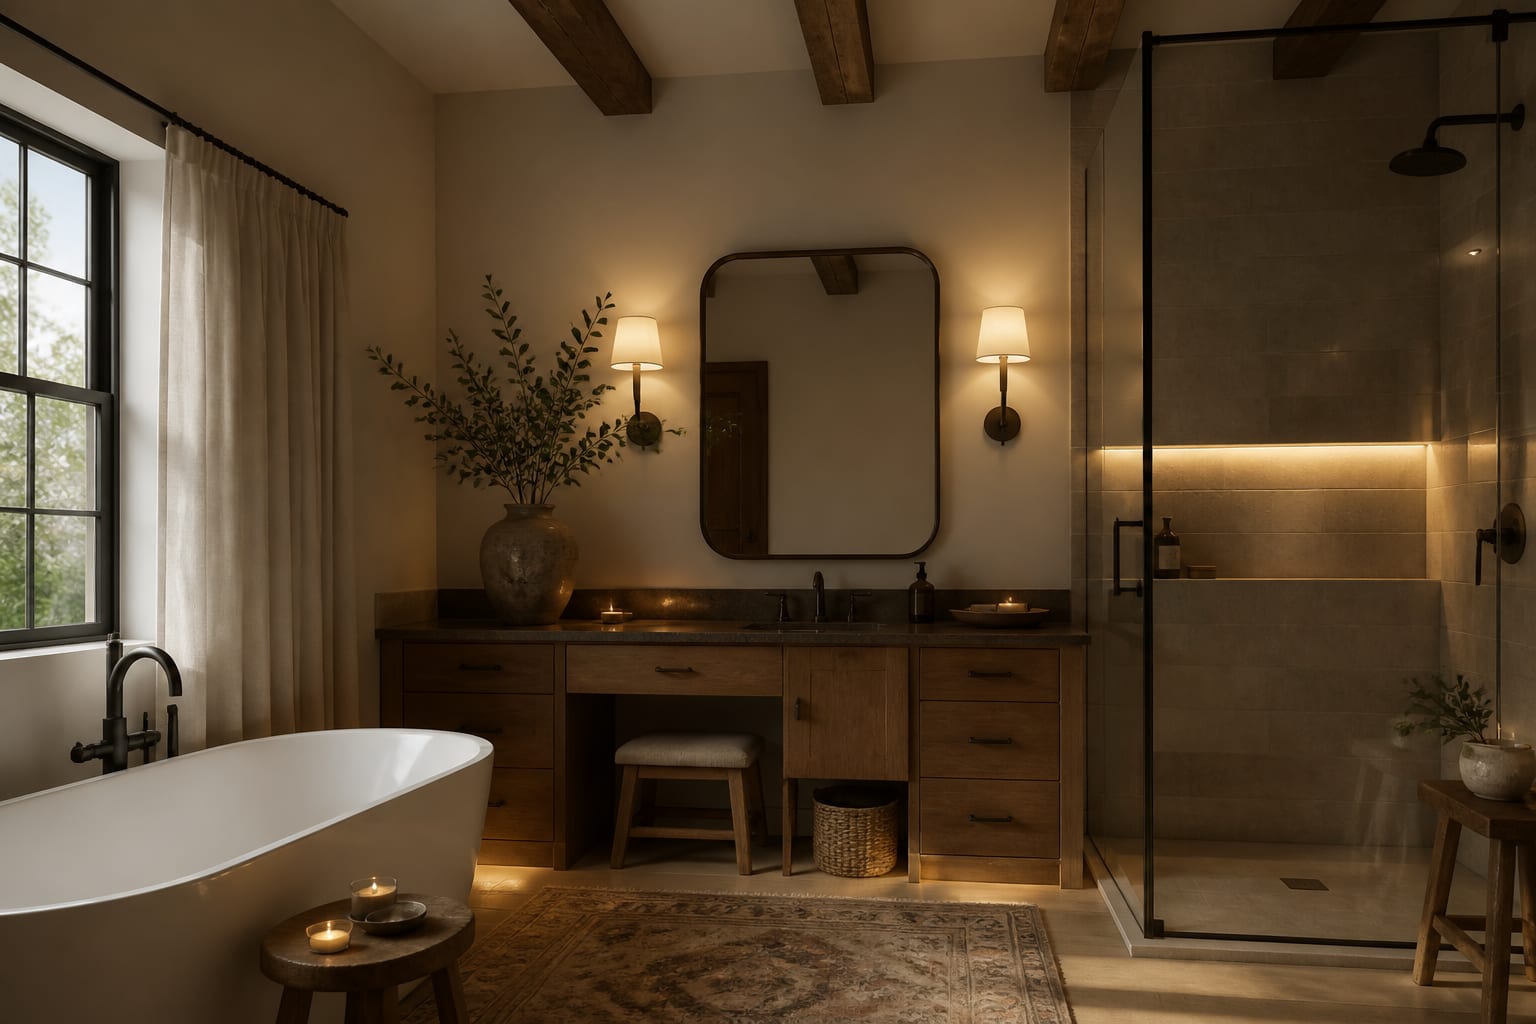
The vanity is the one spot where bad light has daily consequences, so start there. The fix is cross-lighting: put light on both sides of the mirror at roughly face height rather than a single bar above it. A top-only fixture drops shadows into eye sockets and under the chin; side lights at eye level wrap the face evenly and make every grooming task easier.
Mount vanity sconces around 60 to 66 inches off the floor, spaced 28 to 40 inches apart to flank a standard mirror. If you must use a single fixture over the mirror, choose a wide bar at least 24 inches long mounted about 75 to 80 inches up so the light spreads instead of spotlighting the forehead. Either way, color temperature and color rendering decide whether the light flatters. The same layered approach shapes a whole room in my bathroom design ideas walkthrough.
Get the bulb spec right and the vanity transforms. Use 2700K to 3000K for warm, inviting light that still reads true on skin, and insist on a CRI of 90 or above so colors and skin tones look accurate, not washed out or sallow. A 4000K cool bulb may feel crisp but tends to make skin look gray, which is the last thing you want in the mirror.
Build the ambient and accent layers
With the vanity handled, the ambient layer fills the rest of the room so corners and the shower do not fall into gloom. Here is how I stack the layers in a typical bathroom:
- Vanity layer: side sconces or a wide bar at eye level for shadow-free task light on the face.
- Ambient layer: a flush ceiling fixture or 2 to 4 recessed cans for general fill across the floor.
- Shower layer: a damp-rated recessed light inside the shower or tub zone so it is not a dark cave.
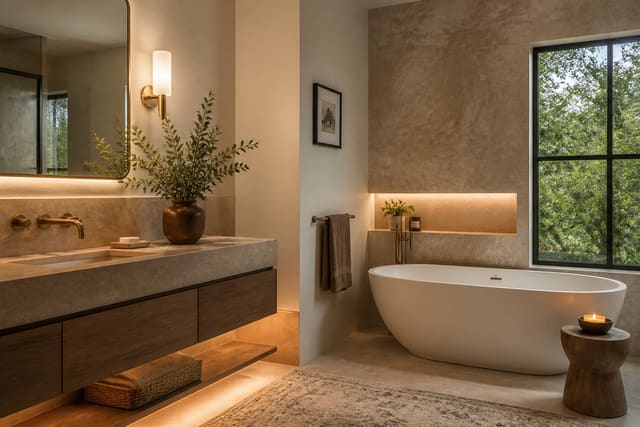
- Accent layer: a niche strip, backlit mirror, or toe-kick glow that adds depth and a soft night light.
For the ambient layer, target roughly 75 to 100 lumens per square foot of floor so the room reads bright and even when you want it to. A small powder room may need just one flush fixture; a larger primary bath benefits from several recessed cans plus the vanity sconces. Keep the ambient color temperature matched to the vanity, in the 2700K to 3000K range, so the room does not read as a patchwork of warm and cool pools.
Accent light is the layer people skip, and it is what separates a finished room from a serviceable one. A strip light in a shower niche, a backlit mirror, or a soft glow under a floating vanity adds depth and doubles as a gentle night light. If the room has a freestanding tub, a small accent fixture nearby turns it into a focal point after dark rather than a shadowed shape.
Put it all on dimmers and control
The layer that makes everything usable is control, and that means dimmers. A bathroom needs to be bright at 7 a.m. for grooming and dim at 2 a.m. so a quick trip does not blast you awake. Put each layer, vanity, ambient, and accent, on its own dimmer or at least separate switches so you can dial the room to the moment.
A practical setup runs the vanity and ambient layers together at full brightness for the morning routine, then drops to the accent layer alone, around 20% output, for the middle of the night. That low glow is enough to navigate safely without resetting your body clock. Smart dimmers or a simple scene controller make this a one-tap habit.
Mind the safety specs while you are at it. Any fixture inside the shower or directly over a tub must be rated for damp or wet locations, and switches should sit beyond arm's reach of the water per local code. Coordinating fixtures with finishes matters too; matching the metal of your lights to your faucets and pulls, covered in my bathroom hardware guide, keeps the room cohesive instead of mismatched.
Common mistakes to avoid
The most common mistake is relying on a single ceiling fixture, which casts downward shadows on every face and leaves the room feeling flat and clinical. Cross-light the vanity and add ambient fill instead.
A second mistake is choosing cool 4000K-plus bulbs that make skin look gray and tired in the mirror; stay in the 2700K to 3000K range with a CRI of 90 or higher. A third is mixing color temperatures across fixtures, so the room reads as clashing pools of warm and cool light. A fourth common mistake is skipping dimmers, leaving only a harsh on-or-off choice that is too bright at night and impossible to soften. The last is ignoring damp ratings and putting a standard fixture in the shower zone, which is both a code violation and a safety hazard.
Use AI design to plan your bathroom lighting
The tough thing about bathroom lighting is that you cannot see the effect of cross-lighting or a warmer bulb until the fixtures are wired in and the walls are patched. Re-Design lets you preview it first. Upload a photo of your bathroom and the AI design re-renders it with different vanity sconces, ceiling fixtures, and accent glows so you can judge how the layered plan looks against your real tile, mirror, and vanity.
Because you upload your actual bathroom, the previews respect your existing layout, mirror size, and finishes while swapping the lighting scheme. Test warm side sconces with a backlit mirror, then preview a brighter recessed setup to decide which layered plan makes your face and your room look right, all before you call an electrician or open a wall.