Most people pick tile size by gut and end up chopping a small bathroom into a grid of little squares. My honest take is that large format tile is the cheapest visual upgrade you can make, because fewer grout lines almost always reads as calmer and more expensive.
What size tile makes a room look bigger? In practice, anything 15 inches or larger on a side starts to feel large-format, and 24-by-24-inch or 24-by-48-inch tiles are the sweet spot for making a floor look bigger because the eye sees fewer interruptions. The fewer the grout lines, the more continuous the surface appears, which tricks the room into reading larger than its actual footprint, almost the way an uninterrupted wall of paint feels more spacious than a busy wallpaper. That is the whole mechanism, and it works just as well on walls as on floors.
Why big tile makes small rooms feel larger
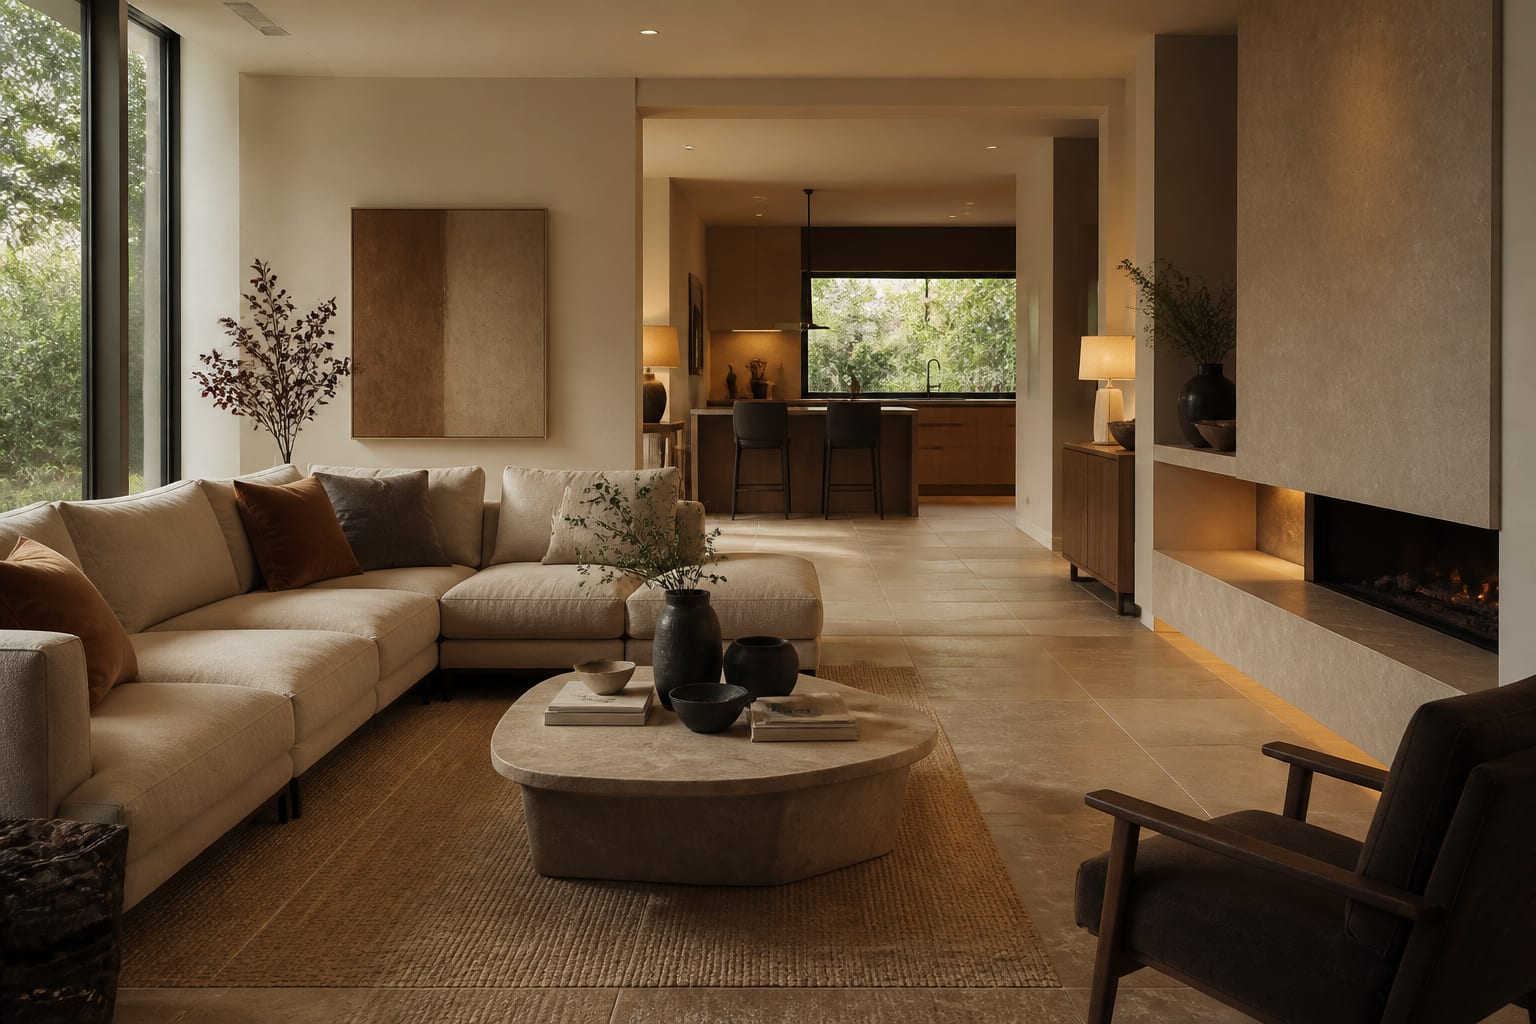
The logic is purely visual. Every grout line is a place your eye stops, so a floor of 4-inch tiles has dozens of stopping points and feels busy, while a floor of 24-inch tiles has a handful and feels open. In a compact bathroom or a galley kitchen, that difference is the gap between cramped and serene. Run the same tile up a shower wall or across a backsplash and the continuity carries through, which is why designers reach for large format when the goal is a quiet, modern envelope.
There is a practical cleanliness bonus too. Fewer grout lines mean fewer porous channels to trap soap scum and mildew, so a large-format shower wall stays looking fresh with far less scrubbing than a mosaic. That alone sells a lot of people on the look once they have lived with a grid of tiny tiles in a wet zone. The flip side is that any single tile is a bigger commitment, so a chip or a wrong color choice covers more of the room, which is one more reason to see the tile at full scale before ordering a pallet.
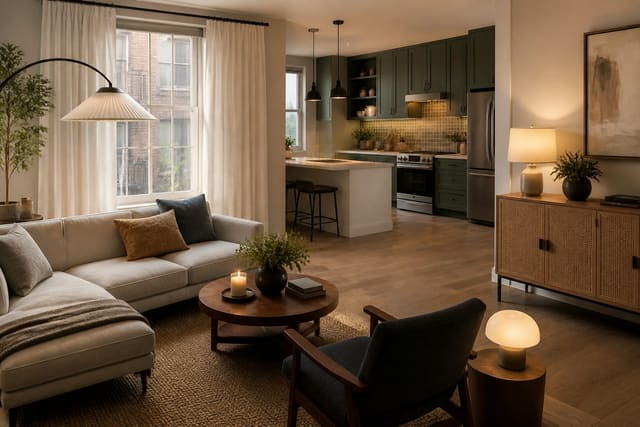
This effect is strongest in exactly the spaces that need it most. Small rentals and apartments benefit enormously, and the principle pairs well with the other space-stretching tactics in my rental apartment design notes. Big tile does not require a big room; it rewards a small one, and that single counterintuitive point changes how a lot of cramped bathrooms get tiled.
There is a counterintuitive part here. People assume small tiles suit small rooms because the tile is in proportion to the space, but the opposite is usually true: small tiles multiply grout lines and make a tight room feel chopped up, while one large continuous field makes the same room feel like a single calm plane. The trick is to keep the grout color close to the tile so the few seams that remain almost disappear, which lets the floor or wall read as an unbroken surface from across the room.
Choosing size, layout, and grout
Match the tile to the room rather than the trend. A powder room can carry a 24-by-24 floor handsomely, a primary bath floor can go to 24-by-48 planks, and a feature wall can run true slabs at 48-by-108 inches for an almost grout-free face. The biggest slabs are genuinely dramatic, mimicking a single sheet of marble or concrete across an entire shower wall, but they demand the most skill and the flattest substrate, so they are not a first-time project. Lay rectangular large format in a straight stack or a one-third offset rather than the old 50 percent brick offset, because oversized tiles lip badly at a half offset where the centers bow.
Grout is where the seamless look lives or dies. Pick a grout color within a shade or two of the tile and keep the joint to 1/16 or 1/8 inch, and the seams nearly vanish. A common temptation is to contrast the grout for definition, but with large format that usually backfires, drawing a heavy grid across the very surface you wanted to read as continuous.
Direction matters too. Run rectangular planks the long way down a narrow room and the space stretches, or across to widen it, the same trick you would use with wood flooring. The same minimization mindset that makes small spaces feel open applies here: reduce the number of visual breaks and the room exhales.
Installation realities and cost
Big tile is less forgiving than small tile, and this is the part worth budgeting for. The substrate has to be genuinely flat, within about 1/8 inch over a 10-foot run, or the corners of adjacent tiles will sit at different heights and create lippage you can feel with a bare foot. Many installers self-level the floor first and use a clip-based leveling system during setting, which adds time. Back-buttering each tile with thinset is close to mandatory at this size, because full coverage under a big tile prevents the hollow spots and cracks that plague poorly bedded large format. Labor commonly lands in the $12 to $20 per square foot range, above standard tile, because each piece is heavy and a cut mistake is expensive.
Cutting is the other reality. Large porcelain planks need a rail cutter or a wet saw with a continuous-rim blade, and thin porcelain slabs require special handling frames so they do not snap during transport and setting. None of this is exotic, but it is why a confident large-format installer charges more than someone who only sets 12-inch squares, and why you want to confirm experience before hiring.
The payoff is durability and a high-end face for relatively little material. Porcelain large format resists scratches and water, takes radiant heat well, and reads as luxurious in listing photos, which is why it shows up so often in home staging work. Spend the money on prep and a skilled setter; the tile itself is the easy part.
Common mistakes to avoid
The most common mistake is installing large format over a wavy substrate and getting lippage, which no grout can hide. Flatten the floor first, full stop. A second common mistake is using a half-offset brick pattern; with long planks the tile centers crown slightly, so a 50 percent offset puts a high point against a low corner and the floor feels uneven.
Before you order, run through this:
- Check substrate flatness and self-level if it exceeds 1/8 inch over 10 feet.
- Choose a stacked or one-third offset layout, never 50 percent for long planks.
- Match grout color closely and keep joints to 1/16 to 1/8 inch.
- Confirm your installer owns a leveling clip system and a large-format suction setup.
Use AI design to preview large format tile before you commit
It is hard to imagine how a 24-by-48 plank floor will read in your actual room from a single sample tile on a showroom shelf. With Re-Design you upload a photo of your bathroom or kitchen and re-render the floor or wall in large format tile, so you can see how dramatically the reduced grout lines open the space before you commit to demolition.
What makes this useful is testing size against your own walls. Upload the room, compare a 12-inch field with a 24-inch and a 48-inch plank, and watch where the floor stops feeling busy and starts feeling continuous. That AI design pass lets you tune tile size and grout contrast to your room's exact proportions instead of guessing from a tile shop's lighting.