A micro kitchen works under 60 square feet when every linear foot of counter does double duty (prep over the dishwasher drawer, cutting board over the sink), the fridge is under-counter or 24-inch wide, and the upper cabinets run to the ceiling so no inch of vertical storage is wasted. An 8x8 kitchen is 64 square feet. That's not a renovation problem — it's a prioritization problem. Owners of micro-kitchens try to fit standard-size versions of every kitchen feature into a space that doesn't have the floor plan for it. The kitchens that succeed in small footprints do so by eliminating two or three things that are only there by convention, ruthlessly optimizing the two or three that matter most, and making every surface work harder than it would in a larger room.
How do you design a very small kitchen under 100 square feet?
Remove everything optional, maximize vertical storage, choose one appliance configuration that fits the actual cooking habits of the household, and treat every surface as a potential work zone — including the top of the refrigerator and the insides of the cabinet doors. In a micro-kitchen, the counter is the premium resource. Protect it with cabinet-mounted, wall-mounted, or under-counter appliances and give that counter back to prep.
Cabinet strategy: go vertical first, then wide
- Take cabinets to the ceiling. The 12"–18" gap between a standard upper cabinet and a 9' ceiling is wasted storage in a micro-kitchen. Have a carpenter extend the uppers or add a second row of shallower cabinets in that gap for dry goods and infrequently used equipment.
- Remove upper cabinet doors on one or two sections. Open shelving in a micro-kitchen reads as lighter and more spacious than solid cabinet faces. One 24"–30" open section with organized shelf contents (matching containers, edited dishware) adds perceived depth.
- Add a pot rack over the stove. A wall-mounted or ceiling-mounted pot rack recovers two cabinet shelves worth of storage and turns everyday cookware into a designed element.
- Use the insides of cabinet doors. Lid organizers, spice racks, and knife strips on door insides add 30%–40% more storage to existing cabinets with zero footprint.
- Install pull-out drawers in base cabinets. Standard base cabinets with fixed shelves waste the back 8"–10" of depth. Pull-out drawers bring everything to the front.
Test this on your own room photo with ReDesign before you choose the final direction; keep the doorway, walls, windows, main furniture, lighting, and awkward fixed features visible so the preview solves the room you actually have.
Counter space: the one thing to protect at all costs
In a micro-kitchen, counter space is the premium resource. Every decision should be evaluated against whether it gains or costs counter space.
- Move the coffee maker, toaster, and any standing appliance to a dedicated appliance shelf or cabinet. Install a countertop outlet strip inside a cabinet with a door; run the appliance from the inside. It lives in the cabinet and slides out when needed.
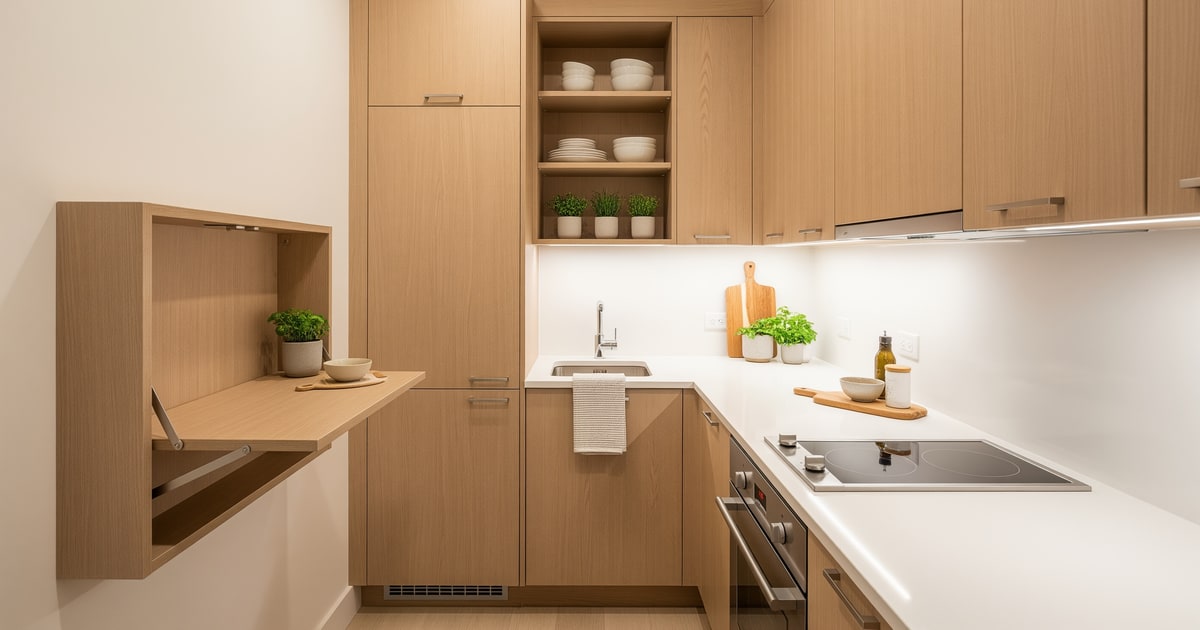
- Install a wall-mounted folding prep shelf that folds flat when not in use. IKEA's NORBO wall-mounted drop-leaf is 18"x22" and holds 55 lb. At 36" height it functions as a second counter; folded it's 2" from the wall.
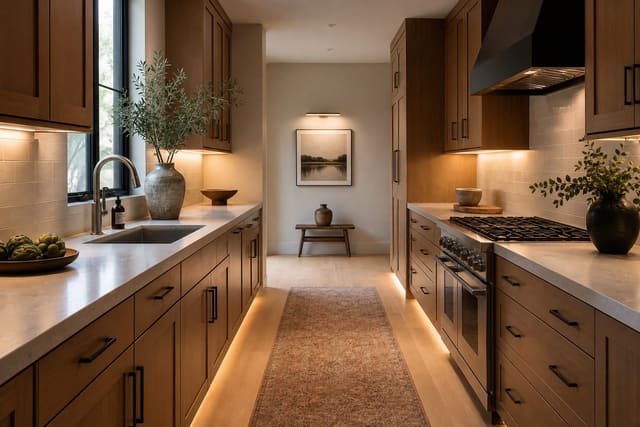
- The stove cover is not a myth. A stainless steel, marble, or wood stove cover gains an additional 20"–24" of usable counter while dinner isn't cooking.
- Over-sink cutting board. A custom-fit or expandable cutting board that spans the sink adds a full work surface at no floor cost.
Appliance choices that work in micro-kitchens
- Apartment-size refrigerator (24"–28" wide, 68"–72" tall) vs. standard 36"–36" wide. If you don't cook for a crowd regularly, the standard-size fridge is the main reason you have no room to cook.
- Two-burner induction cooktop vs. four-burner range. Two burners cover 95% of everyday meals and cost roughly half the counter depth of a four-burner. The oven under the range can be replaced by a convection toaster oven on a shelf.
- Under-counter refrigerator drawer instead of a full-height unit, if your workflow permits. Frees 36" of floor-to-ceiling wall for cabinetry.
- Dishwasher drawer vs. dishwasher. A single Fisher & Paykel dishwasher drawer is 24" wide and half the height; combined with hand-washing, it's sufficient for a 1–2 person household.
Visual tricks that make a micro-kitchen feel larger
- Continuous backsplash from counter to ceiling. Uninterrupted vertical tile from counter height to the cabinet bottom or to the ceiling reads as taller and more spacious than a standard 4" backsplash band.
- Match the cabinet color to the wall color or go lighter on the cabinets. High-contrast cabinet color against the wall visually chops the room into smaller segments.
- Large-format floor tile (12"x24" or larger). Small floor tile in a small kitchen is visual noise; large format reads as one continuous surface.
- Glass or open-face cabinet fronts on the upper run. Depth-of-field through glass makes the wall feel farther back.
- Under-cabinet lighting at 2700K. Lights the counter and makes the lower half of the room feel brighter — which the eye reads as larger.
A micro kitchen should protect one uninterrupted prep zone before chasing storage. Aim for at least 18 inches of clear counter between sink and cooktop, even if that means choosing a smaller dish rack, a single-bowl sink, or a two-burner induction unit. Use 24 inch appliances where possible, and make the refrigerator panel or side surface work with a magnetic rail, shallow spice shelf, or towel bar. The best storage add-ons are narrow: a 6 to 9 inch pullout, toe-kick drawer, or Rev-A-Shelf-style tray divider beats another deep black-hole cabinet. The one-wall kitchen guide is the closest relative because both layouts live or die by sequence.
Finishes should keep the run continuous. Matching the cabinet color to the wall, using slab fronts, and carrying one counter material across the whole line makes the kitchen read wider than it is. If the backsplash is busy, stop adding open shelves; use closed uppers to the ceiling instead. Renters can add a rolling cart only when there is a real parking place for it. Owners should spend on under-cabinet light, full-extension drawers, and a compact dishwasher before decorative tile. The lighting placement from kitchen task lighting is not optional in a small kitchen because one shadow can erase half the usable counter.
Common micro-kitchen mistakes
- Standard-depth appliances in an undersized floor plan. A 30" standard refrigerator in an 8x8 kitchen is not a mismatch of style — it's a mismatch of physics.
- All upper cabinets with doors. A wall of identical doors flattens the room; one open section adds depth.
- Not going to the ceiling. The 12" gap at the top is storage you paid for.
- Island in a room under 120 sq ft. Blocks circulation. Replace with a wall-mounted folding shelf.
- Busy backsplash pattern in a small room. Complex pattern in a small space reads overwhelming.
- Filling every wall with open shelves. Open shelves add storage only if they stay edited. In a micro kitchen, visual clutter makes the room feel smaller faster than closed storage does.
- Adding a cart with nowhere to park. Extra prep space is useful only if it does not block the cabinet, oven, or path out of the kitchen.
Use AI design to preview your micro-kitchen layout
Deciding to remove one upper cabinet bank or replace the refrigerator with an apartment-size model is a significant commitment. AI design lets you photograph the existing micro-kitchen and preview the optimized version — open shelving, ceiling-height cabinets, stove cover in place, matching container system on the open shelves — in minutes. The visual confirmation is what unlocks the $800 decision.
Frequently Asked Questions
What is the smallest functional kitchen size?
A micro kitchen functions at 40 to 60 square feet when it includes a 24-inch range or cooktop, an under-counter or 24-inch fridge, a single bowl sink, and at least 18 inches of prep counter beside the range. Use the room photo to compare the visible layout and fixed constraints before committing, because door swings, windows, outlets, storage reach, circulation, and existing furniture decide whether the idea survives daily use.
Should a micro kitchen have a dishwasher?
Yes when possible — an 18-inch slimline or single-drawer dishwasher fits under most counters and frees the sink for prep; hand-washing for two adults consumes the same counter space cooking would use. Keep the preview honest by leaving the problem area visible in the frame, then compare one conservative version against one bolder version before you buy lighting, paint, furniture, or storage.
How tall should cabinets go in a micro kitchen?
Run uppers to the ceiling with a 12-inch shallow top row for seasonal storage; standard 30 or 36-inch cabinets stop short and waste 18 to 24 inches of usable height. Check the result against ordinary movement first: drawer clearance, chair pullout, walkway width, glare, switch access, and sightlines matter more than a perfect catalog angle.
Where does the trash go in a micro kitchen?
Inside an under-sink pull-out or in a 6 to 9-inch wide cabinet column next to the sink; freestanding trash cans eat 1 to 2 square feet of floor that the kitchen cannot afford. Use the image to narrow priorities and measurements before ordering anything custom; final purchases still need real dimensions, outlet locations, installation limits, and product clearances.
What appliances belong on the counter in a micro kitchen?
One — usually the coffee setup; everything else (toaster, blender, kettle) lives in a closed appliance garage or pulls out of a lower cabinet on demand. If the preview invents architecture or hides the awkward feature you need solved, rerun it with stricter instructions so the result remains tied to your actual room.
Three transformations to try
- Ceiling-height uppers with 24-inch under-counter fridge
- Cutting board over single-bowl sink for prep
- One-appliance counter rule with closed garage