The smartest connected homes in 2026 do not look connected at all. The plastic gadget-on-a-stand era is over, and good design now means the technology you cannot see is doing the most work. If a guest can spot every speaker, sensor, and switch from the doorway, the integration failed.
How to integrate smart home tech without ruining the aesthetics
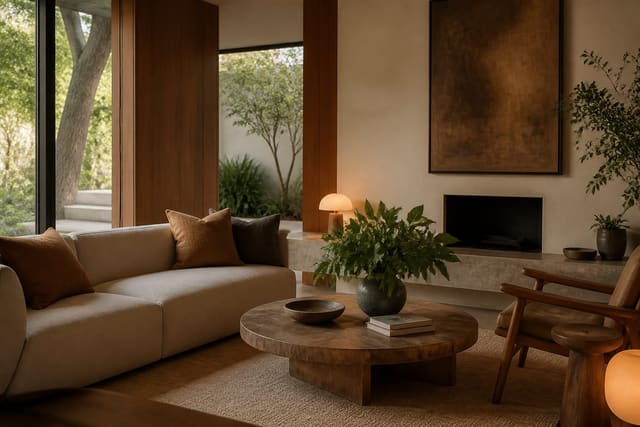
Integrate smart home tech into interior design by treating each device as a finish material rather than an appliance. That means choosing hardware that disappears into the surface it sits on: in-ceiling speakers painted to match the drywall, thermostats in brushed metal that echoes your door hardware, and motion sensors tucked into the upper corner of a casing where the eye never travels. The goal is a room that responds to you without announcing it can.
Start with the wiring, because that is what separates a polished install from a tangle of dongles. Running low-voltage cable in-wall during a paint refresh costs around $4 to $9 per linear foot but eliminates the visible cord that ruins an otherwise clean console. Where you cannot open a wall, use raceway channels painted to match the trim, or route power to a single base cabinet so chargers and hubs live behind a door. The principle is that a cord you can see is a design failure, even when the device itself looks fine.
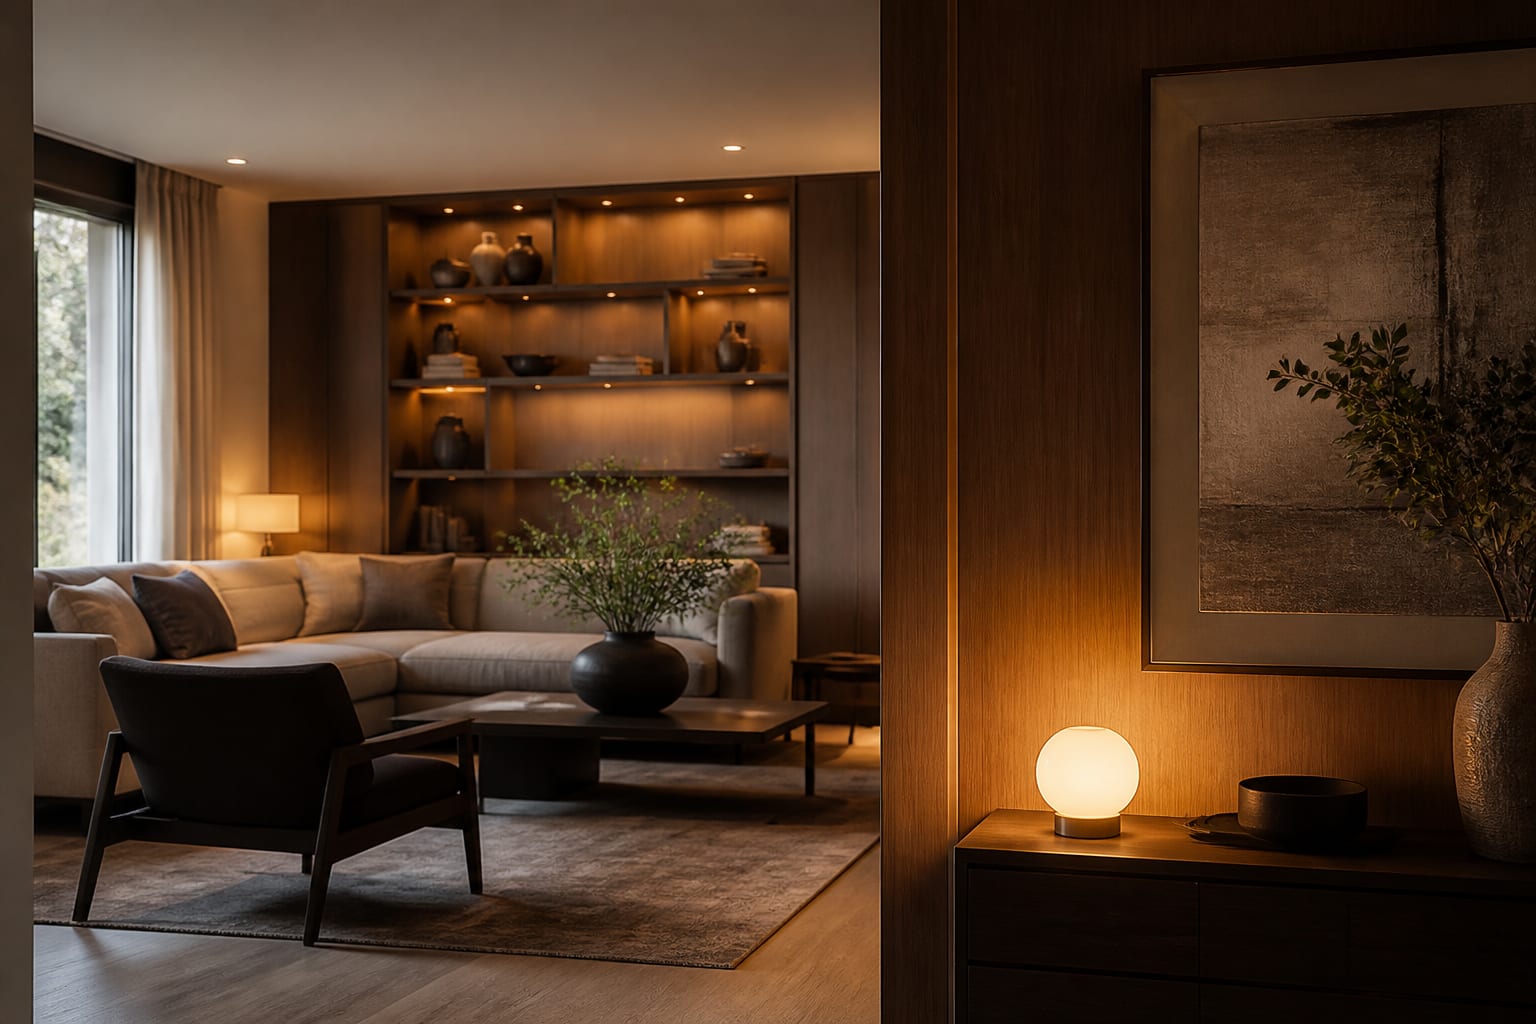
Then audit what actually needs to be in the room versus what can hide. Most homeowners are surprised by how little belongs on a visible surface once they separate the controls they touch daily from the infrastructure that simply runs. The hub, the router, the network switch, and the power bricks all want to live in a single closet or cabinet, leaving the room with only the handful of touchpoints a person genuinely uses. That edit alone cuts visible clutter by more than half in most setups.
Hardware finish matters more than spec sheets at this stage. A 4-inch in-ceiling speaker with a paintable magnetic grille all but vanishes once it wears the ceiling color. Wall panels and keypads should sit flush, not proud; a panel that protrudes 8 millimeters past the drywall catches shadow and reads as an afterthought. For anything that must stay visible, pick one metal finish for the whole floor and hold the line.
Placement is the other half of disappearing. The best installers mount sensors and keypads on secondary walls, never the focal one, and at heights the eye glides past: a thermostat at 52 inches, a keypad cluster beside the doorway rather than centered on the feature wall. The same instinct that softens a room with the rounded profiles in the curved and organic shapes trend applies here, because a flush, radiused panel reads as part of the architecture while a boxy protruding one fights it. When a device must announce itself, make it deliberate, like a single statement smart display in the kitchen, and hide everything else.
A copyable spec list for an invisible setup
- Lighting: tunable white fixtures rated 2200K to 4000K, dimmable to 1 percent, so evenings warm to candle-like 2200K and mornings hit a crisp 4000K.
- Speakers: in-ceiling or in-wall drivers with paintable grilles, kept under 4.5 inches in visible diameter.
- Climate: a thermostat no wider than 3.5 inches, mounted at 52 inches off the floor on a quiet wall, not the focal one.
- Control: a single Matter-compatible hub plus two or three flush wall keypads instead of a tablet on every surface.
- Power: one dedicated cable-management cabinet per floor, with a 6-outlet surge strip and a 3-inch grommet for heat.
- Shades: hardwired motorized roller shades with a recessed pocket, avoiding the visible battery tube that dates a window instantly.
That list keeps the visible device count low while covering the four systems people actually notice: light, sound, climate, and shading. Everything else can run headless in a closet. A doorbell camera, a leak sensor under the sink, and a smart lock all do their jobs without ever entering the design conversation, so they belong on the headless list rather than on a wall you look at.
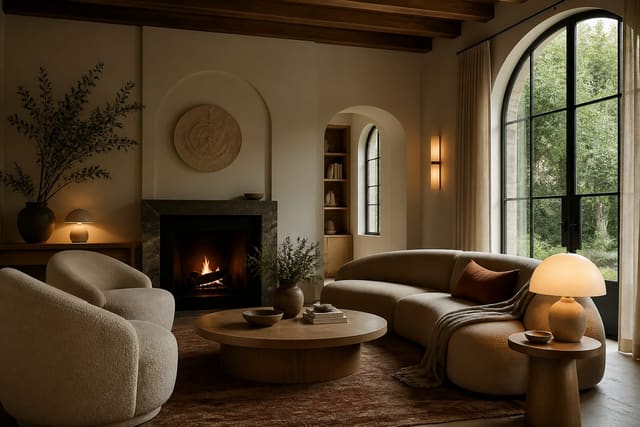
Lighting deserves the largest share of attention and budget because it changes the room more than any screen. Layering tunable fixtures across three zones in a living room runs roughly $900 to $2,400 installed, and the payoff is a space that shifts from a 4000K work mode to a 2200K wind-down without a lamp in sight. Set scenes by time of day rather than by switch, so the house drifts warmer after sunset on its own and you never hunt for the right dimmer. A well-considered lighting approach overlaps heavily with the broader calm, low-stimulation rooms covered in wellness design, where light temperature is treated as a health input rather than a convenience.
Shading is the quiet runner-up. Motorized shades that drop into a recessed ceiling pocket disappear entirely when raised, and tying them to a sunrise schedule means the room wakes with you without a single visible motor or chain. Hardwire them during a remodel for around $350 to $700 per window installed; the battery-tube versions are cheaper but the visible tube dates a window the moment you notice it.
Common mistakes to avoid
The first mistake is buying devices before choosing an ecosystem. Mixing a Z-Wave lock, a proprietary thermostat, and a Wi-Fi-only camera leaves you juggling three apps and no shared automation. Pick a Matter-compatible spine first, then buy only what speaks to it; this single decision prevents about 70 percent of the frustration homeowners report a year in.
The second is over-mounting screens. A tablet on every wall looks dated within 18 months and turns a calm room into a control panel. Two keypads and a phone cover almost every real need. The third mistake is ignoring acoustics: hard, screen-heavy rooms echo, so pair any audio install with at least one soft surface, whether a wool rug or an upholstered panel, to keep dialogue intelligible.
A fourth, quieter error is skipping the neutral conduit during renovation. Pulling a spare empty conduit between floors costs under $200 during a remodel and saves a wall demolition later when standards change. Skipping it is the regret homeowners voice most. A fifth is chasing every new gadget; a home that adds a device a month never settles into a coherent look, so set a fixed device budget and stop once the four core systems are handled well.
Finally, do not let bold tech crowd out personality. A maximalist room full of pattern and color, like the kind explored in the 2026 maximalism revival, can hide tech beautifully precisely because the eye has so much else to land on. The opposite is true in a stark, minimal room, where a single blinking LED becomes the focal point by default. Match the visibility of your hardware to how busy the room already is, and the technology stops competing for attention it was never meant to hold.
Preview a hidden-tech home in Re-Design
Frequently Asked Questions
How do I integrate smart home tech into interior design? Treat every device as a finish: recess it, color-match it, and route its wiring in-wall so the hardware reads as part of the architecture. Standardize on one Matter-compatible ecosystem first, then choose products by how well they disappear, not by feature count. Lighting and shading deliver the biggest visible payoff for the least visual clutter.
What does a whole-home smart retrofit cost? Expect roughly $3,000 to $12,000 for a home that stays visually clean, depending on square footage and how much wiring runs in-wall. Lighting alone often accounts for $900 to $2,400 per main room. Doing the wiring during an existing paint or remodel job is where you save the most.
Is a control tablet on the wall a good idea? Usually not. A wall tablet dates quickly and turns a calm space into a dashboard. Two flush keypads plus everyone's phone handle the same jobs while keeping surfaces clean and timeless.