Vinyl plank installs cleanly over existing tile when the tile is flat (no broken pieces, no missing grout), grout lines are leveled with a thin embossing leveler, transitions at doorways accept the new height, and click-lock LVP at 5-6 mm thick floats over the existing floor without adhesive. Ripping out tile is messy, loud, and expensive, so I understand the appeal of laying a new floor right over it. My opinion is clear: vinyl plank over tile is smart only when the old tile is boringly stable. If the tile is loose, wavy, damp, or already stacked too high at the doors, skipping demolition just hides the problem under a prettier surface. This guide shows how to decide whether your existing tile can become a reliable base or whether removal is the cleaner long-term move.
Can you install vinyl plank flooring over ceramic tile?
Yes, you can install vinyl plank flooring over ceramic tile when the tile is firmly bonded, mostly flat, dry, clean, and not so textured that grout joints telegraph through the new planks. That is the answer homeowners want, but the condition of the existing tile matters more than the promise on the flooring box.
Treat the tile as a subfloor, not as a decorative layer you are trying to ignore. Walk every part of the room and listen for clicks, crunching, hollow spots, or movement. A few ugly tiles are not a problem; loose tiles are. Luxury vinyl plank needs a steady surface because the locking edges are thin and precise. If the floor moves below them, the planks can separate, cup, or sound cheap underfoot.
The best candidates are kitchens, baths, entries, laundry rooms, and living areas where the tile is level, intact, and well bonded. The risky candidates are old mud-set floors with cracks, tiles over damp slabs, uneven handmade tile, and floors with deep grout valleys. If the tile has lippage greater than about 1/16 inch between neighboring pieces, or grout joints wider or deeper than about 1/8 inch, plan on patching and leveling before any plank goes down.
Floor height is the other early test. A 5–8 mm rigid-core LVP, plus underlayment if the product allows it, can raise the floor enough to scrape doors, trap dishwasher panels, or create a trip edge at carpet and hardwood. Check every threshold before you fall in love with a sample.
What has to be true before tile becomes a good subfloor?
A tile floor earns the right to stay only after it passes four checks: bond, flatness, moisture, and height. Skip one, and the finished LVP may look fine for a month while the failure is already starting underneath.
Press on cracked tiles with your heel and the handle end of a screwdriver. If a tile rocks, clicks, or makes a sandy sound, remove and patch that section instead of floating over it. One loose tile can become a soft spot that breaks the vinyl locking joint right where traffic is heaviest.
Flatness matters more than level. A room can slope slightly and still accept vinyl plank, but it cannot have ridges, lips, or rolling dips. Many plank products call for a surface tolerance around 3/16 inch over 10 feet, though the manufacturer’s printed instruction is the rule that matters. Use a long straightedge, not your eye. Mark high tile edges, low grout fields, and doorway humps with painter’s tape.
Moisture is non-negotiable over concrete slabs, basement tile, bathrooms, laundry rooms, and entries. Tape a clear plastic square roughly 2 feet by 2 feet to the tile for two days, then check for trapped condensation or darkened grout. That quick check does not replace a manufacturer-required moisture test, but it can warn you that the room is not ready for a floating floor. If the tile smells musty at cabinets or baseboards, solve that before flooring.
Height is the design check people forget. Measure from the tile to the bottom of doors, refrigerator panels, dishwasher kick plates, toilet flanges, stair nosings, and adjacent floors. Leave room for required expansion gaps, often about 1/4 inch at walls and fixed objects, then hide those gaps with baseboard or shoe molding. If your room already has awkward traffic paths, the planning ideas in rooms with too many doorways can help you keep transitions from turning into obstacles.
Test this on your own room photo with ReDesign before you choose the final direction; keep the doorway, walls, windows, main furniture, lighting, and awkward fixed features visible so the preview solves the room you actually have.
How do you prep, level, and lay LVP over tile?
Preparation decides whether an LVP over tile guide becomes a clean project or an expensive disguise. Start by removing base shoe, transition strips, loose caulk, and anything that would trap the new floor. Vacuum grit from grout lines, then degrease kitchens with a cleaner that leaves no waxy residue. Vinyl plank hates crumbs under pressure; one pebble can read like a permanent bump.
Repair isolated damaged tiles first. Pull loose pieces, scrape out failed thinset, and fill the depression with a cement-based patching compound rated for the location. Do not use random wall spackle, premixed mastic, or soft filler under plank flooring. Let the repair cure as directed, then scrape it flush.
Fill grout joints when they are deep enough to print through the new floor. A skim coat of floor patch can flatten a grid of grout lines, especially under thinner glue-down vinyl or flexible planks. For rigid-core floating products, minor grout lines may be acceptable, but I still prefer a smoother base in sunny rooms where low light can reveal every shadow. If the room already struggles with darkness, pair the floor choice with ways to fake natural light in any room so the new surface brightens the space instead of looking dull and plastic.
Choose the plank type honestly. Rigid-core floating LVP is usually friendlier over tile than thin peel-and-stick vinyl because it bridges small irregularities better. Look for planks at least 5 mm thick for busy rooms, with an attached pad only if the manufacturer permits it over hard tile. Extra foam underlayment can void warranties, make the floor bouncy, and stress the click joints.
Dry lay the first several rows before locking them. Stagger end joints by at least 6 inches, avoid skinny pieces under 2 inches at long walls, and plan the first row so the last row is not a sliver. Undercut door casings when possible so planks slide underneath, but keep the expansion gap clear. At bathrooms, kitchens, and laundry rooms, follow the product rules for sealing perimeters; some floating floors need limited silicone at wet edges, while others need airflow.
Common vinyl plank over tile installation mistakes
The first mistake is assuming tile equals flat. Tile can be hard and still unsuitable. A glossy porcelain floor with uneven edges can punish click-lock vinyl faster than an old plywood subfloor that was properly patched. Check the floor with a straightedge and your ears before you buy planks.
The second mistake is ignoring grout depth. Deep grout lines create a repeated grid below the new floor. Under thin vinyl, that pattern can show as faint shadows; under floating plank, it can create flex at the joints. Fill joints that are wider or deeper than about 1/8 inch, then sand or scrape the patch so the floor feels continuous under your palm.
Another mistake is trapping appliances. A kitchen floor over floor installation can raise the surface enough that a dishwasher no longer slides out, a refrigerator cabinet gap disappears, or a range sits proud of the counter. Measure appliance clearance before installation day, not after the planks are locked across the room.
Do not install over moisture because the surface looks clean. Ceramic tile can hide damp concrete, failing grout, or old leaks around toilets and exterior doors. Vinyl is water-resistant from above, but it can trap moisture below. If the room has recurring dampness, a loose toilet, swollen baseboards, or white mineral residue, pause the flooring project and diagnose the source.
The last mistake is choosing the wrong visual plank for the existing room. A busy gray wood-look plank over beige tile may feel newer for one week, then make cream cabinets, warm trim, and tan counters look dirty. Bring samples next to cabinetry, walls, rugs, and daylight. If you are using mirrors to improve brightness, study mirror placement that amplifies light before choosing a high-contrast floor that reflects every seam and threshold.
Use AI design to preview the floor before you commit
Vinyl plank over existing tile is partly a construction decision and partly a whole-room design decision. A loose sample cannot show whether the new floor makes the kitchen calmer, whether the entry looks chopped up at the threshold, or whether the plank color fights the wall undertone. Upload a straight photo of the room and preview several LVP options before ordering boxes.
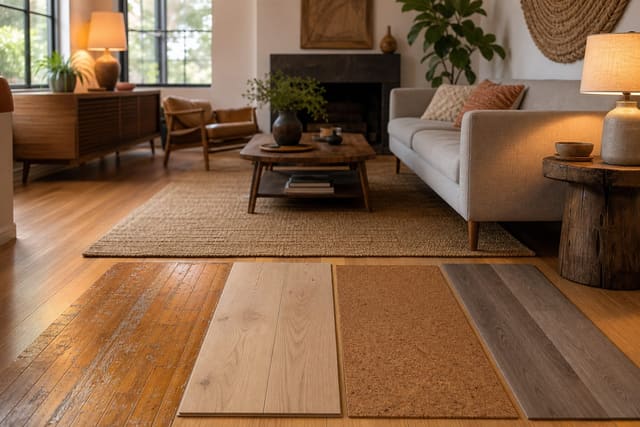
Prompt the image with the real constraints: existing ceramic tile covered with warm natural oak vinyl plank, 6 inch wide boards, satin finish, white baseboards, low-profile transition at the hallway, and no change to cabinets. Run a second version with a paler plank, a third with a medium brown plank, and a fourth where the tile is removed and a different floor continues through adjoining rooms.
Use the preview to judge color, scale, and transitions, not to approve the technical installation. AI will not detect loose tile, slab moisture, or door clearance. It will show whether the room wants a quieter plank, a warmer undertone, a larger rug, or a different transition strategy before you spend money on a floor that technically works but visually disappoints.
Before you commit, make the decision in this order: inspect the tile, test flatness, check moisture, measure height, choose the plank, then preview the room. If any of the first four steps fails, removal may be less dramatic than living with a floating floor that clicks, waves, or blocks a door. When the tile is solid and the prep is careful, vinyl plank can be a practical, good-looking reset. When the tile is failing, LVP is only a cover story.
Frequently Asked Questions
Is it OK to install LVP over tile without removing the tile?
Yes when the tile is sound, flat, and the height stack works at thresholds — most click-lock LVP installs over tile floats fine and saves the cost and dust of tile removal. Use the room photo to compare the visible layout and fixed constraints before committing, because door swings, windows, outlets, storage reach, circulation, and existing furniture decide whether the idea survives daily use.
Do I need to fill grout lines before LVP?
Yes — grout lines over 1/8 inch deep telegraph through the LVP within a year; apply a thin self-leveling embossing leveler to bring the tile surface flush before install. Keep the preview honest by leaving the problem area visible in the frame, then compare one conservative version against one bolder version before you buy lighting, paint, furniture, or storage.
Will doorways still close with LVP over tile?
Maybe — LVP adds 5-7 mm of height; check exterior doors first (cannot be trimmed without losing weatherstrip) and undercut interior doors as needed. Check the result against ordinary movement first: drawer clearance, chair pullout, walkway width, glare, switch access, and sightlines matter more than a perfect catalog angle.
Does LVP-over-tile work in bathrooms?
Yes — modern LVP is fully waterproof and works in bathrooms; just confirm the toilet flange height still seals after the new floor adds 5-7 mm. Use the image to narrow priorities and measurements before ordering anything custom; final purchases still need real dimensions, outlet locations, installation limits, and product clearances.
Does AI preview the LVP-over-tile result?
Yes — upload the tile floor photo and AI previews LVP plank colors and widths against the existing trim and threshold height. If the preview invents architecture or hides the awkward feature you need solved, rerun it with stricter instructions so the result remains tied to your actual room.
Three transformations to try
- LVP over kitchen tile with embossing leveler
- LVP in bathroom over existing tile
- LVP threshold transition at doorway