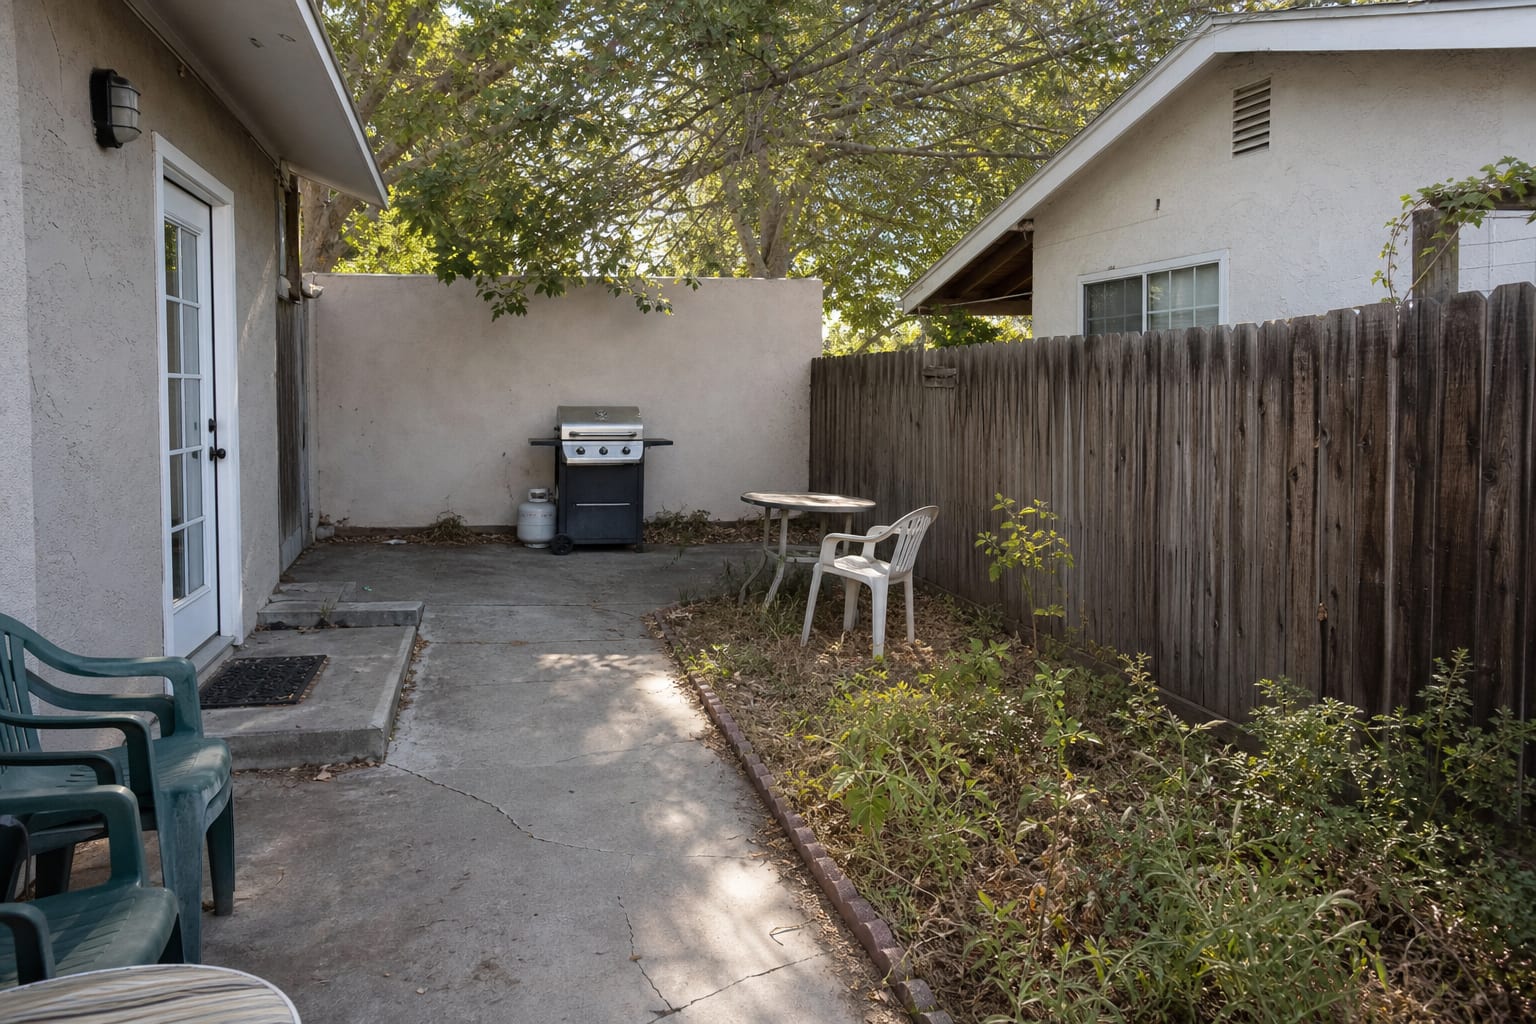
An outdoor kitchen island works when it is 6–8ft long for a single zone (grill or prep) or 10–12ft long for a full grill-and-bar layout, includes 24in of clear circulation behind every stool, and uses heat-rated materials within 12in of any flame. My firm opinion: seating matters only after the cooking path, landing space, and weatherproof surfaces are solved. If your patio lacks counter space and guests hover in the cook's elbow, the island is not too small; it is poorly organized. The fix is to design the island as a working edge of the patio, with the grill, prep, storage, and stools each earning their footprint.
What makes an outdoor kitchen island work like a real room?
Design an outdoor kitchen island by placing the cooking appliance first, preserving at least 36 inches of circulation, adding 24 to 36 inches of landing counter near the grill, choosing weather-rated materials, and putting seating where guests can talk without blocking the hot zone.
- Set the outdoor Kitchen Island Ideas: Design Configurations and Materials work zone so the main route stays about 36 inches wide and does not cross the sharpest cooking, water, planting, or seating edge.
- Keep the first material palette to 3 dominant finishes for outdoor Kitchen Island Ideas: Design Configurations and Materials; one floor, one vertical edge, and one repeated accent usually reads calmer than five small ideas.
- Test the layout from 2 normal viewpoints before buying: the house door and the main seat, because those angles decide whether outdoor Kitchen Island Ideas: Design Configurations and Materials feels planned or leftover.
That sounds practical because it is. A patio island is not a kitchen cabinet copied outside; rain, smoke, sun, grease, and guests all pressure the layout. Start with the grill or cooktop, then draw the work triangle outward: kitchen door, prep counter, cooking surface, serving surface, dining or lounge area. If the island forces the cook to turn their back to everyone all night, rotate the grill or shift seating to the long side.
For most patios, 36 inches is the minimum walking lane behind the island, and 42 inches is kinder when people pass behind stools. A counter-height island at 36 inches feels natural for prep, while a 42-inch bar ledge can hide mess but often separates guests from the cook. Stool seating needs about 24 inches of width per person, plus a 10 to 12 inch overhang for knees. If you want four stools, plan for roughly 8 feet of seating run rather than squeezing everyone shoulder to shoulder.
- Give the cook real landing space instead of decorative counter scraps; 24 inches beside a grill is the practical minimum, and 36 inches feels noticeably better for trays, tongs, sauce, and finished food.
- Choose the outdoor island countertop for weather and cleaning first; exterior-rated porcelain, concrete, stainless steel, granite, and dense sintered surfaces handle grease and rain better than soft porous stone.
- Treat a BBQ island with seating as a conversation edge, not a barricade; seat guests along the side or end so they face the cook without sitting directly in smoke or heat.
- Repeat one patio material on the island base, countertop, or paving so the island looks built into the yard instead of delivered as a separate object.
Which island configuration fits your patio?
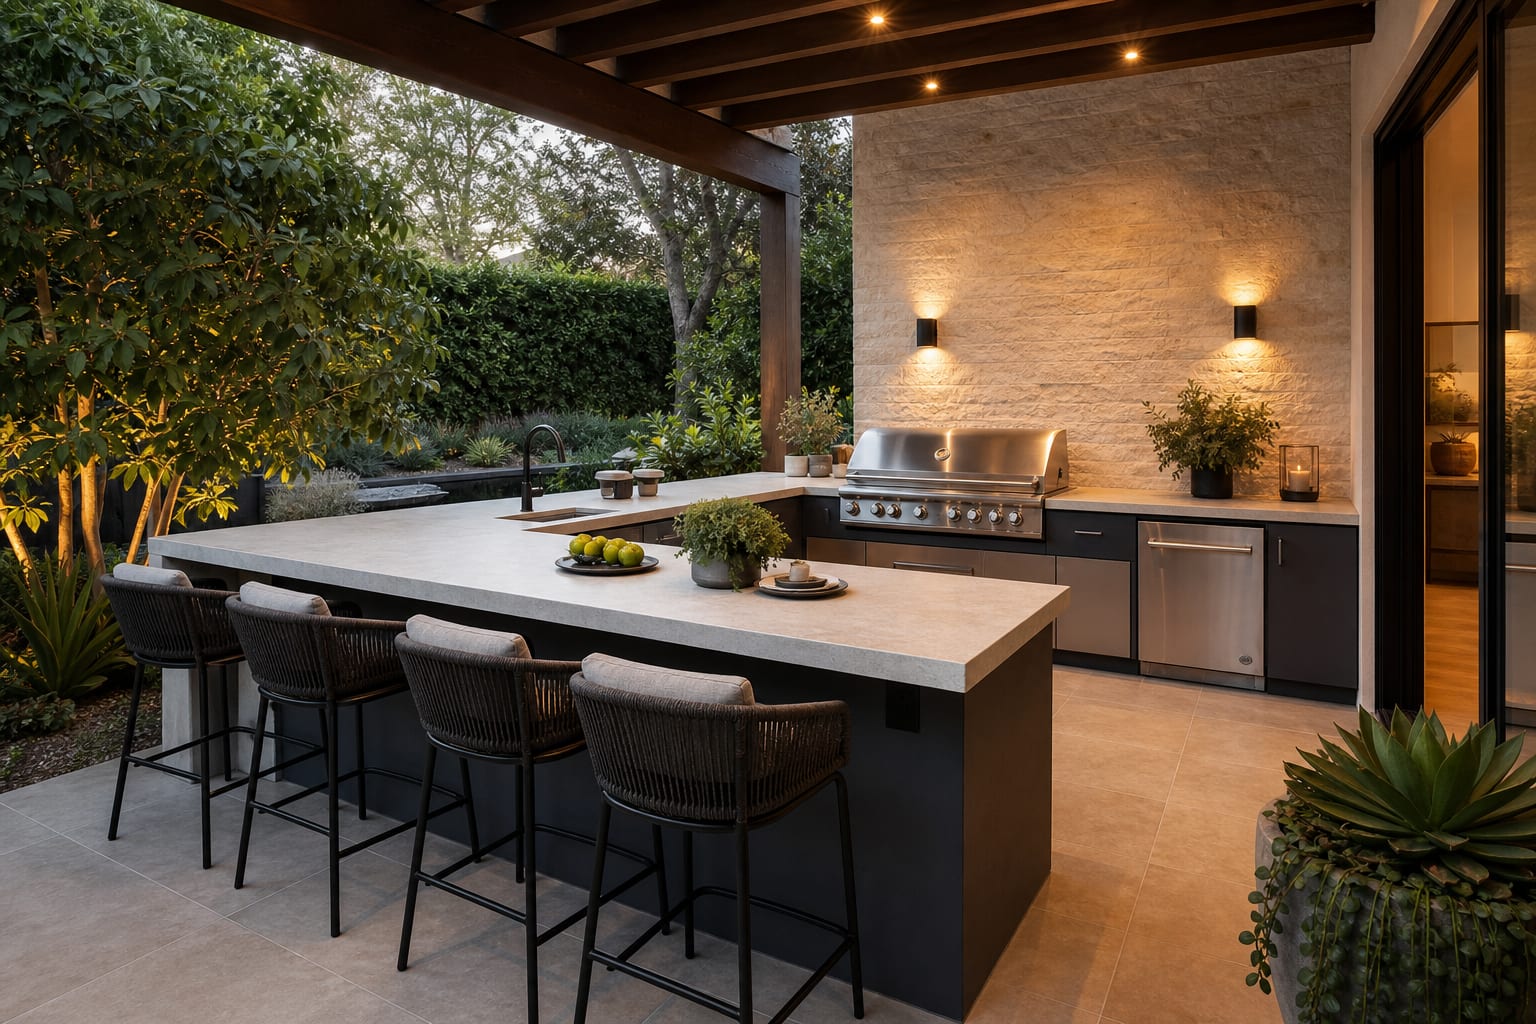
The best configuration is the one that protects the cooking lane while giving guests a clear place to gather. A straight island is clean and efficient on narrow patios, but it can feel like a wall if the stools face away from the view. An L-shaped island is usually better for social cooking because one leg can hold the grill and the other can hold serving space or seating. A U-shaped island sounds luxurious, but it needs a generous patio; otherwise the cook gets trapped inside a hot little corral.
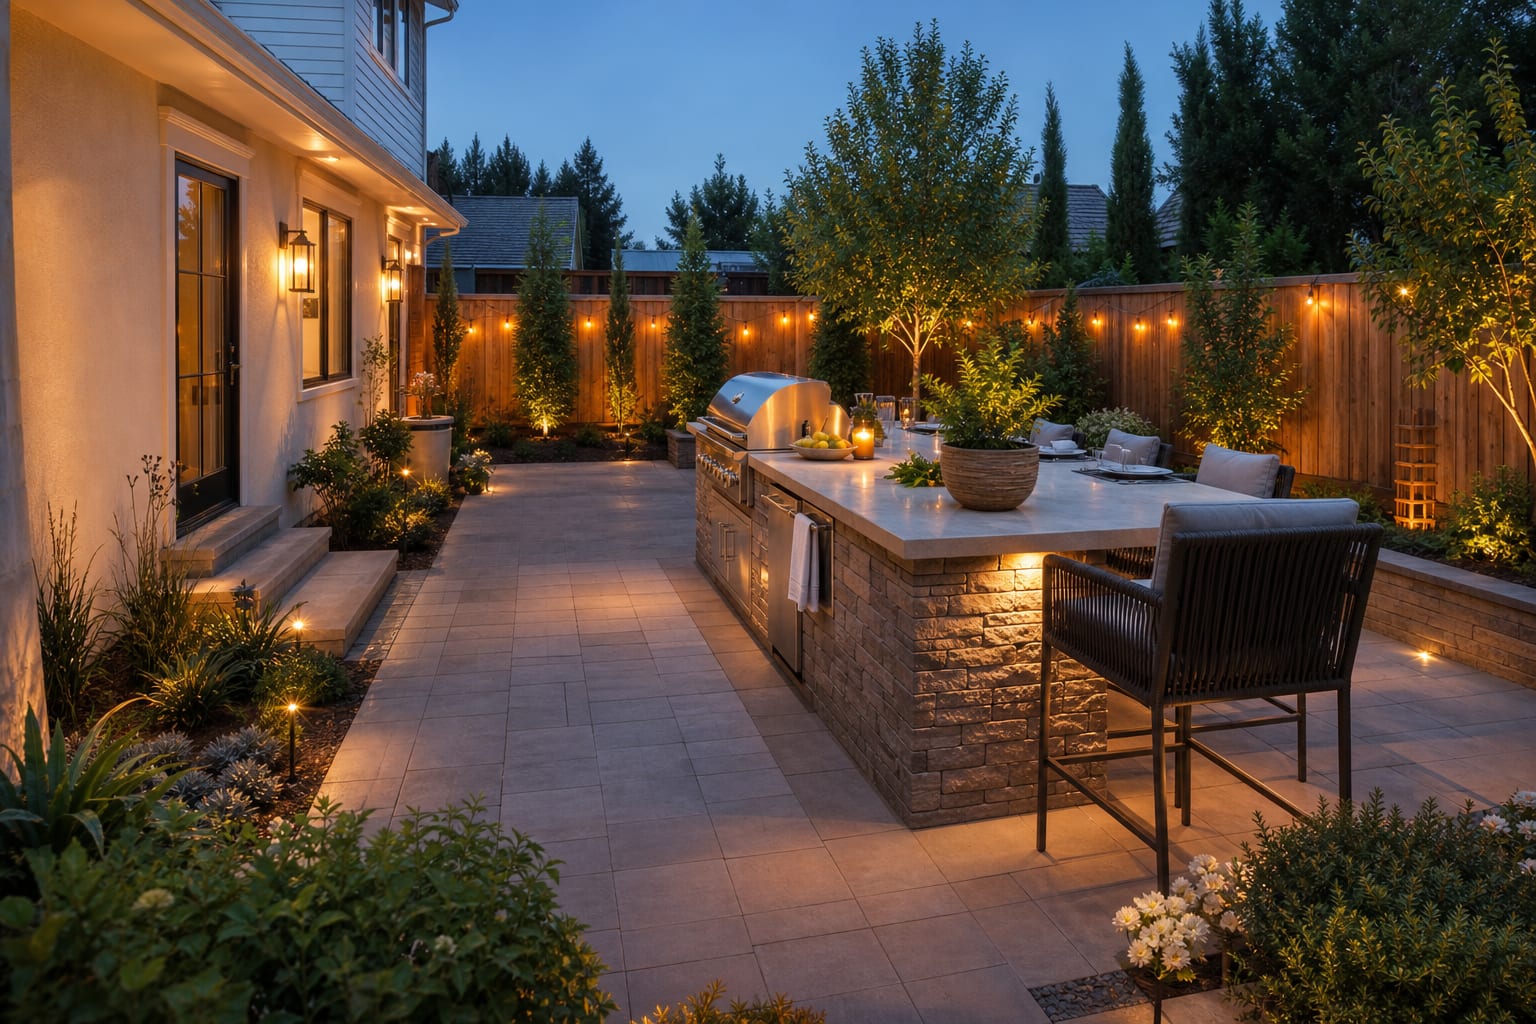
- Choose a straight BBQ island when the patio is narrow or the island sits along a fence wall; keep the grill centered on the counter run and leave at least 18 inches of landing on one side and 24 inches on the other so hot platters are not balanced on a stool ledge.
- Use an L-shaped island when you want cooking and seating to happen together; put the grill on the working leg and stools on the return, with a 42 inch aisle behind the stools so people can sit while others carry food past them.
- Build a galley-style outdoor kitchen when the patio has a long wall and a dining table opposite; keep 48 inches between the island and the wall counter if cabinet doors, dishwasher drawers, or undercounter refrigeration need to open comfortably.
- Consider a compact prep island beside an existing grill when budget or utilities are limited; a 30 by 60 inch weatherproof island can add serving space without forcing gas, plumbing, or electrical work into the middle of the patio.
- Skip the oversized U-shape unless the patio can spare it; the inner aisle should be about 42 to 48 inches, and the outside still needs walking room to the house, gate, pool, or dining area.
If the island sits on a tiled patio, look carefully at slip resistance, grout width, and outdoor rating before committing. The same surface logic in porcelain tile patio ideas for outdoor kitchens applies under an island: dense, cleanable paving makes grease and chair movement far less annoying.
How should you choose the outdoor island countertop and base?
The outdoor island countertop should be chosen like a work surface, not like a showroom sample. Sunlight changes color, rain exposes weak seams, and grease punishes anything too porous. A honed or textured finish is often more forgiving than a glossy one outdoors because glare and water spots are less obvious. If you want a light counter, test the sample in direct sun; some pale surfaces become painfully bright at midday.
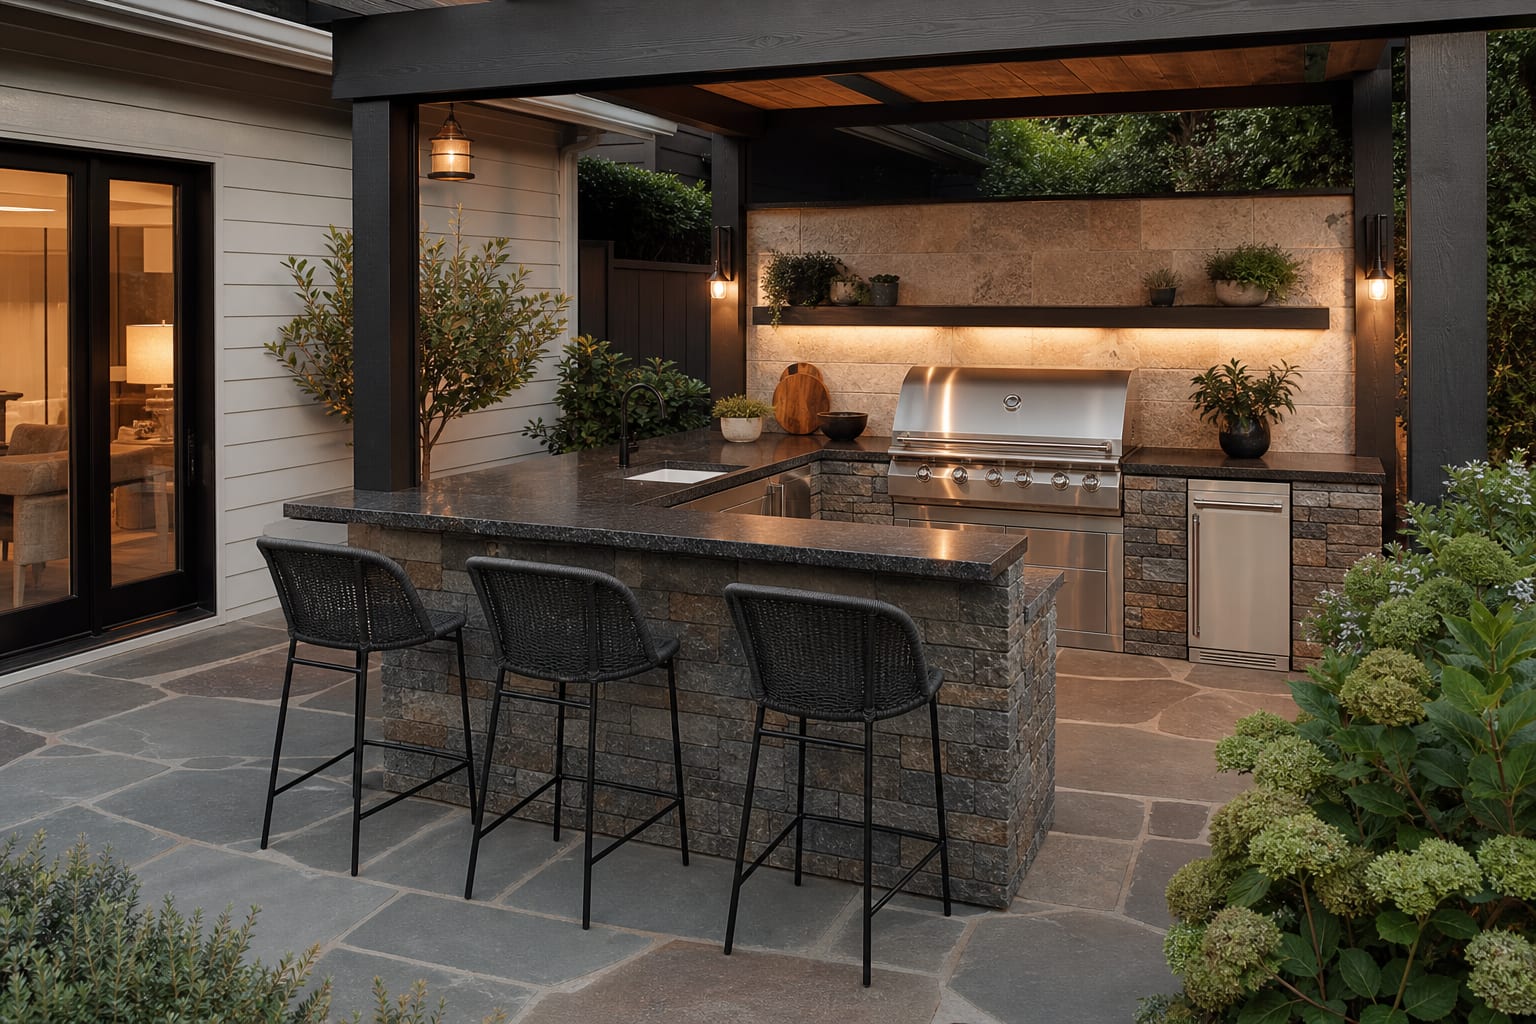
The base material should relate to the house or hardscape. Stucco works beside Mediterranean, Spanish, and contemporary homes. Brick makes sense when the house already has masonry. Stone veneer can be excellent, but only when the scale and color are disciplined; outdoor stone veneer ideas for patio islands are worth reviewing before choosing a busy stacked stone that fights the paving.
Plan drainage and service access early. Outdoor counters should shed water, and a subtle slope of about 1/8 inch per foot on adjacent paving helps prevent puddles around stools. Use stainless hardware, exterior-rated cabinet boxes, and ventilated appliance bays. Gas grills, refrigerators, and ice makers have manufacturer clearance requirements, and those rules outrank any pretty rendering. If the island includes electrical outlets, they need outdoor-rated covers and GFCI protection under local code.
For softer patios, a decomposed granite cooking court can work around a freestanding island or modular station, especially where a full slab would feel too formal. Study decomposed granite patio ideas for outdoor rooms if you want a more relaxed surface, but keep the actual grill and cabinet feet on a stable, level base so doors and drawers do not rack.
Use AI to preview your BBQ island before utilities get expensive
AI design is useful for outdoor kitchen islands because the early choices are visual and spatial before they become plumbing, gas, and masonry. Upload a straight-on patio photo from the house door or main seating area, then preview a straight island, an L-shaped island, and a smaller prep island from the same camera angle.
Keep the test honest. Show the grill, stools, counter overhang, dining table, path to the kitchen door, and any fixed posts or steps. The preview will not replace a contractor, appliance manual, gas fitter, electrician, or building code check. It can reveal something homeowners often miss: whether the island blocks the best patio view, crowds the dining table, or makes the cook face a fence all night.
Run material versions after the layout feels right. Try a stone base with a pale counter, a stucco base with a dark porcelain top, and a wood-look accent only where it will not sit beside open flame. Add lighting last: 2700K task lighting near the cooking surface and low path lights near steps usually feel warm without turning the patio into a parking lot.

Common outdoor kitchen island mistakes to avoid
- Building the island too close to the house door makes every cookout feel congested. Leave a 36 inch minimum route from the kitchen to the patio, and keep that path free of stool backs, cooler lids, planter boxes, and cabinet doors.
- Putting guests directly behind the grill sounds social until heat and smoke hit their faces. Move stools to the side, angle the grill opening away from seating, or add a serving ledge at the island end so conversation happens outside the hot zone.
- Choosing a pretty counter with no landing space creates a frustrating outdoor kitchen. A grill needs at least one serious landing area, and a 24 to 36 inch counter beside the appliance will matter more than an extra decorative cabinet panel.
- Forgetting shade makes the island unusable at the exact time people want to cook. A pergola, umbrella, shade sail, or roof overhang should protect the prep side when possible, but keep combustible structures and fabric well outside manufacturer clearance zones.
- Treating storage like indoor cabinetry leads to swollen doors, rusty pulls, and dirty tools. Use weather-rated cabinets, stainless or powder-coated hardware, and closed storage for utensils; keep propane, gas shutoffs, and appliance vents accessible rather than sealed behind stone.
A good island makes outdoor cooking calmer. The cook has space to land food, guests know where to sit, the patio still breathes, and the materials can handle a wet Sunday morning after a messy Saturday dinner.
Frequently Asked Questions
How big should an outdoor kitchen island be?
A 6ft island handles a 36in grill plus 12in of counter on each side; an 8ft island adds a small fridge or sink; a 10–12ft island fits grill, prep, sink, and a bar overhang. Use this as a fit check by measuring real clearances, sunlight, and access, then compare a restrained version against a stronger version from the same viewpoint.
How wide should an outdoor kitchen island be?
30in is the practical minimum for a single-zone island; 36–42in is standard with a counter overhang; for a bar with seating add 12–15in to the overhang side for knee clearance. If this choice meets your access and maintenance limits in one ordinary week, it is usually the one worth scaling.
What goes underneath an outdoor kitchen island?
Plan for a gas line stub, an electrical drop with GFCI outlets, a water supply and drain if you want a sink, and a vented base for any gas grill — runs are easier before the island is finished than after. Treat the decision as staged: confirm constraints, test one conservative layout, and then test one stronger layout before committing.
Should an outdoor kitchen island have a roof?
A pergola or louvered roof above the island makes the kitchen usable in light rain and full sun without trapping cooking smoke; a solid roof directly over the grill requires extra ventilation per code. Run a two-pass practical check from the main viewpoint and one alternate route so the option still works once use begins.
How much does an outdoor kitchen island cost?
DIY masonry or pre-fab kit islands run $4,000–$12,000; mid-range custom built-ins with grill, sink, and fridge run $15,000–$40,000; high-end full kitchens with pergola and counter seating exceed $60,000. Keep the evaluation concrete: if the option still reads well after watering, evening use, or weather swing, it usually survives purchase.
Three transformations to try
- Outdoor kitchen island with grill and bar
- L-shape outdoor kitchen island
- Compact 6ft outdoor kitchen island