Outdoor stone veneer reads natural when full-bed or thin-veneer stone runs in horizontal courses with a flush mortar joint, returns the full thickness at every outside corner with real return stones, and caps every wall and pillar with a 2in stone capstone that overhangs by 1in. Stone veneer outside goes wrong when it is treated like wallpaper for concrete. My take is simple: veneer should make a wall, pillar, grill surround, or seat wall look constructed, not decorated after the fact. The difference is almost always in the caps, corners, shadow lines, drainage, and how much surface you choose to cover. Here is how to use it so your patio gains texture without turning into a faux lodge.
What makes outdoor stone veneer look built in instead of pasted on?
Use stone veneer on outdoor walls by treating it as a cladding system over a properly prepared substrate, with drainage, caps, corners, and scaled placement planned before the first panel goes up. The best outdoor stone veneer ideas start with restraint: choose one or two vertical surfaces, then let the house, patio floor, planting, and lighting do the rest.
On a plain concrete wall, veneer looks most convincing when it covers the full height from a hard stopping point to another hard stopping point. That might mean from patio surface to coping, from grade to a wood privacy screen, or from a stair landing to the underside of a cap. Stopping randomly at 42 inches on a tall blank wall can look like someone ran out of material.
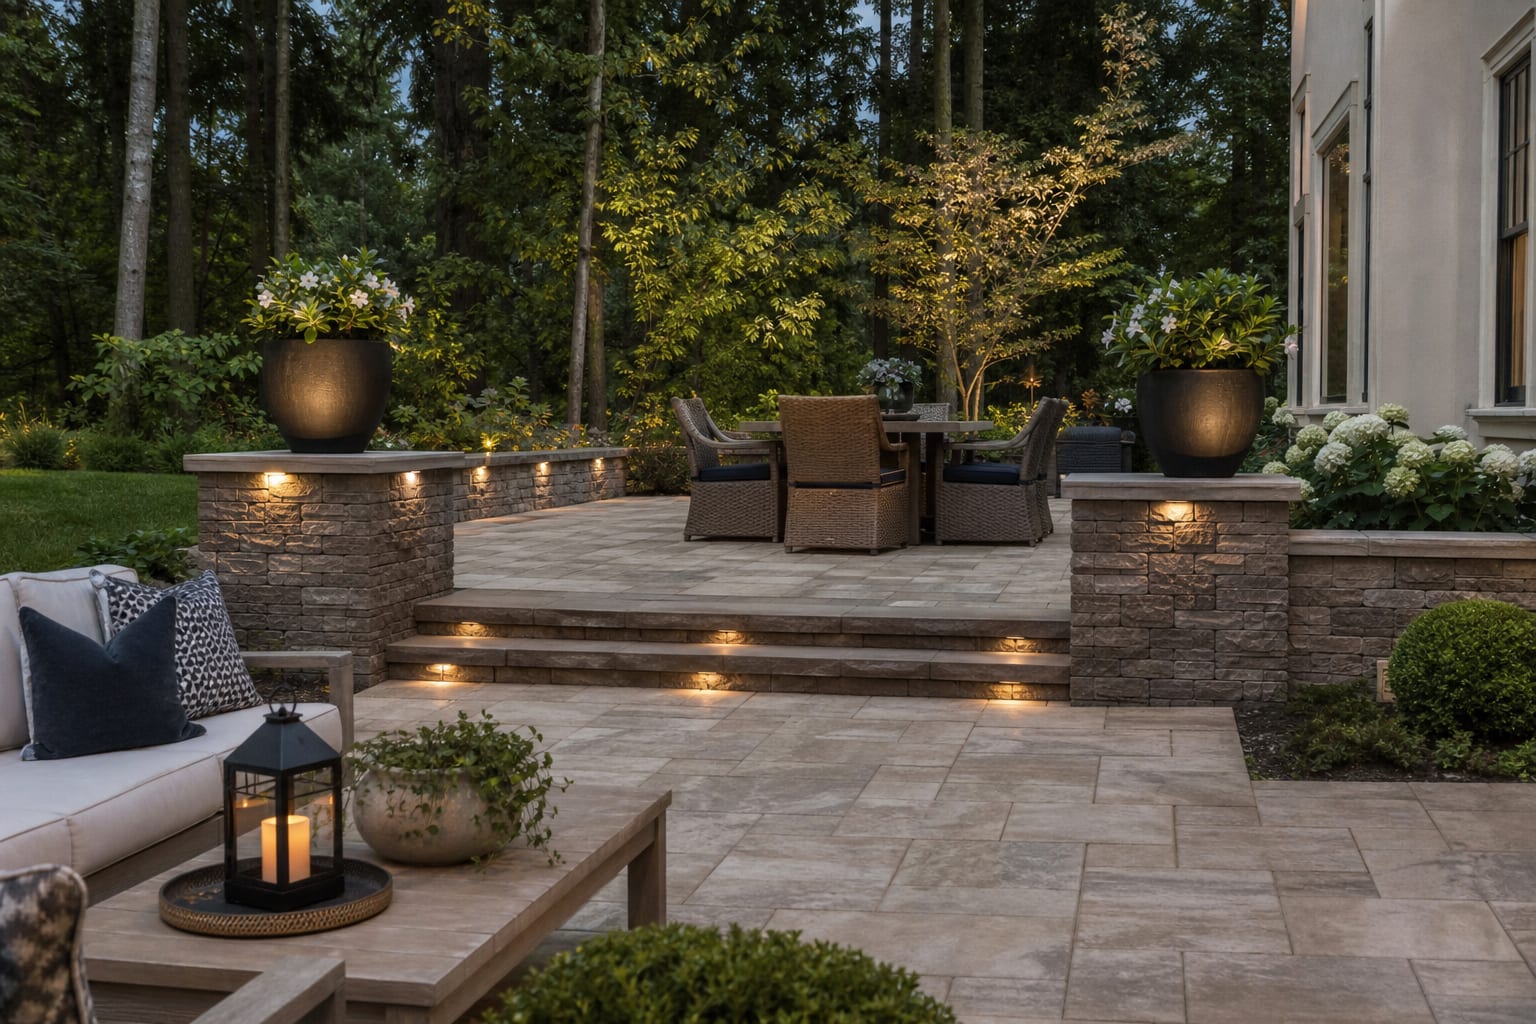
Pillars need even more discipline. A square patio column that is 12 inches wide can look chunky once veneer, mortar, and corners are added, while a 16 to 24 inch wide pillar usually has enough visual mass to carry stone. If you are wrapping existing posts, confirm the final thickness does not crowd a gate swing, stair landing, or dining chair path.
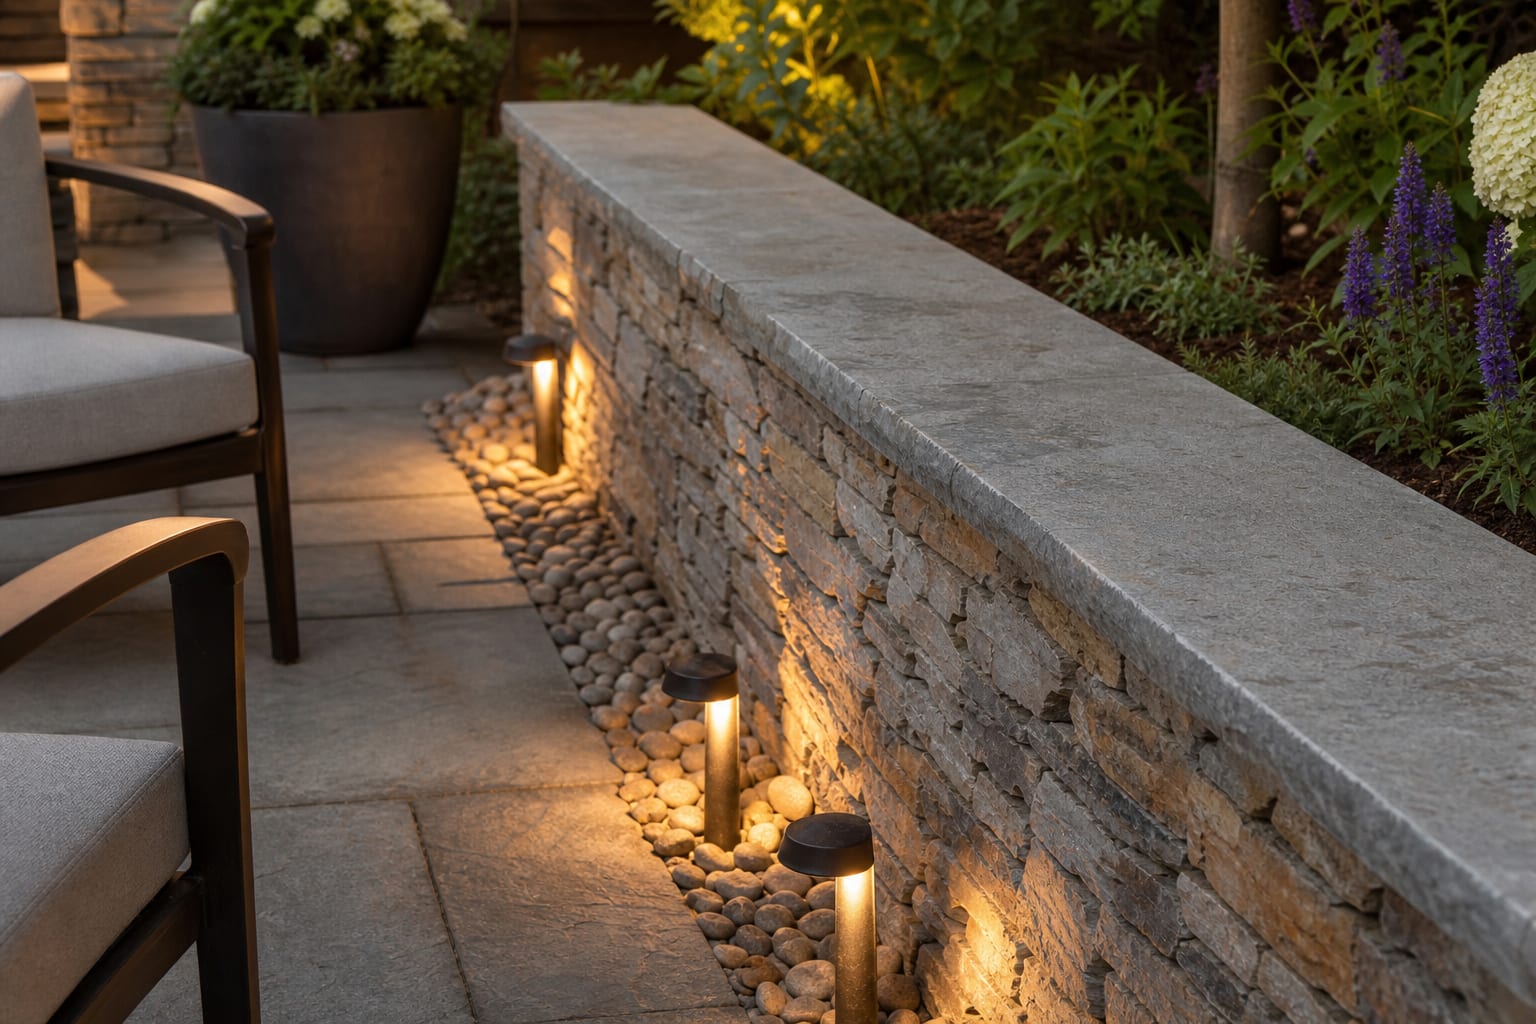
Drainage is not decorative, but it decides whether the veneer ages well. Exterior cladding needs the right substrate, water-resistive layers, flashing, weep paths, and mortar or panel system for the product. A patio wall should still shed water, and any horizontal surface above veneer needs a cap with a drip edge. A 1 inch to 1 1/2 inch overhang on a stone, concrete, or metal cap helps keep runoff from streaking down the face.
The decision that shapes every stone veneer patio project
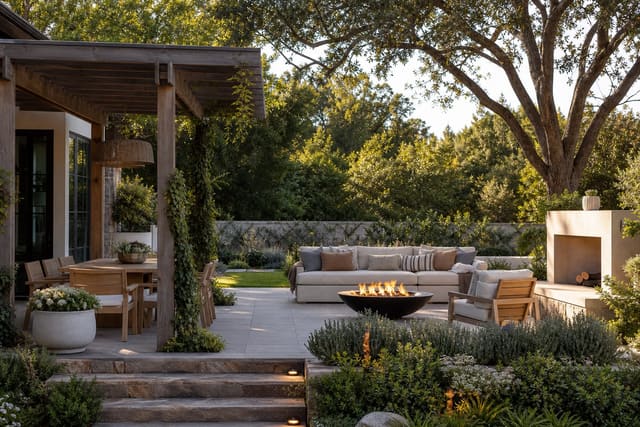
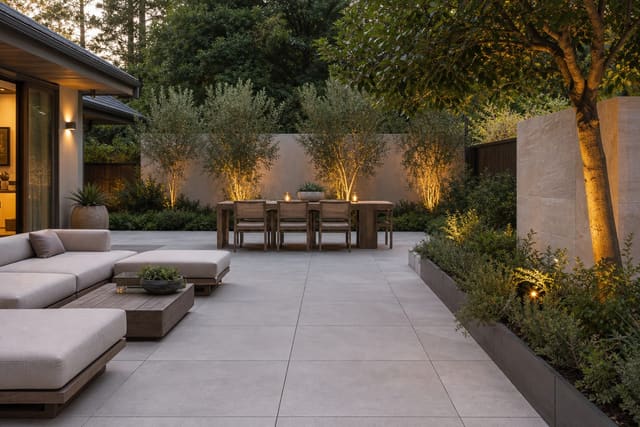
The main choice is whether the stone should be an accent or the architecture. Most patios only need one strong stone gesture: a fireplace wall, a pair of pillars, a low seat wall, or the face of an outdoor kitchen. Covering every vertical surface can make a small backyard feel heavy, especially when the patio is already brick, concrete, or dark pavers.
| Veneer move | Best use | Watch the detail | | --- | --- | --- | | Full feature wall | Blank concrete or CMU wall behind a sofa, dining area, or fountain | Add a cap or coping and avoid stopping short of corners. | | Wrapped pillars | Pergolas, patio entries, gate posts, and porch columns | Keep finished posts proportional; many look better at 16 inches wide or more. | | Low seat wall face | Fire pits, dining edges, and raised planting beds | Seat height usually feels comfortable around 18 to 20 inches before cushions. | | Outdoor kitchen base | Grill islands and prep counters | Use noncombustible assemblies and maintain manufacturer clearances around grills. |
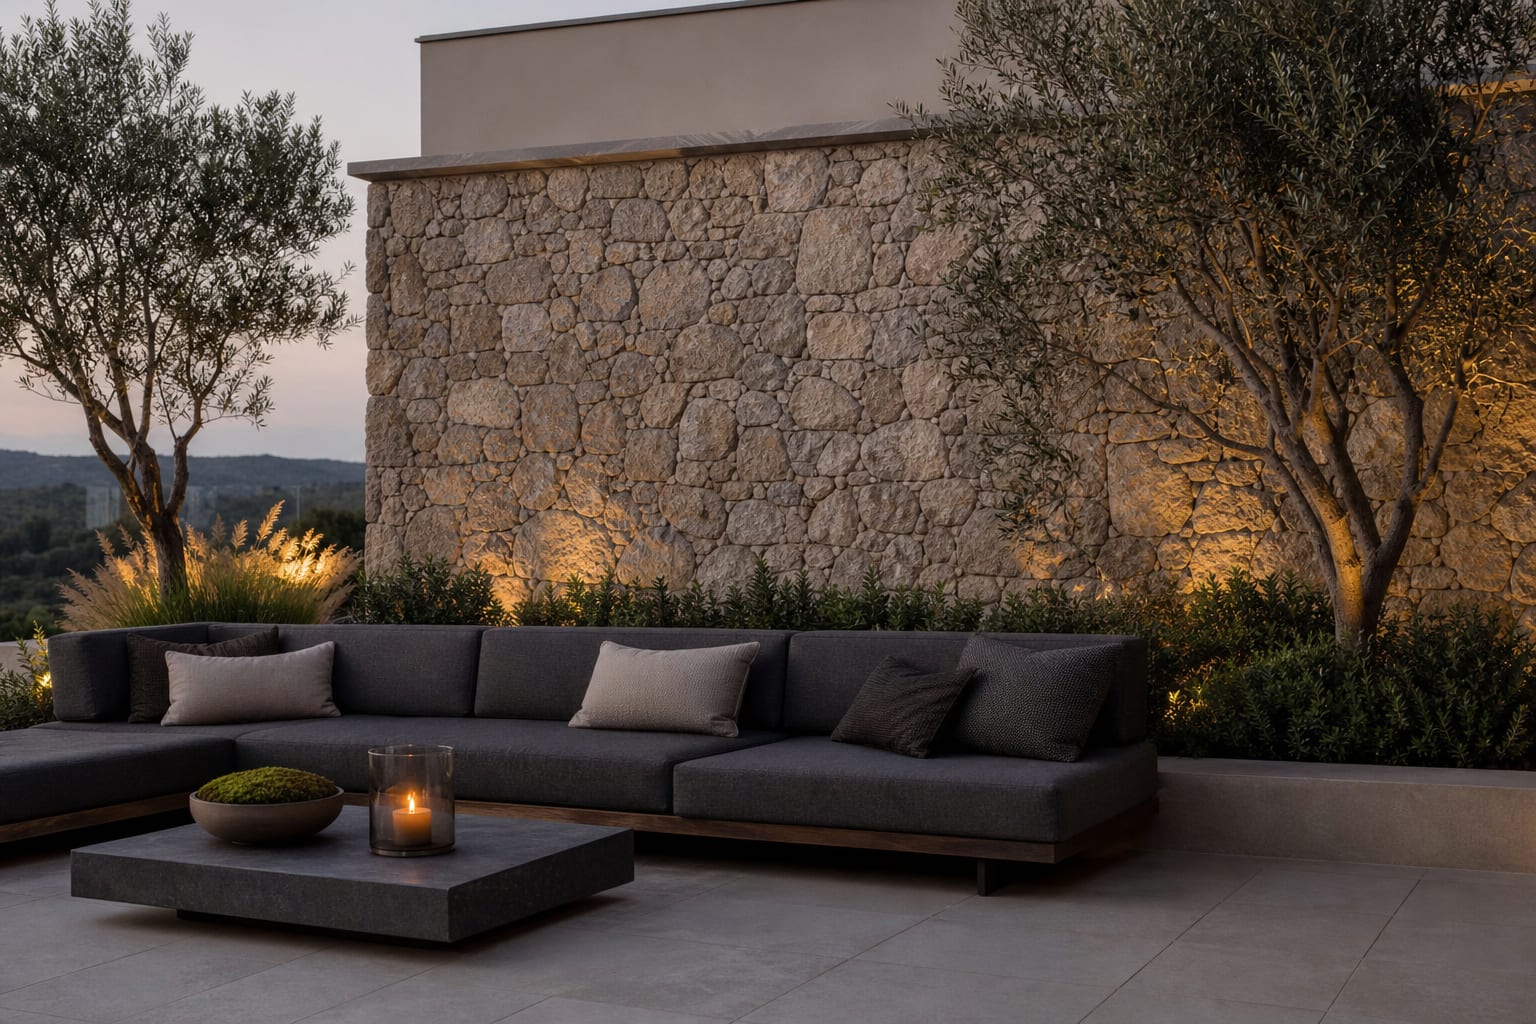
Natural stone veneer exterior projects often have more variation, deeper shadow, and less repetition than manufactured panels. They also need a structure that can handle the selected system, and some stones require more careful sorting on site. Faux stone outdoor wall panels can be useful on lighter-duty projects, but they look best when seams are hidden, corners are believable, and caps are real enough to cast a shadow.
The patio floor matters as much as the wall. If your floor is clean and modern, a rugged stacked stone can add needed texture; if the ground plane is already busy, the wall should quiet down. A large-format surface like porcelain tile patio ideas for outdoor rooms pairs well with rougher veneer because the pavers stay calm while the vertical stone carries the movement.
Test this on your own photo with ReDesign before you choose the final outdoor direction; keep the house edge, horizon line, hardscape, planting beds, and main path visible so the preview solves the space you actually have.
Which outdoor stone veneer ideas make walls and pillars look intentional?
Strong stone veneer design is less about covering more square footage and more about choosing the exact surface that needs weight, texture, or protection. These ideas work because each one gives the veneer a job.
- Wrap the lower half of chunky patio pillars when the roof or pergola already feels visually top-heavy; keep the stone base around 30 to 42 inches tall and finish it with a crisp trim band so the upper post still looks deliberate.
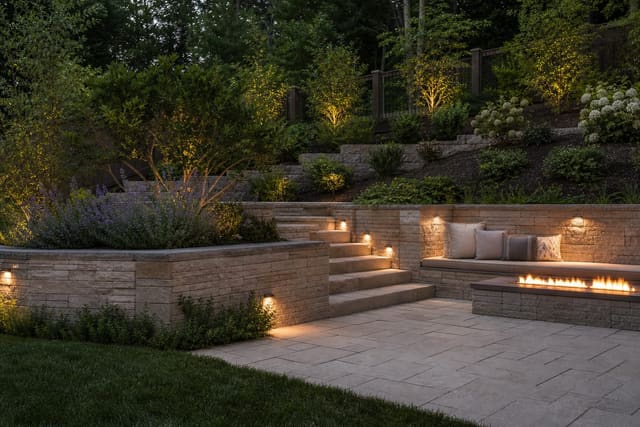
- Turn a blank retaining wall into a backdrop by veneering the full face and adding a 2 inch to 3 inch thick cap; this makes the wall read as landscape architecture instead of exposed concrete behind furniture.
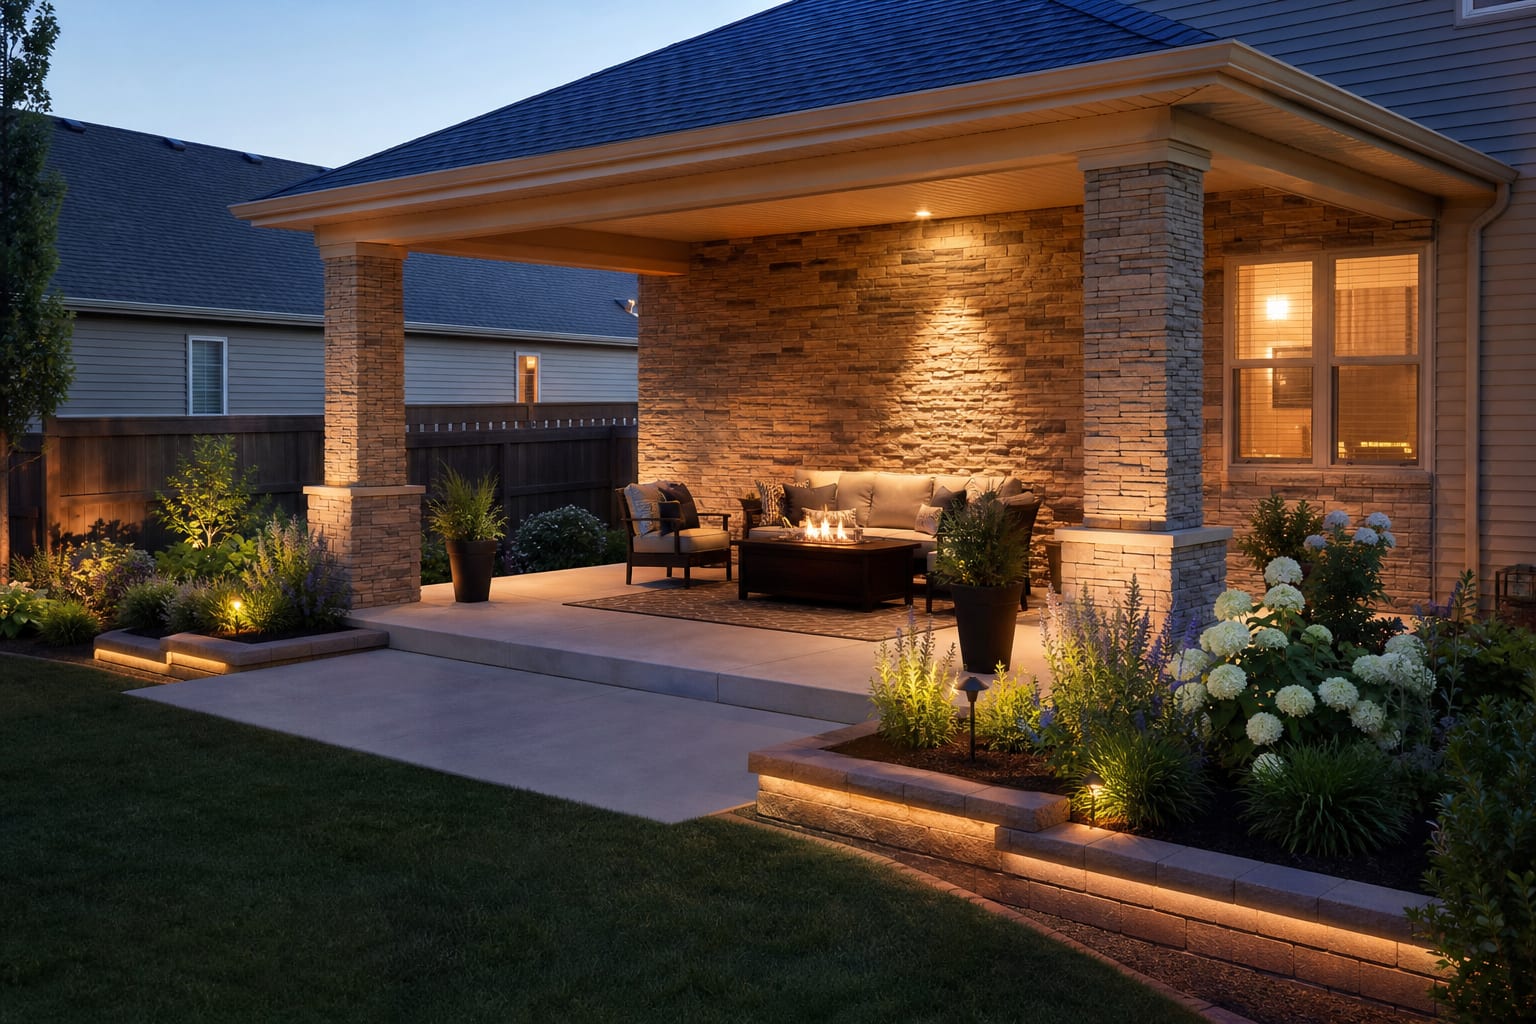
- Use stone veneer on a fire pit or fireplace wall when the seating zone needs a focal point; keep at least 36 inches of walking space behind chairs so the heavier wall does not squeeze circulation.
- Face a raised planter or seat wall in the same veneer as nearby pillars; repeating the material twice, with 8 to 15 feet between uses, usually feels more designed than applying it to one lonely column.
- Combine a stone wall with a softer adjacent surface, such as decomposed granite patio zones, when a big yard needs both a polished dining pad and a more relaxed fire pit area.
- Add a narrow gravel reveal at the base of a veneered wall where splashback is a problem; a 6 inch to 12 inch band of washed stone can protect the wall visually and connect it to planting beds, and gravel patio ideas for casual outdoor rooms can help you tune that edge.
- Lighting should be planned while the stone layout is still flexible. Use warm 2700K to 3000K fixtures, and aim for grazing light from sconces, step lights, or shielded path lights rather than bright uplights set inches from the face. Deep ledgestone will throw dramatic shadows; flatter ashlar or limestone needs less aggressive light to avoid looking striped.
Common outdoor stone veneer mistakes
The first mistake is using veneer to hide bad proportions. A narrow, tall concrete post does not become handsome just because it gets stone; it may become a skinny stone column with awkward corners. Build out the base, add a cap, or choose paint and planting instead if the final width would still look weak.
The second mistake is skipping the cap. Stone veneer should not be left with an exposed horizontal top where rain can sit behind it. Use a capstone, concrete coping, metal cap, or masonry detail with a drip edge, and slope the top slightly so water moves away instead of soaking the assembly.
The third mistake is mixing too many stone personalities. A patio with gray ledgestone pillars, tan flagstone paving, red brick steps, and white gravel can feel like a showroom sample wall. Pick one dominant mineral family and let other materials support it quietly.
The fourth mistake is trusting a tiny sample board. Manufactured stone often repeats shapes, and natural veneer changes from box to box or pallet to pallet. Dry-lay a few square feet on the ground, include corner pieces, and view it in morning sun, shade, and evening light before approving the install.
The fifth mistake is forgetting the bottom edge. Veneer that disappears into mulch can wick dirt and look buried. Leave a clean reveal, set the patio grade carefully, or use a gravel strip so the base stays sharp through rain, leaf litter, and regular sweeping.
Use AI design to preview your stone veneer before you commit
AI previewing is useful for stone veneer because scale and undertone are hard to judge from a sample, especially on pillars and long patio walls. Upload a straight photo of the patio wall, concrete column, grill island, or retaining wall, then test specific prompts such as warm limestone veneer with capstones, charcoal stacked stone on square pillars, or natural stone veneer exterior wall with planting at the base.
Keep the prompt practical. Include the house siding, patio surface, fence color, steps, doors, roof overhangs, and furniture you plan to keep in the photo. The preview should help you see whether the stone makes the patio feel grounded or crowded, whether the color fights the house, and whether one accent wall is enough.
Do not let the image replace construction checks. Once the look feels right, confirm the substrate, flashing, drainage plane, freeze-thaw suitability, product weight, grill clearances, and local code needs with a qualified installer or manufacturer guidance. The visual decision and the technical assembly have to agree.
Frequently Asked Questions
Thin veneer or full-bed stone outdoors?
Thin veneer (under 1.5in) handles non-structural cladding over CMU or framed walls with a weather barrier; full-bed stone (3-5in) serves structural and freestanding garden walls. Use the outdoor photo to compare the visible layout and fixed constraints before committing, because slope, shade, drainage, doors, utilities, and traffic paths decide whether the idea survives daily use.
How do you avoid the fake-stone look?
Avoid identical L-shaped corners — use real-thickness return stones — and vary the stone size so no two adjacent stones share a top edge. Keep the preview honest by leaving the problem area visible in the frame, then compare one conservative version against one bolder version before you buy plants, materials, or furniture.
Does stone veneer need a moisture barrier?
Yes outdoors over framing or CMU: two layers of weather-resistive barrier, lath, scratch coat, and bond coat; without the barrier, water trapped behind the veneer rots the substrate. Check the result against ordinary movement first: chair pullout, walkway width, gate swing, glare, storage reach, and evening light matter more than a perfect catalog angle.
Should mortar joints be flush or recessed?
Flush or slightly raked joints with sand-finished mortar read like dry-stack and avoid the chunky grout-line look; deep raked joints suit basement-style retaining walls only. Use the image to narrow priorities and measurements before ordering anything custom; final purchases still need real dimensions, code checks, utility locations, and product clearances.
How do I light stone veneer at night?
Mount a shielded warm-white wall grazer at the top or bottom of the wall pointing along the face; light hitting the wall obliquely reveals the texture, while flat front-lighting kills it. If the preview invents architecture or hides the awkward feature you need solved, rerun it with stricter instructions so the result remains tied to your actual outdoor space.
Three transformations to try