A rain garden is a shallow planted basin that catches runoff from your roof, driveway, or lawn and lets it soak into the ground instead of rushing to the storm drain. You build one by digging a depression 4 to 8 inches deep, shaping a flat bottom, and planting it with species that tolerate both flooding and drought. That is the whole idea, and it is genuinely one of the best-value projects in a yard.
My honest take: a rain garden solves a real drainage problem and looks better than the soggy lawn patch it replaces, which is rare for a functional fix. Done right it absorbs the first inch of rain off a downspout, recharges groundwater, and gives pollinators a lush patch to work. Done wrong it becomes a mosquito pond, so the specs below matter.
Siting and sizing the basin
Location makes or breaks a rain garden. Keep the basin a minimum of 10 feet from your house so soaking water never reaches the foundation, and pick a spot that already sits downhill from the runoff source, whether that is a downspout, a driveway edge, or a low lawn swale. Avoid the wettest corner of the yard; a rain garden needs soil that drains, not ground that stays saturated.
Run a quick percolation test before you commit. Dig a hole 12 inches deep, fill it with water, and time how fast it drops. If it drains at least 1/2 inch per hour you are fine; much slower and you will need to amend the soil with sand and compost or choose a different spot. Size the garden at about 20 to 30 percent of the impervious surface feeding it, so a 400-square-foot roof section draining to one downspout wants a basin around 80 to 120 square feet. You can break the raised garden bed ideas approach here by keeping this bed recessed instead, since the whole point is to hold water low rather than lift it.
Getting the water from source to basin is its own small project. The cleanest method is a buried 4-inch corrugated pipe running from the downspout to the garden's inlet, pitched at least 1 to 2 percent so it drains by gravity and never holds standing water. If you would rather keep it visible, a shallow rock-lined swale carries roof runoff across the lawn just as well and reads as a design feature. Aim to capture the first inch of rainfall, the so-called first flush that carries the most pollutants off a roof, because that is the water a rain garden filters best before it ever reaches the storm drain.
Shaping, soil, and overflow
The basin needs a flat, level bottom so water spreads evenly instead of pooling in one corner. Build a low berm of excavated soil on the downhill side, about 6 to 12 inches high, to hold back the design depth, and set a rock-lined overflow notch at the berm's lowest point so big storms spill out safely instead of blowing through the wall. Line the inlet where water enters with cobble or river rock to kill the force of the flow and stop erosion.
Soil mix matters more than people expect. A blend of roughly 50 to 60 percent sand, 20 to 30 percent compost, and the rest topsoil drains fast while still feeding plants. Top everything with 2 to 3 inches of shredded hardwood mulch, which knits together and resists floating away better than bark nuggets. Good edging keeps the whole thing crisp, and the techniques in garden wall ideas work well for a low stone lip that frames the basin and doubles as a mowing strip.
Dig the basin in two passes so the depth stays honest. Strip the sod, then excavate to your target 4 to 8 inches while checking the bottom with a board and a level, since an eyeballed floor almost always slopes more than you think. Pile the spoil on the downhill side to form the berm and tamp it firm in layers so it does not slump after the first storm. If you hit heavy clay below the cut, loosen another 6 to 12 inches and work in coarse sand and compost so water has somewhere to go rather than perching on a hard pan and stagnating.
Plant zones that handle wet and dry
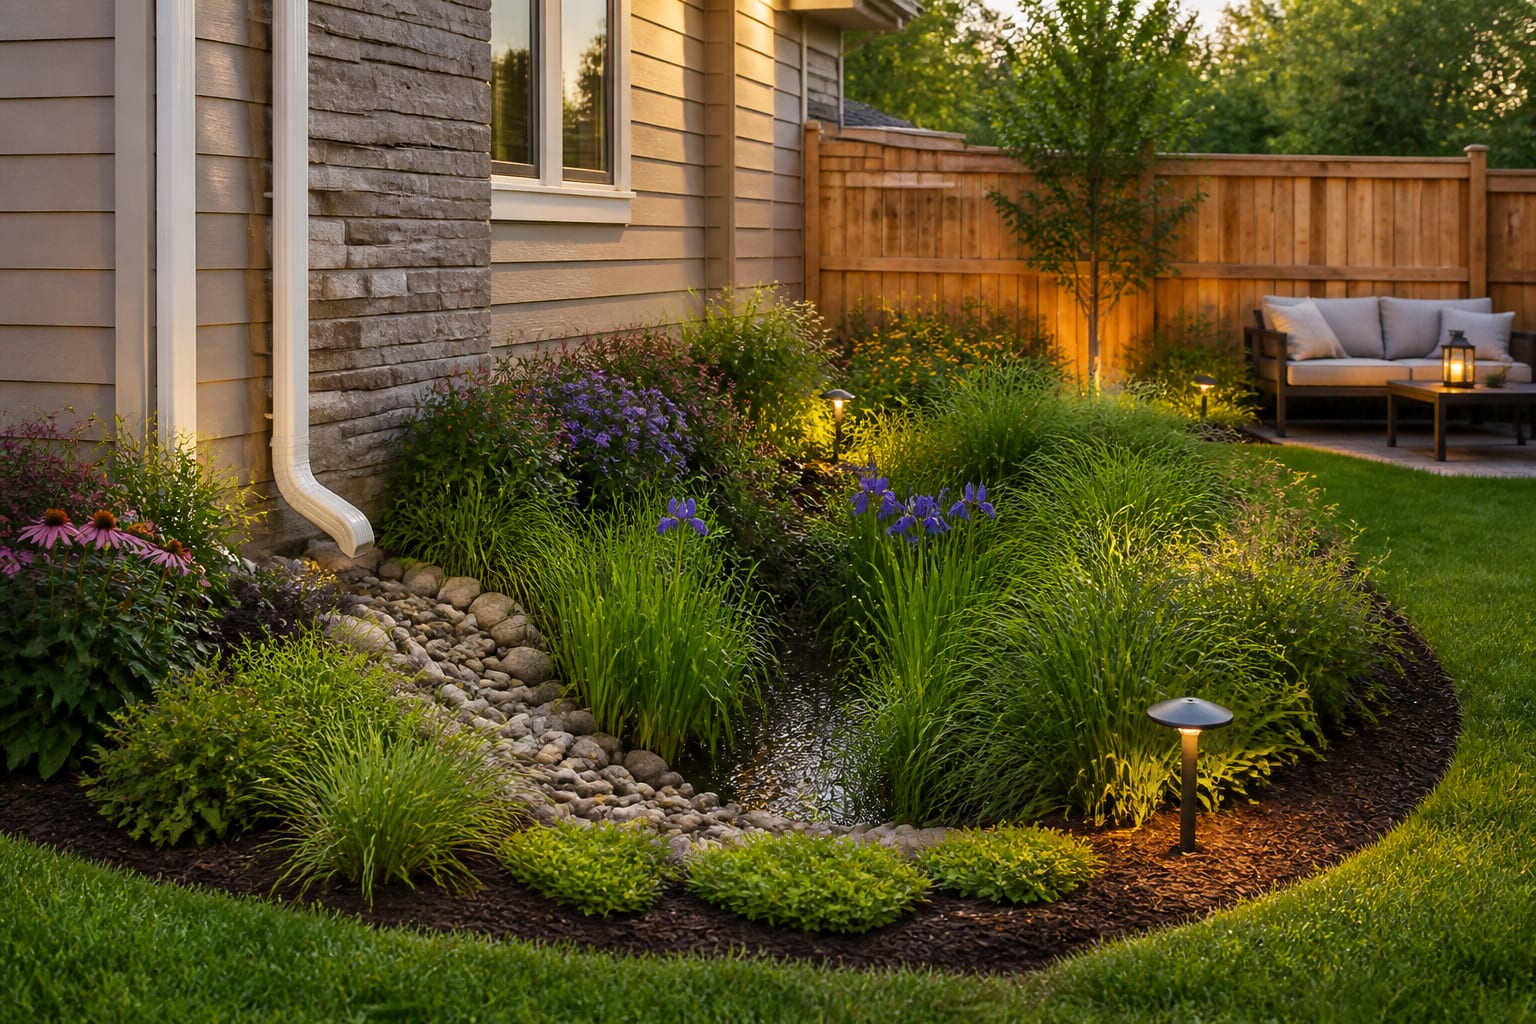
Think of a rain garden in three rings. The bottom center floods and dries repeatedly, so it wants the toughest moisture-lovers: sedges, blue flag iris, swamp milkweed, or rushes. The sloped middle stays moist but rarely floods and suits black-eyed susan, switchgrass, and joe-pye weed. The top rim behaves like ordinary garden soil and takes coneflower, little bluestem, or asters.
A few rules keep that planting list from sprawling:
- Lean on native perennials and grasses, whose deeper roots open channels that speed infiltration each year.
- Space plants about one per square foot so the canopy knits shut within a single season.
- Skip fertilizer so the nutrients already riding in the runoff never push soft, floppy growth.
Lean on native perennials and grasses because their deep roots, often reaching 2 to 3 feet down, open channels that boost how fast water infiltrates over time. Plant densely, around one plant per square foot for perennials, so roots knit fast and crowd out weeds. For evening interest, low-voltage fixtures from solar light outdoor ideas tucked along the rim wash light across the grasses without any wiring trenched through the basin.
The first year is the one that matters for establishment. Even drought-tolerant natives need regular water for their first season while roots reach down, so plan to supplement during dry spells until they take hold, usually after about 12 weeks of growth. Skip fertilizer entirely; rich feeding pushes soft floppy growth and the runoff you are capturing already carries nutrients you do not want to amplify. Weed by hand for the first couple of seasons until the planting closes in, then the dense canopy mostly suppresses newcomers on its own. By year two a well-built basin runs close to maintenance-free, asking only for a spring cutback of last year's stems.
Common mistakes to avoid
The most common mistakes to avoid are about water behavior, not plants. People dig the basin too close to the house and end up wicking moisture toward the foundation; keep that 10-foot minimum. They forget the overflow notch, so the first heavy storm overtops the berm and carves a channel out the side. They also build on clay that drains slower than 1/2 inch per hour without amending it, which turns the garden into a stagnant pool that breeds mosquitoes instead of draining in 24 to 48 hours.
Two more trip-ups: skipping the percolation test entirely, and planting fussy ornamentals that cannot take a flood-then-drought swing. Match plants to the three zones and test the soil first, and most failures simply never happen.
Use AI design to preview your rain garden before you dig
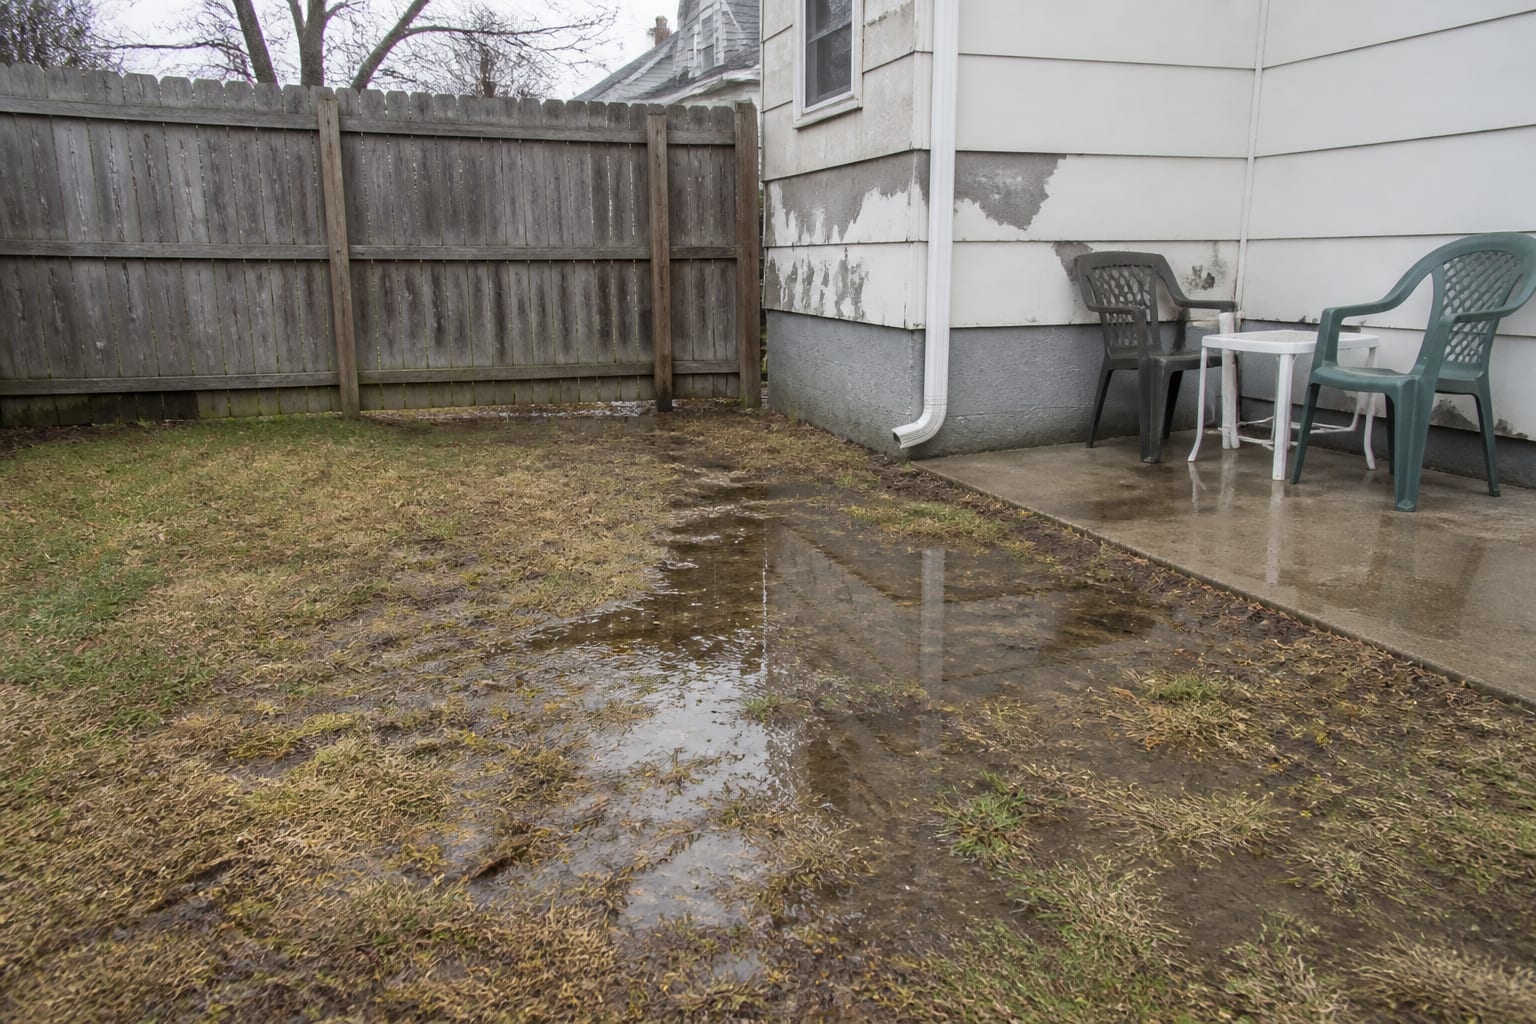
A basin is a lot of digging to undo if the shape or planting looks wrong, so previewing helps. Upload a photo of the low spot or downspout corner where the water collects, and Re-Design re-renders it as a finished, planted rain garden, so you can judge the curve of the berm and the mix of grasses against your actual fence and house.
Try a few planting moods on the same shot. Upload the bare corner and ask the AI design tool for a tidy native-grass version, then a looser cottage mix of iris and milkweed, then a more structured layout with a stone-lined inlet. Seeing your own yard rendered each way makes it clear how big the basin should read before a shovel touches the ground.