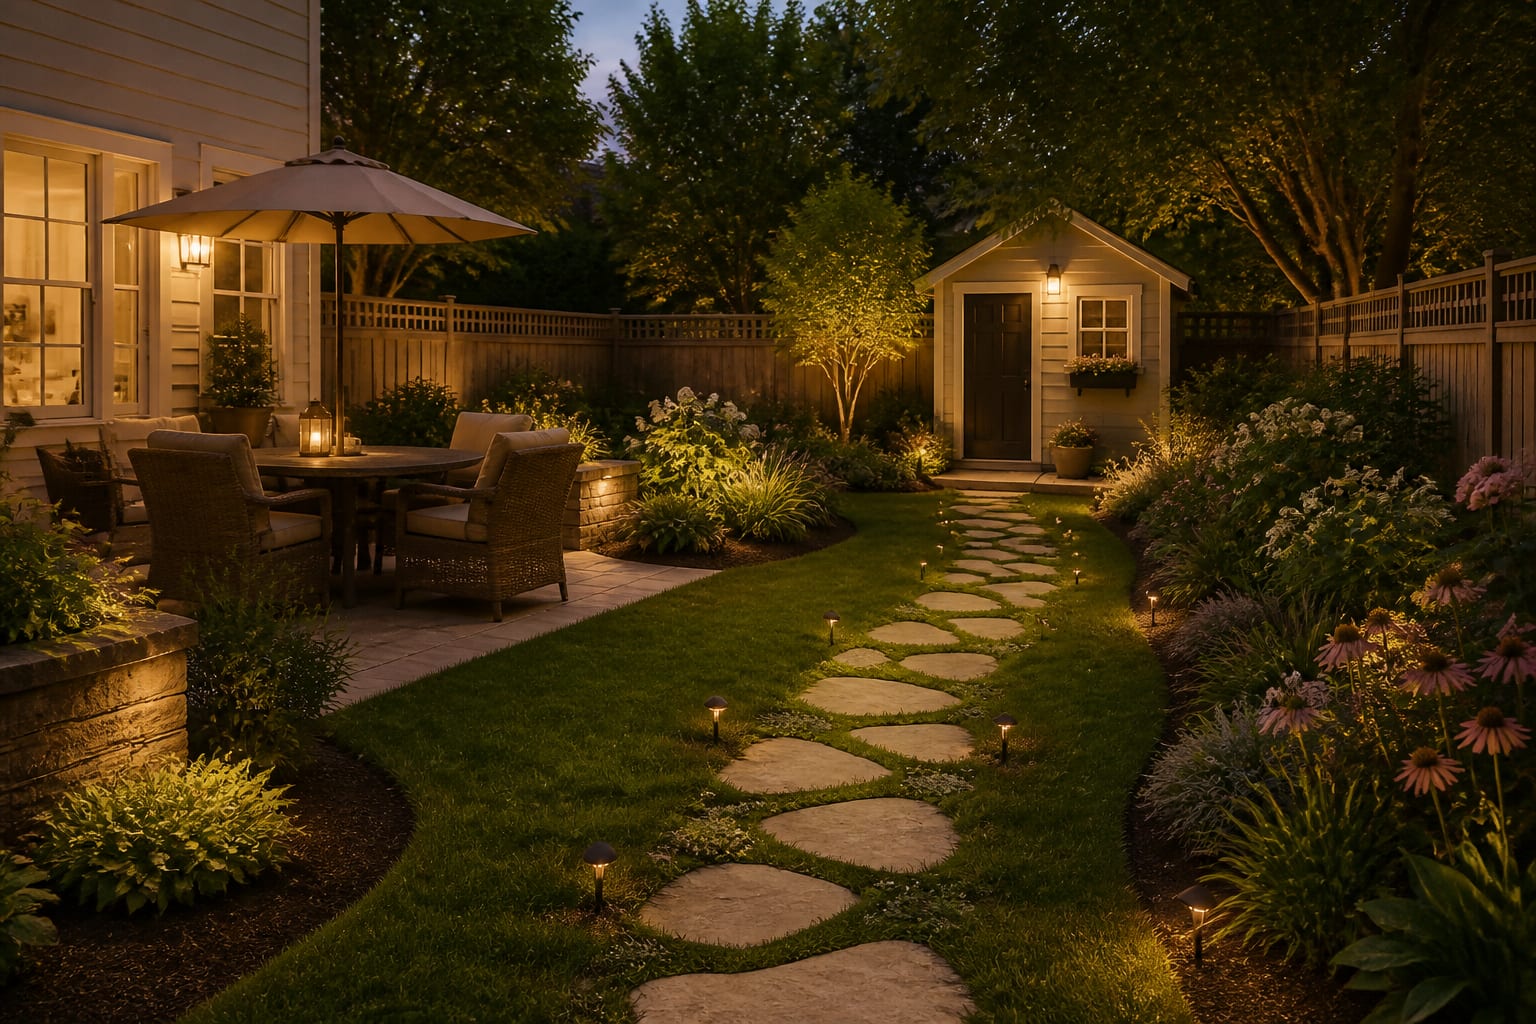
Walk the route before you buy a single stone, because the path your feet want is rarely the straight line you sketch. To design and lay a stepping stone path, set each stone where a relaxed stride lands, dig a flat bed, and bed every slab on compacted gravel so nothing rocks underfoot. My read is that most DIY paths fail at the spacing step, not the material step, which is why they feel like a hopscotch grid instead of a walk.
I think of a good path as choreography. Measure your own comfortable stride, then place stones on those centers and the path disappears under your feet the way a well-set table disappears under a meal.
Get the spacing to match a real stride
Spacing is the whole game, and it is measured center to center, not edge to edge. Walk a relaxed pace across grass and have someone mark where your heels land twice; the gap between marks is your stride, usually 24 to 26 inches for an adult. Set stone centers on that number and your foot finds each one without you looking down. For a slow garden stroll past beds you want people to notice, tighten to 18 to 20 inches so the pace naturally drops.
Think about who uses the path. A route to a shed carrying tools wants a confident 26-inch stride, while a meander through a garden design scheme should slow people to a 20-inch step so they actually look at the planting. Children and older walkers do better with shorter, more frequent stones, so split the difference around 20 inches on shared paths.
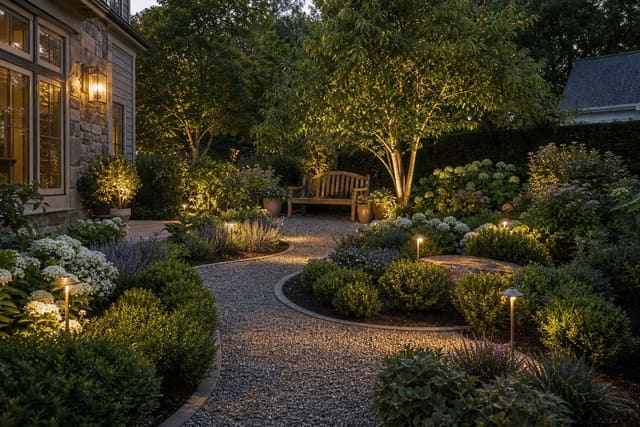
Stagger the stones slightly side to side rather than lining them up like a centerline. A 2 to 4 inch left-right offset mimics the way hips swing when you walk and keeps the path from feeling like a balance beam. On a curve, place stones on the inside of the arc where feet naturally cut the corner, not on the geometric centerline of the curve.
Lay the route out with the stones loose before you cut a single piece of turf. Set every slab on top of the grass, walk the path back and forth a dozen times, and shift any stone your foot has to reach for or hop over. I leave the dry-laid path in place for a full day so I catch the route at different times, then mark each stone's outline with a spade or a ring of sand. That hour of walking saves a weekend of lifting and re-bedding stones that landed a few inches off your real stride.
Choose stone that earns its keep
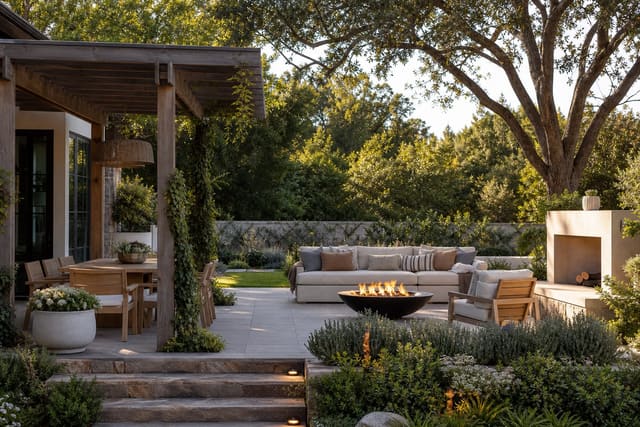
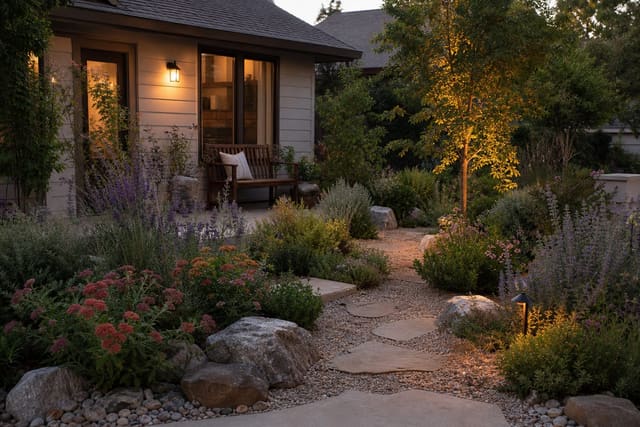
Material sets the mood and the maintenance. Natural flagstone in sandstone or bluestone gives an irregular, settled look and grips well when wet, but thickness varies, so hand-pick slabs of 2 inches or more to avoid cracking. Pre-cast concrete steppers are uniform and cheap, which makes leveling faster, though they read more formal. Cut granite or basalt setts suit a crisp modern garden but cost the most and get slick when smooth.
Size matters more than people expect. A stone under 16 inches across forces you to aim your foot, which defeats the point; 18 to 24 inches lets a boot land anywhere on it. Round or organic shapes suit informal cottage gardens, while squared slabs match straight bed lines and a drought-tolerant landscaping palette of gravel and grasses. Whatever you pick, get every slab from the same batch so color and texture stay consistent down the run.
Here is what I check on every stone before it goes in the cart:
- A minimum 2-inch thickness so foot traffic and frost heave do not crack it.
- A flat, slightly textured top face that grips wet soles instead of polishing slick.
- A footprint of 18 inches or more so a stride lands without aiming.
- Color that reads against your soil, not so pale it shows every grass clipping.
- Square or organic edges that match the geometry of nearby beds and fences.
Build a base that stays flat
A path lives or dies on its base. Excavate 4 to 6 inches under each stone, going deeper in clay that holds water or in a freeze-prone climate. Lay 3 to 4 inches of crushed gravel and compact it firmly with a hand tamper, then add a 1-inch sand setting bed you can screed level. Seat the stone, twist it into the sand, and check it with a level in two directions; a 1/4-inch tilt toward a bed sheds rain without feeling crooked.
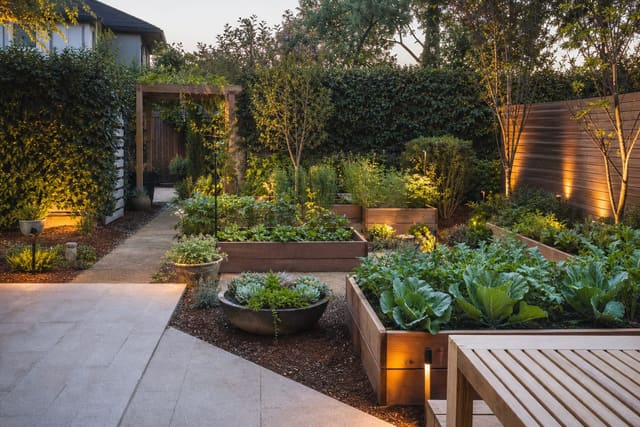
Height relative to the lawn decides whether you ever curse the path. Set each stone 1/2 to 1 inch below the surrounding turf so a mower blade rides straight over it and you never trim around edges by hand. In a planted bed instead of lawn, you can sit the stone flush or slightly proud. Fill the gaps between stones with the same gravel, with a low groundcover like creeping thyme, or with a tight vegetable-bed border if the path threads a vegetable garden design so the path doubles as a working access route.
Compaction is the step amateurs skip and pros never do. Tamp the gravel until it stops moving under the plate, not just until it looks flat, because a soft layer settles unevenly over the first winter and tilts the stones with it. On a slope, build the path as a series of short level landings rather than one continuous grade, and pin a length of edging along the downhill side so the gravel bed cannot creep out from under the stones. Check each slab again a week after rain, since a stone that felt solid on a dry day will tell you the truth once the ground has been soaked and the base has had a chance to settle into place.
Common mistakes to avoid
The most common mistakes to avoid all trace back to skipping the base or guessing the spacing. The biggest one is setting stones straight on soil: without a compacted gravel and sand bed, every slab rocks within a season and tilts as the ground freezes and thaws. Dig the 4 to 6 inches even when it feels like overkill.
The second trap is eyeballing the stride instead of measuring it, which leaves stones too far apart for short legs and too close for tall ones. Mark a real stride first. Other repeat errors: choosing stones under 16 inches that force you to aim each step, polishing-smooth slabs that turn into a slick hazard the first rainy morning, and setting stones proud of the lawn so the mower scalps the turf around them. Bed everything 1/2 inch low and the path maintains itself.
Use AI design to preview your path before you dig
A path is hard to picture because you are imagining stones on grass you already know too well. Re-Design closes that gap: upload a photo of your yard and the AI design tool re-renders the same view with a flagstone path curving through it, so you can test whether bluestone or buff sandstone suits your siding before you order a pallet.
Try a few versions of the one shot. Upload the photo, ask for a tight 18-inch formal run of square steppers, then compare it against a loose 24-inch flagstone meander with thyme in the joints. Seeing both against your real beds makes the right spacing and stone obvious, and it saves you from staring at a half-built path wishing you had gone wider.