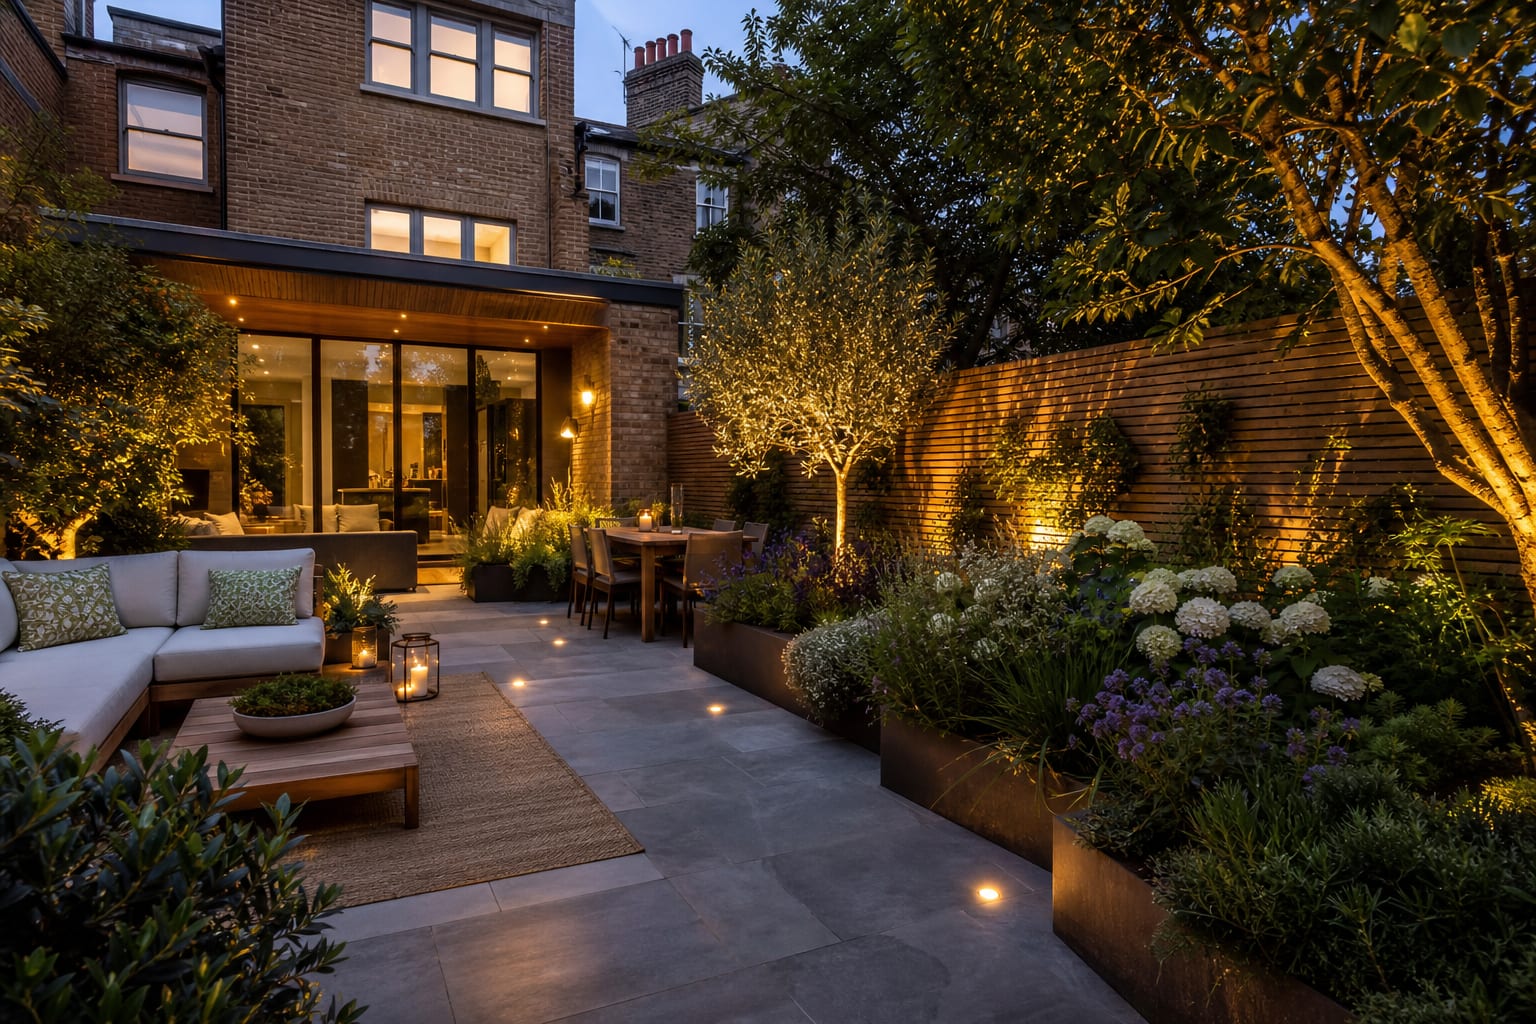
A garden reads designed rather than planted-by-accident when it has a clear structure layer (paths, hedges, or hard edges that hold shape in winter), a repeated planting theme (three to five species that recur throughout the garden in odd-numbered drifts), and a single focal point per vista — one specimen tree, one sculpture, or one feature plant — that gives each sightline a destination. A garden that looks like random plantings usually has too many favorites and not enough decisions. The hard truth: plants are the last layer, not the plan. If the beds have no shape, the paths do not guide movement, and the focal points compete with each other, even expensive shrubs will look accidental. This guide shows how to turn a scattered garden into a composed outdoor space with beds, paths, planting layers, and focal points that make sense.
What makes a garden feel designed instead of merely planted?
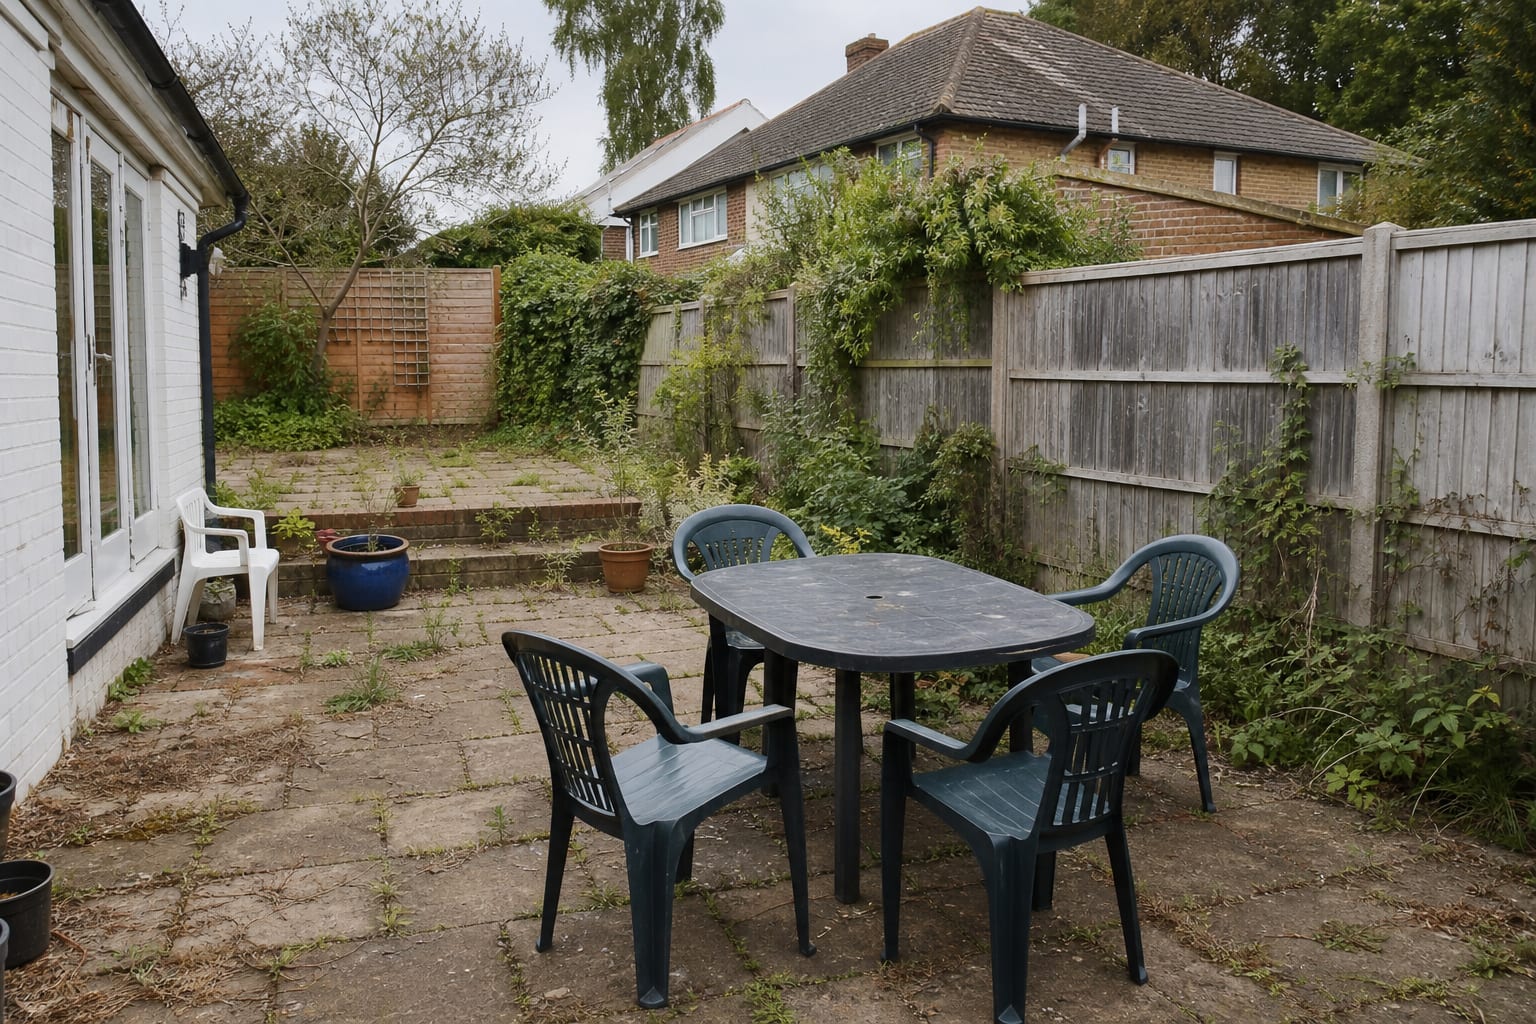
A garden feels designed when the ground plane, edges, routes, and visual pauses are composed before the nursery cart gets involved. Random planting often happens because the homeowner buys what looks good in April, then tries to find room for it beside the patio. Better garden planning works the other way around: decide where people walk, where the eye lands, where shade falls, and where maintenance access has to stay open.
Start with the view from the house. The kitchen window, back door, patio chair, or main gate should look toward something deliberate, not toward the side of a compost bin or a gap in the fence. A focal point does not need to be fancy; a 30 inch wide bench under a small tree can do more for the garden than another tray of annuals. If the garden is narrow, place the focal point slightly off center so the view feels longer and less tunnel-like.
The bed shape matters as much as the plant list. Broad curves look calm; fussy wiggles look nervous and are harder to edge. If you use curves, make the radius generous enough for a mower or wheelbarrow to follow. If you use straight lines, align them with the house, fence, patio, or existing path so the geometry feels connected to the property.
| Garden element | Weak version | Stronger design move | | --- | --- | --- | | Bed edge | Tiny scallops every few feet | One broad curve or a straight run tied to the house | | Path | Stepping stones that disappear into lawn | 36 inch main route or 24 inch stone spacing for a secondary path | | Focal point | Multiple small ornaments | One bench, pot, tree, or water feature placed on a view line | | Planting | One of everything | Repeated groups with height stepping from back to front |
Which garden design ideas give beds, paths, and focal points real structure?
Use these moves to make a garden read as a plan rather than a collection. Each one fixes a specific problem: weak edges, awkward circulation, shallow beds, or too many small distractions.
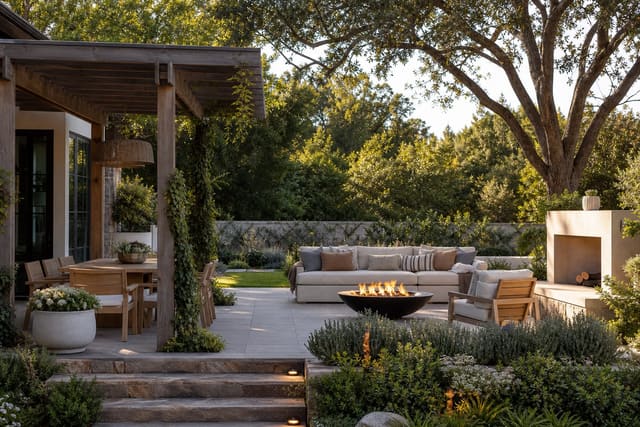
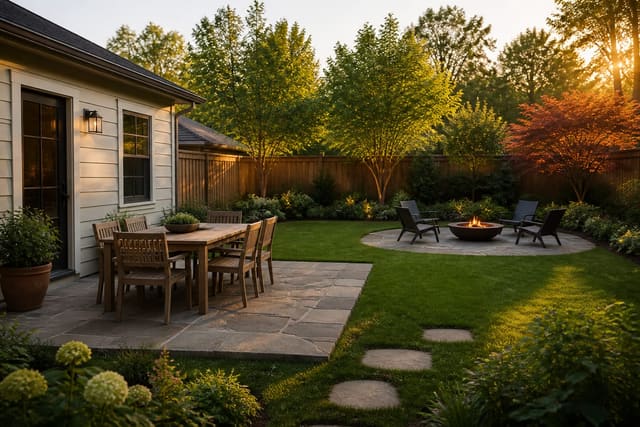
- Draw one continuous bed around the garden edge, because a single connected border frames the lawn, terrace, or gravel court like a rug. Give the bed at least 4 feet of depth where shrubs need to mature, and expand corners to 6 or 8 feet when you want a small tree or layered evergreen planting.
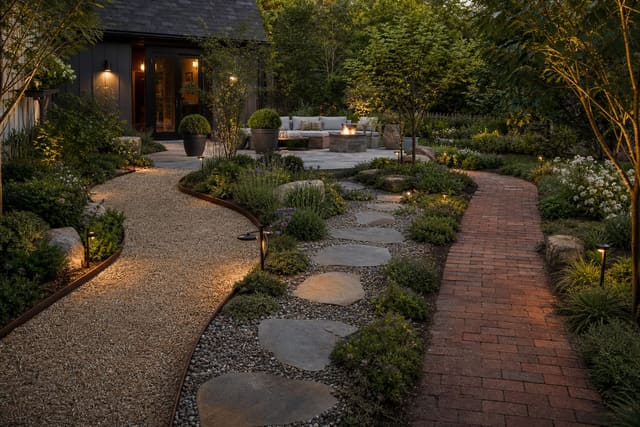
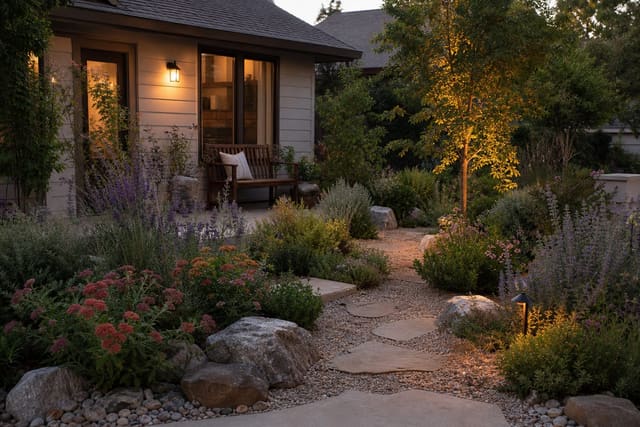
- Use a path to create anticipation, because a garden that reveals everything at once often feels flat. A 36 to 42 inch gravel, brick, or stone path works for daily movement, while a narrower secondary path can curve through herbs, shade plants, or a cutting border. If your site is dry and exposed, borrow principles from drought tolerant landscaping ideas so the path and planting palette do not fight the climate.
- Place a focal point where a path ends or a view needs a reason to stop, because the eye wants a destination. A large glazed pot should usually be 20 to 28 inches wide to hold its own outdoors; a tiny pot at the end of a long view will vanish.
- Step planting heights from front to back, because flat planting makes even colorful borders look thin. Keep low edging plants around 8 to 15 inches tall, use mid-height perennials and grasses around 18 to 36 inches, then anchor the rear with shrubs, climbers, or small trees that suit the mature space.
- Design a productive corner with the same discipline as an ornamental bed, because vegetables look messy when they are treated as an afterthought. Raised beds that are 3 to 4 feet wide are easier to reach from both sides, and a simple grid can make tomatoes, herbs, and flowers feel handsome together; for edible layouts, study vegetable garden design ideas before deciding bed size.
Test this on your own photo with ReDesign before you choose the final outdoor direction; keep the house edge, horizon line, hardscape, planting beds, and main path visible so the preview solves the space you actually have.
Common garden planning mistakes to avoid
The first mistake is buying plants as isolated crushes. One hydrangea, one salvia, one rose, one grass, and one mystery perennial may all be lovely alone, but together they can look like a holding area outside a nursery. Choose a smaller palette and repeat it, then vary leaf size, height, and bloom time so the border has rhythm without chaos.
The second mistake is making every bed too shallow. A thin strip against a fence cannot hold layered planting, and it forces every shrub into a flat lineup. Pull the bed forward, even by 18 to 24 inches, and the garden gains room for lower front planting, bulbs, and groundcovers that hide bare stems.
The third mistake is ignoring maintenance routes. A beautiful border becomes irritating if you cannot reach the hose bib, prune the hedge, empty the compost, or clean behind the shed. Leave practical access at least 18 inches wide where hands and tools need to pass, and keep thorny plants away from gates, bins, and children’s shortcuts.
The fourth mistake is using focal points as clutter. A birdbath, obelisk, lantern, statue, arch, and bistro set can make a small garden feel like a shop display. Pick the strongest view and support it with planting; let the rest of the garden breathe.
The fifth mistake is planning only for peak summer. A strong garden has bones in winter, texture in spring, shade in summer, and seedheads or foliage in autumn. Evergreens, deciduous shrubs, grasses, bulbs, and perennials should share the workload instead of asking one flowering month to carry the entire year.
Use AI to preview your garden before you commit
AI design helps most when you use it as a visual rehearsal for layout choices: bed depth, path shape, focal point placement, planting mass, and the balance between open space and filled borders. Upload a straight, daylight photo from the patio, back door, gate, or main garden view, and include the fence, house edge, existing trees, lawn, and any awkward utilities. The preview should not replace a tape measure, but it can reveal whether the garden feels calm, cramped, empty, or overstuffed before you order stone, soil, or plants.
Test two or three versions that differ in structure, not just flower color. One version might use a curved border and gravel path; another might use square beds and a central lawn panel; a third might add a small tree and bench as the focal point. Keep the camera angle identical so the comparison is honest. If a 5 foot bed looks generous on screen, mark it outside with a hose or landscape paint and walk around it before committing.
This is especially useful for renters and budget projects. You can preview container borders, freestanding trellises, gravel over a removable grid, solar path lighting, or a bench-and-planter focal point before changing anything permanent. The point is not to create a fantasy garden; it is to make the next real purchase less random.
How should you phase a garden redesign without wasting money?
Phase the garden from structure to softness. The order matters because the most expensive mistakes happen when plants go in before paths, drainage, bed lines, or seating locations are settled. If water pools near the house, fix grading before adding mulch. If the only route to the shed cuts across wet lawn, place the path before planting the border it will eventually cross.
Start with the layout: main path, bed edges, focal point, and open area. A garden does not need a large lawn, but it does need some negative space, whether that is turf, gravel, paving, or a simple groundcover panel. Keep dining chairs on a stable surface with 30 to 36 inches behind them for pullout room, and avoid placing prickly or brittle plants where people brush past daily.
Next, install the backbone plants. These are the shrubs, small trees, climbers, and evergreen masses that give the garden shape in quiet months. Choose mature sizes honestly; a shrub that wants to be 5 feet wide should not be planted 18 inches from a path unless constant clipping is part of the plan.
After that, add the seasonal layer. Perennials, bulbs, annuals in pots, herbs, and small decorative moments are easier to change once the garden bones are right. Use mulch 2 to 3 inches deep on planted beds, keep it pulled away from trunks and crowns, and water new planting deeply while roots establish. A garden feels finished when the lines are clear, the plants have room to grow, and every focal point has earned its place.
Frequently Asked Questions
What are the basic principles of garden design?
Structure, repetition, focal point, scale, and sequence: the structure holds the garden in winter; repetition creates visual rhythm; a focal point gives the eye a destination; scale matches plant size to space; sequence controls what you see as you move through the garden. Use the outdoor photo to compare the visible layout and fixed constraints before committing, because slope, shade, drainage, doors, utilities, and traffic paths decide whether the idea survives daily use.
How do I design a garden with year-round interest?
Assign every season at least one 'moment': spring bulbs and blossom trees, summer perennial peak, autumn grasses and seed heads left standing, and winter evergreen structure and bark interest — four distinct moments create a garden that is never fully dormant. Keep the preview honest by leaving the problem area visible in the frame, then compare one conservative version against one bolder version before you buy plants, materials, or furniture.
What is the first step in designing a garden from scratch?
Map the existing sun, soil, drainage, and view conditions before choosing any plant or hard landscaping; 80% of garden problems originate from planting the wrong plant for the existing conditions rather than from design errors. Check the result against ordinary movement first: chair pullout, walkway width, gate swing, glare, storage reach, and evening light matter more than a perfect catalog angle.
How do I make a small garden look bigger?
Use a single diagonal path that crosses the longest axis, mirror the boundary planting on all four sides so no wall reads as a terminus, and avoid the visual clutter of more than 5-7 distinct plant species — repetition reads spacious, variety reads cramped. Use the image to narrow priorities and measurements before ordering anything custom; final purchases still need real dimensions, code checks, utility locations, and product clearances.
How do I choose a garden style?
Match the garden style to the house architecture (formal house-formal garden, contemporary house-contemporary garden) and your maintenance budget (formal gardens require twice the maintenance hours of informal naturalistic styles); mismatches between house and garden style are the most common design error. If the preview invents architecture or hides the awkward feature you need solved, rerun it with stricter instructions so the result remains tied to your actual outdoor space.
Three transformations to try
- Mixed border with structure and seasonal interest
- Formal garden with hedged rooms and central path
- Naturalistic garden with grass and wildflower layers