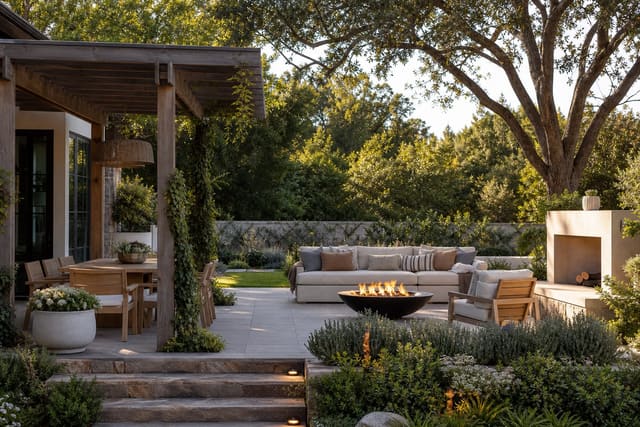
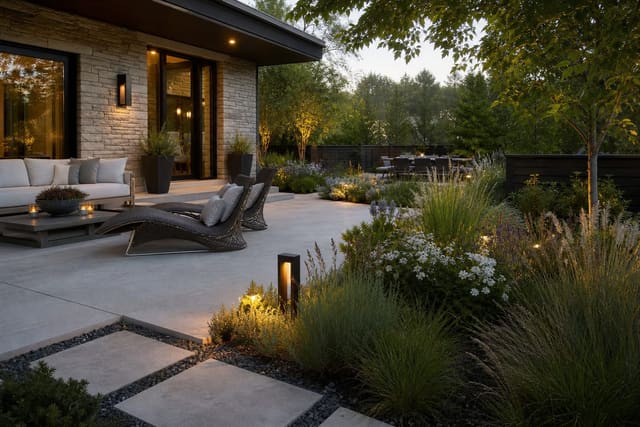
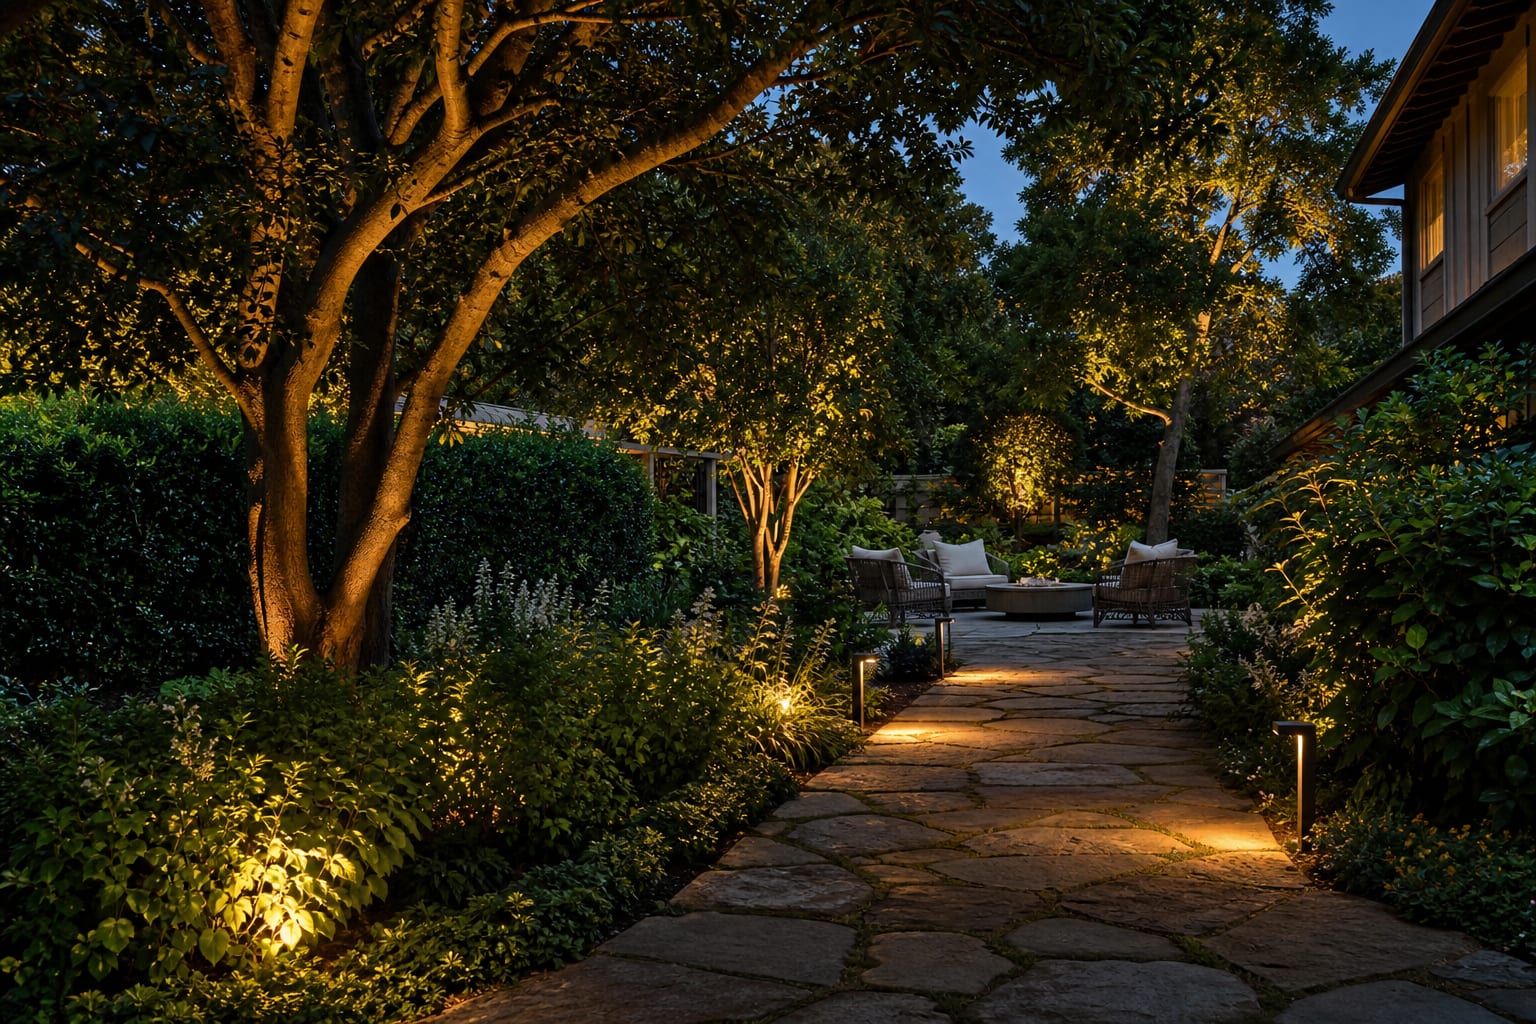
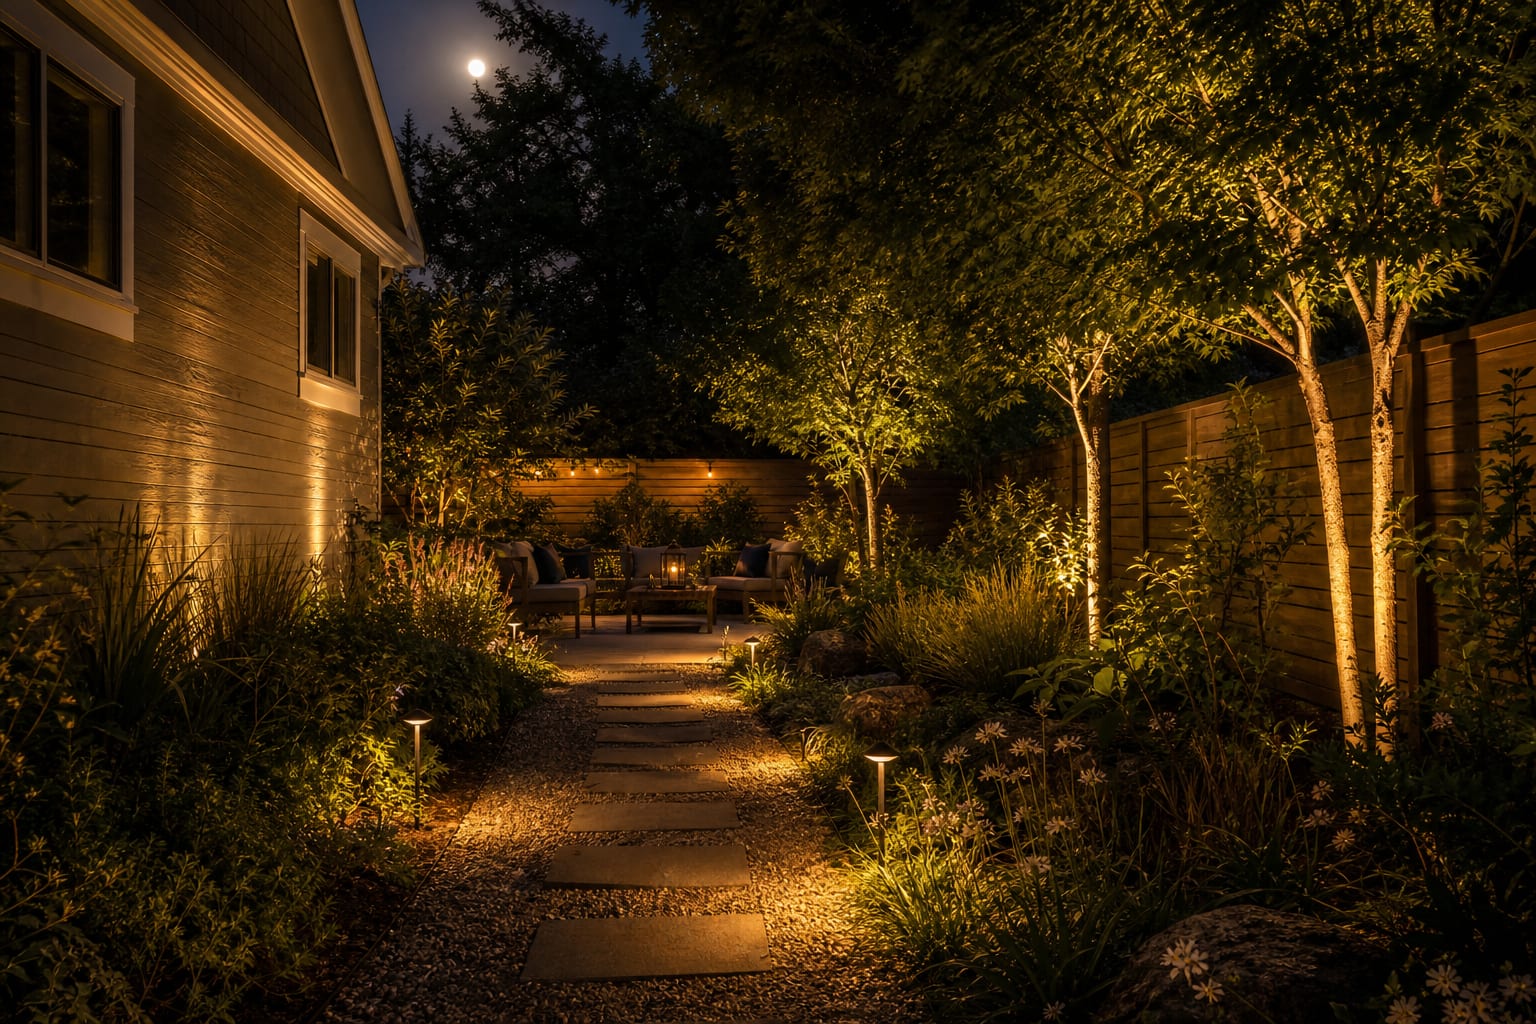
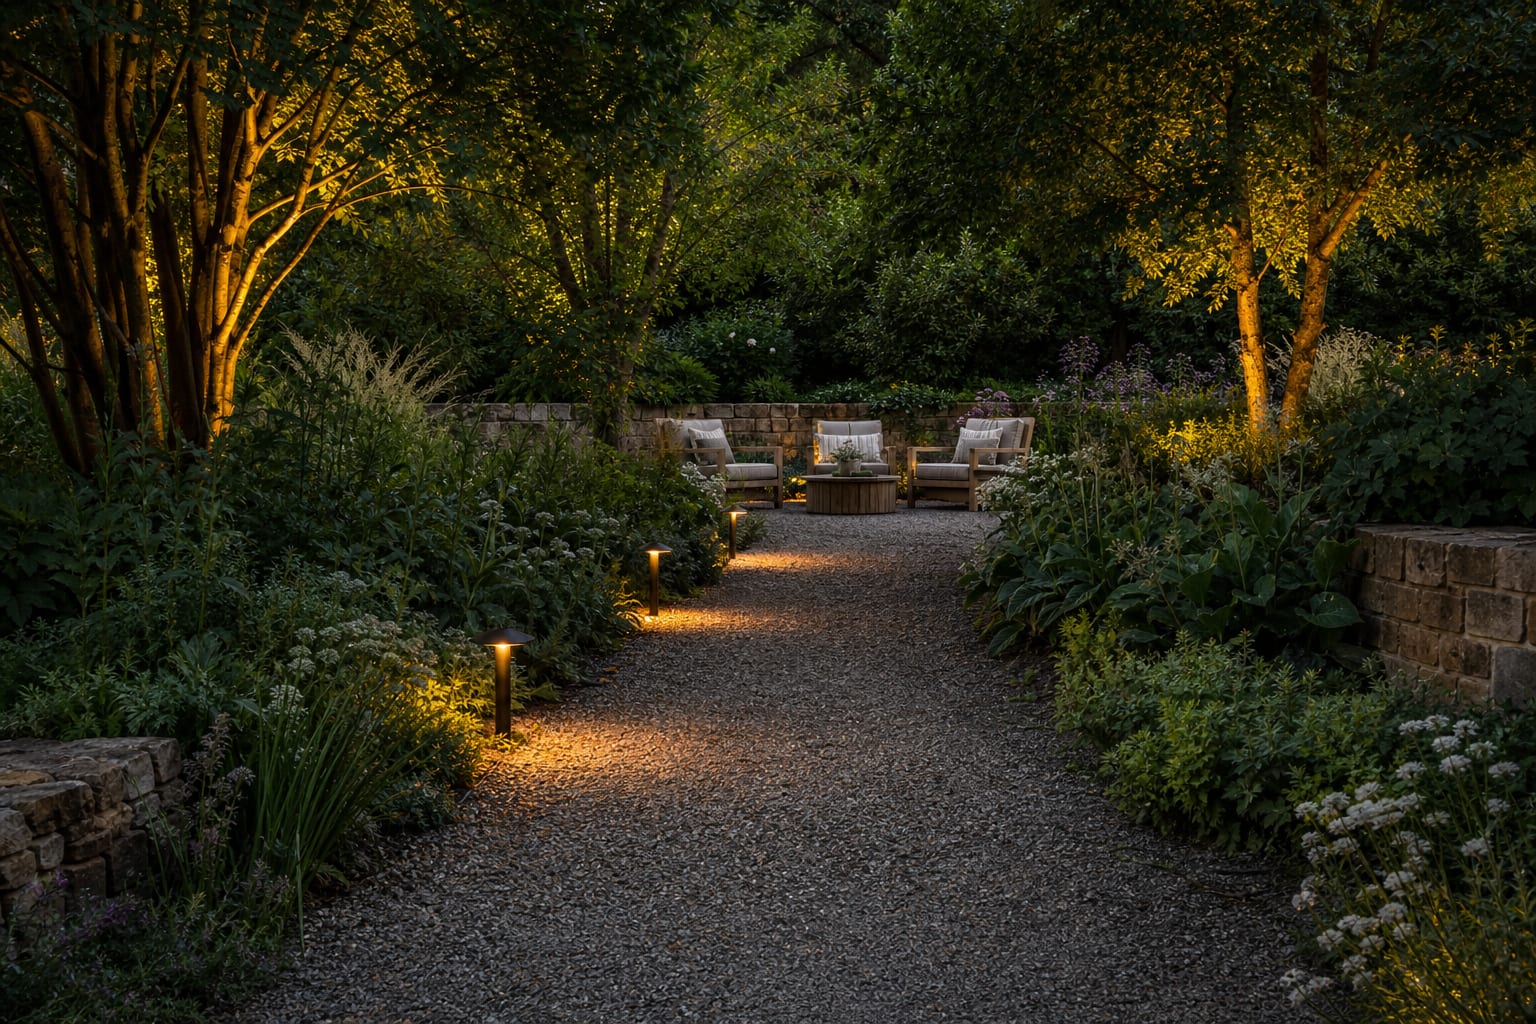
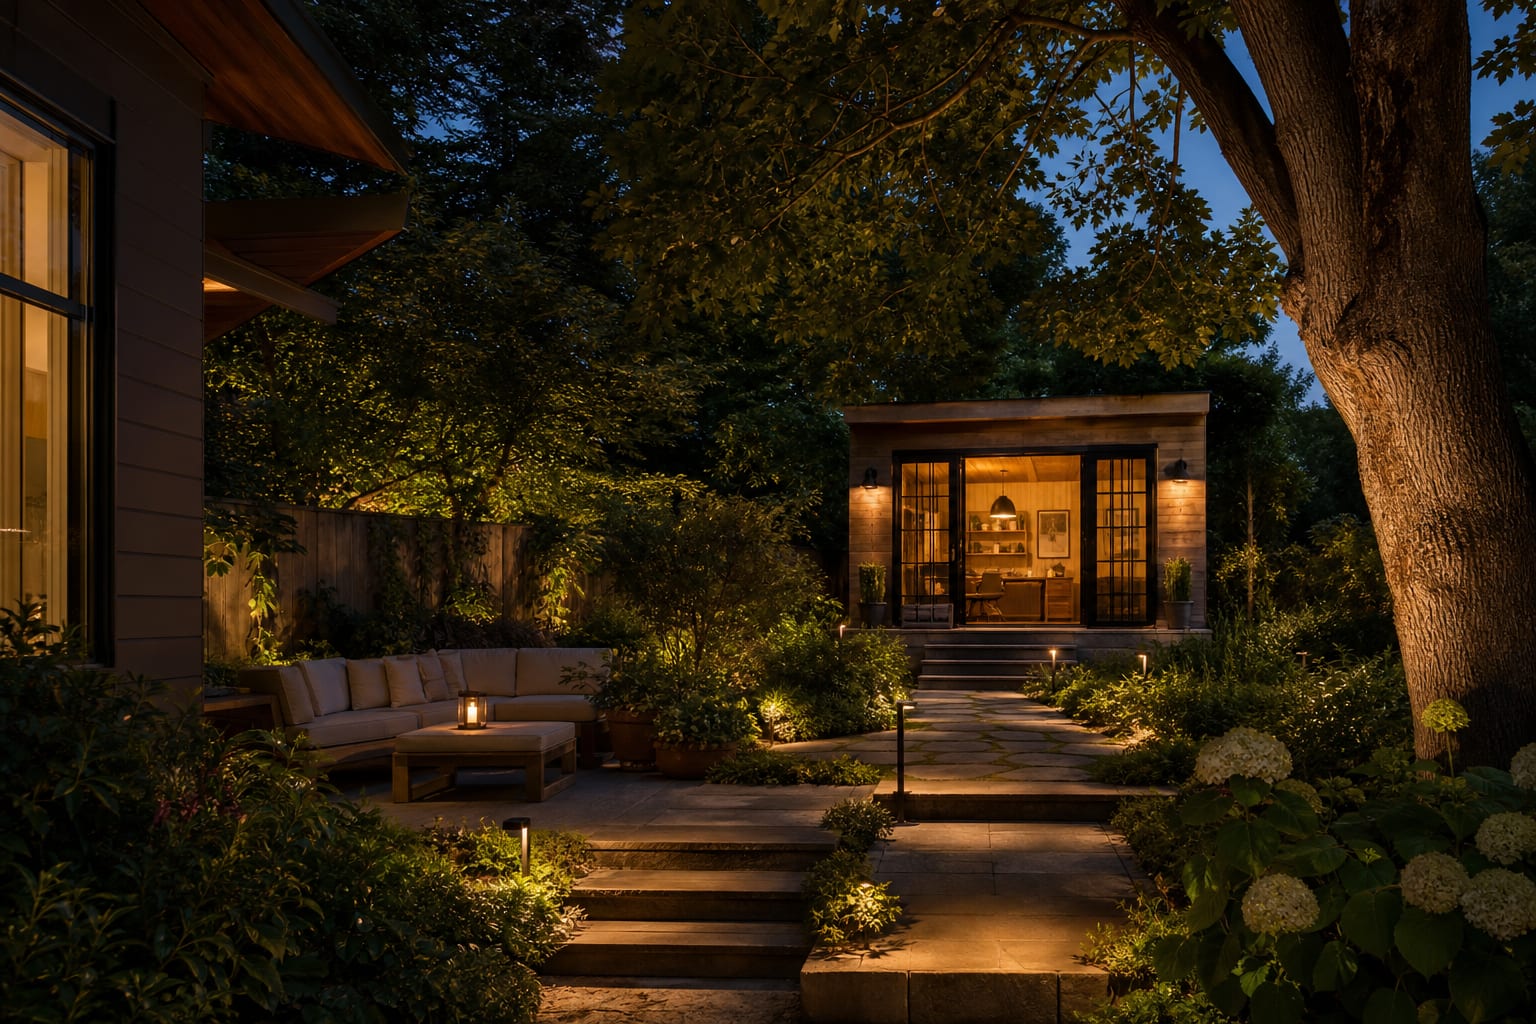
A garden lighting plan layers three intensities — task lights at 2700K on paths and steps for safety, accent lights uplighting trees and feature walls at 3000K, and moonlight downlights mounted high in trees casting a cool 2900K dappled wash — all on dimmers and a single astronomical timer. A garden that disappears at night is not romantic; it is unfinished. Strong opinion: most residential garden lighting design fails because homeowners buy too many bright fixtures and not enough darkness. The goal is not to flood the beds so every leaf performs after sunset. The goal is to make paths safe, trees sculptural, seating inviting, and the best parts of the garden visible without turning the yard into a hotel driveway.
How do I light a garden professionally?
To light a garden professionally, build the plan in layers: use low path lights for circulation, narrow uplights for trees, shielded accents for planting, and warm 2700K to 3000K lamps so the garden reads softly at night. Start with the routes people actually use: the back door to the dining area, the gate to the trash enclosure, the stepping stones to the shed, and the path around raised beds. Those routes need enough light to show edges and level changes, not a runway of identical dots.
The second layer is vertical structure. One well-aimed uplight on a multi-stem tree usually looks better than five fixtures scattered through mulch. Place the fixture 12 to 24 inches from the trunk for bark texture, or 3 to 6 feet away for a wider canopy wash, depending on tree size. Mature olives, Japanese maples, birches, and crape myrtles can take narrow beams; loose shrubs and grasses usually need softer grazing from the side.
The third layer is restraint. Leave some planting in shadow so the lit elements have contrast. If every bed edge glows, the garden becomes flat. This is where planting design matters as much as electrical work: layered grasses, evergreen mounds, and late-season seed heads catch light beautifully, especially if your daytime scheme already follows naturalistic planting design ideas rather than isolated specimen shrubs.
Test this on your own photo with ReDesign before you choose the final outdoor direction; keep the house edge, horizon line, hardscape, planting beds, and main path visible so the preview solves the space you actually have.
Which landscape lighting techniques belong where?
Landscape lighting techniques work best when each fixture has a job that can be described in one sentence. If you cannot say what a light is doing, it probably does not belong in the garden. A professional plan often uses fewer fixtures than a DIY kit, but the placement is more deliberate.
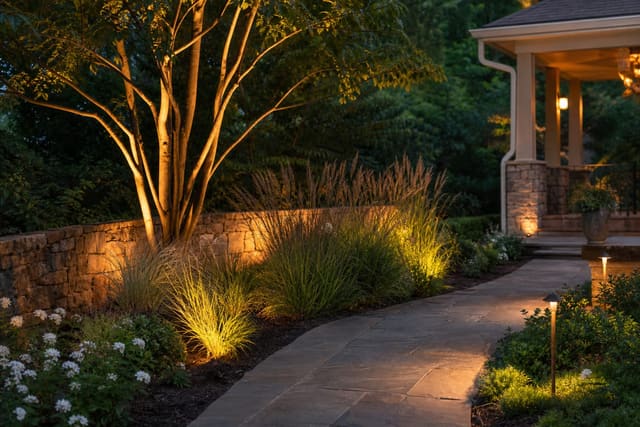
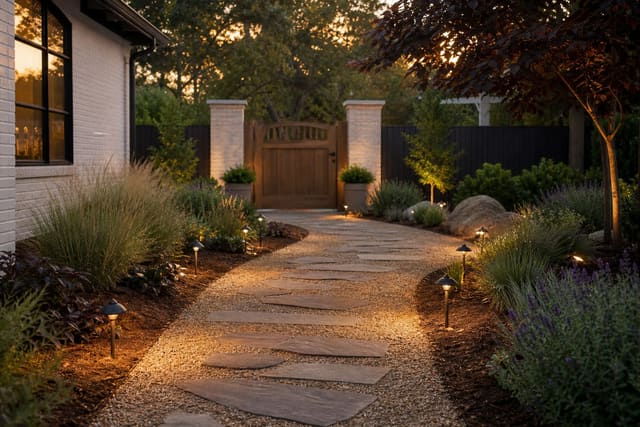
| Technique | Best use | Spec to start with | |---|---|---| | Path lighting | Steps, gravel walks, gate routes, bed edges | Low fixtures 18 to 24 inches tall, spaced roughly 6 to 10 feet apart | | Uplighting | Trees, stone walls, pergola posts, sculptural shrubs | Place 12 inches to 6 feet from the subject, then adjust beam spread after dark | | Moonlighting | Branching trees above seating or paths | Mount shielded fixtures 15 to 25 feet high and aim downward through foliage | | Grazing | Textured masonry, fences, tall grasses, clipped hedges | Set fixtures close to the surface so texture casts small shadows | | Silhouetting | Plants with strong outlines against walls or fences | Hide the light behind the plant and wash the background, not the leaves | - Use path lights only where feet need help. A 36 inch wide stepping-stone route does not need a fixture at every stone; staggered lights on alternating sides keep the path visible while avoiding the airport-runway effect. - Choose uplights for trees with trunks worth seeing. To uplight trees garden beds successfully, aim across the trunk rather than straight at the canopy, because bark, branching, and shadow make the tree feel dimensional. - Try moonlighting only when the tree can hide the hardware. The fixture should sit above eye level, usually 15 feet or higher, with a glare shield so the light filters through leaves instead of shining into faces. - Light seating from the edges, not the center. A bench, fire pit chair, or small dining table usually feels better with a shielded downlight, lantern, or nearby planting accent than with a bright fixture aimed at the middle of the conversation. - Treat working garden zones differently from show zones. Compost, potting, and tool areas need clear, honest light, and the same planning that makes compost garden ideas that look intentional work in daylight helps you hide utility lighting from the patio view.
Controls matter as much as fixtures. A small low-voltage transformer sized for the total wattage, plus a little future capacity, is cleaner than a tangle of plug-in lights. Put the transformer where it can be reached without crushing plants, and run cable along bed backs or hardscape edges before mulch hides the route. If the garden has irrigation, drainage lines, or buried utilities, confirm those before trenching; beautiful lighting is not worth cutting a pipe.
Common garden lighting mistakes
The most common garden lighting mistake is using brightness to solve uncertainty. A fixture that is too bright creates glare, flattens planting, and makes the unlit areas feel even darker. Start lower than you think, use shielded fixtures, and test at night before committing to final aiming.
Another mistake is lining both sides of a path with matching lights. Symmetry can work on a formal entry walk, but in most gardens it feels stiff. Stagger fixtures, let planting interrupt the rhythm, and place light where grade changes, turns, or destination points actually need emphasis.
Putting spotlights at the base of every tree is also a fast way to make the yard look busy. Choose the best two or three trees from the main viewing areas, then let lesser shrubs sit in shadow. A small garden may need one canopy lit well, one wall grazed lightly, and one path marked clearly; more fixtures can make the space feel smaller.
Ignoring glare from inside the house is the mistake people notice too late. Stand at the kitchen sink, the sofa, and the bedroom window after dark, then look for visible bulbs. If you can see the lamp source rather than the effect, add a hood, change the angle, lower the output, or move the fixture behind planting.
Solar stakes are not always wrong, but they rarely solve a serious garden lighting plan. They can mark a temporary route or brighten a rental border without wiring, yet inconsistent output and cool color often make them feel scattered. For a long-term garden, low-voltage wired fixtures with replaceable lamps or integrated warm LEDs usually give better control.
The last mistake is forgetting plant growth. A fixture placed 8 inches from a young grass may vanish by midsummer, while a shrub that was open in April can block a beam in August. Leave service gaps, keep cables out of root-pruning zones, and revisit aiming twice a year: once after spring growth and once after leaf drop.
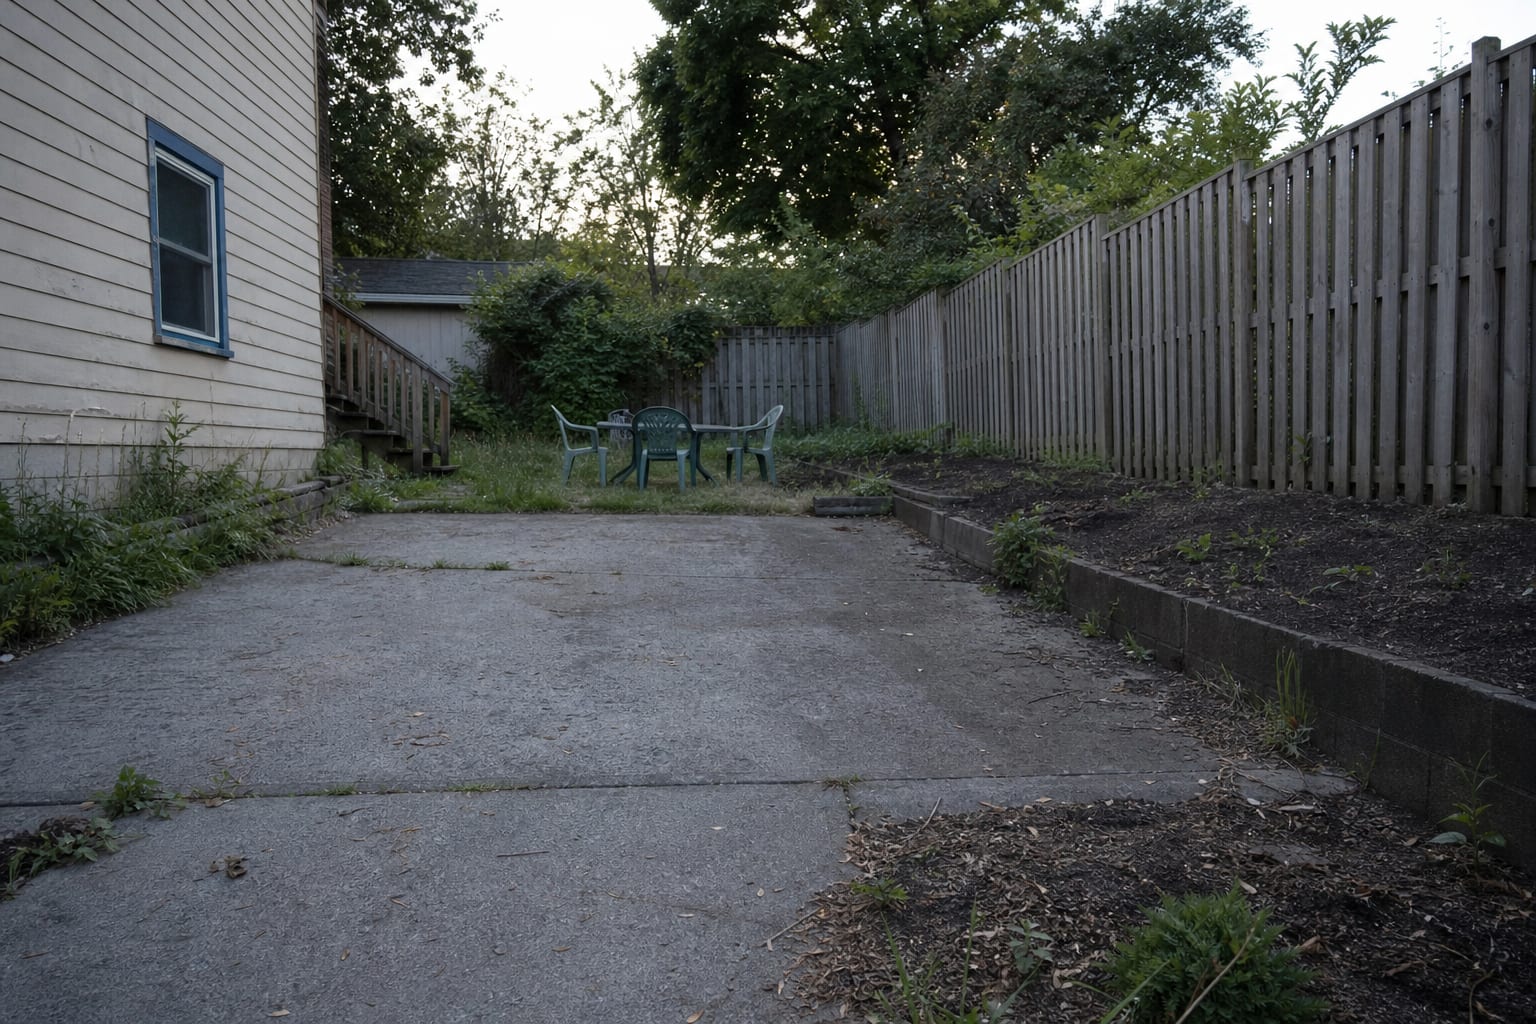
Use AI design to preview your garden lighting before you commit
AI design is useful for garden lighting because night choices are hard to imagine from a daytime plant bed. Upload a clear photo of the garden from the patio, back door, or main window, then preview several lighting directions before buying fixtures or trenching cable. Keep the prompt specific: warm path lights along the gravel walk, narrow uplights on the birch trunks, soft moonlighting from the oak, and no bright floodlight on the fence.
The preview should answer visual questions, not replace the electrician or landscape lighting installer. Use it to compare a tree-focused scheme against a path-focused scheme, or to see whether the seating area needs a lantern, a wall sconce, or a hidden downlight. For gardens with a studio, greenhouse, or work shed, include that building in the photo; the same sightline discipline used in backyard office shed ideas helps the lighting make an outbuilding feel connected rather than stranded in darkness.
Take one image at dusk and one in daylight if possible. The dusk photo helps the AI understand shadow and existing house light, while the daylight photo shows plant structure, path edges, and fixture locations. Ask for fewer lights than you think you need, then add one layer at a time. If a preview looks harsh on screen, it will look harsher when a real lamp is pointed at wet leaves, pale paving, or a white fence.
Frequently Asked Questions
What\'s the difference between path lighting and accent lighting?
Path lights deliver safe circulation at 2700K shielded fixtures 12-18in tall; accent lights highlight trees, walls, or sculpture with directional spots aimed at the feature, not the viewer. Use the outdoor photo to compare the visible layout and fixed constraints before committing, because slope, shade, drainage, doors, utilities, and traffic paths decide whether the idea survives daily use.
What\'s moonlighting in garden design?
A high-mounted downlight (15-25ft up in a tree) that casts a soft dappled pattern through branches onto the ground, mimicking moonlight; it\'s the single most romantic technique in landscape lighting. Keep the preview honest by leaving the problem area visible in the frame, then compare one conservative version against one bolder version before you buy plants, materials, or furniture.
How many lighting layers does a garden need?
Three — safety (paths and steps), accent (trees, walls, sculpture), and ambient (moonlighting, downlit dining, perimeter glow) — each on a separate dimmer so the layers can be combined for different moods. Check the result against ordinary movement first: chair pullout, walkway width, gate swing, glare, storage reach, and evening light matter more than a perfect catalog angle.
Are LED lights bright enough for a garden?
Yes — modern landscape LEDs from 4-15W replace the legacy 20-50W halogen fixtures one-for-one, draw less wire and transformer capacity, and last 25,000+ hours. Use the image to narrow priorities and measurements before ordering anything custom; final purchases still need real dimensions, code checks, utility locations, and product clearances.
How is garden lighting controlled?
An astronomical timer or smart relay that triggers at sunset and shuts off at a fixed hour (commonly 11pm-1am); manual switches at the patio door extend or end the evening as needed. If the preview invents architecture or hides the awkward feature you need solved, rerun it with stricter instructions so the result remains tied to your actual outdoor space.
Three transformations to try