An outdoor kitchen works when the grill, prep counter, and storage form a tight three-station work triangle inside a 10-14ft footprint, with a 24-36in prep zone on each side of the grill, a 30-36in landing zone at the door of any refrigerator, and a bar counter or dining table within 6-8ft so the cook stays in the conversation. An outdoor kitchen that makes you pivot, dodge chairs, and carry hot food across a patio is not a luxury; it is an expensive obstacle course. My strongest opinion: the grill should not automatically be the star of the layout. The best outdoor kitchens are planned around movement first, then appliances, then the pretty finishes. Get the station order right and even a modest patio kitchen starts cooking like it was designed on purpose.
What is the best outdoor kitchen layout for real cooking?
The best outdoor kitchen layout is a compact station plan where the grill, prep counter, sink or cooler, and serving surface form a short work triangle with 42" to 48" aisles and landing space on both sides of the hot zone. That answer sounds practical because outdoor cooking is practical: hands are wet, trays are heavy, kids cut through the patio, and nobody wants to turn dinner into a relay race.
Think in stations, not in a row of appliances. A grill needs a landing surface of at least 24" on one side and ideally 36" on the other, because platters, tongs, thermometer probes, foil, and cooked food all need a safe place to land. A sink or beverage cooler works best within a few steps of prep, not stranded at the far end like a showroom feature. Trash should sit near prep and serving, because outdoor kitchens generate packaging, skewers, paper towels, citrus peels, and ice bags faster than people expect.
The patio matters as much as the cabinet run. Keep the active cooking aisle out of the main route from house to table, especially if the outdoor kitchen sits between the back door and a lawn. When the kitchen connects to planting or turf, a clean threshold helps; these patio to lawn transition ideas are useful when the cooking zone needs to feel finished instead of dropped onto the edge of grass.
Use this compact station pass before choosing finishes: - Hold 42" to 48" aisles where guests pass behind the cook. - Keep at least 24" of landing counter beside the grill, with 36" better on the main prep side. - Separate bar stools from the hot zone so knees and serving trays do not share the same 18" edge.
Which stations belong in the work triangle?
A smart outdoor kitchen station design starts with the tasks that happen every time: prep, cook, serve, clean, and store. Skip one of those jobs and the missing station will appear anyway as a messy side table, a cooler in the walkway, or a pile of dirty platters on the dining table.
- Put prep beside the grill, because raw food should move to heat without crossing the guest path. A 30" to 42" prep counter is enough for a cutting board, platter, and seasoning tray, while a tiny 12" ledge becomes decorative almost immediately.
- Place cold storage near the entry side, because drinks and condiments are used by people who are not cooking. A beverage fridge, ice drawer, or lidded cooler should be reachable without forcing guests behind the grill master.
- Give cleaning a narrow but deliberate home, because outdoor sinks and trash pull work away from the indoor kitchen. If plumbing is unrealistic, plan a trash pull-out and a 24" landing zone for a bus tub so dirty tools do not colonize the serving counter.
- Keep serving on the social side, because cooked food should move out of the hot zone quickly. A bar ledge 12" to 15" deep can hold plates and drinks, but a buffet counter wants closer to 18" to 24" of depth.
Shade is part of the station plan, not a decorative bonus. A west-facing grill can be miserable at 5 p.m., and a black countertop in full sun can become unpleasant to touch. If the kitchen needs to work beyond one season, borrow ideas from four-season outdoor space planning: overhead cover, wind protection, task lighting, and storage do more for comfort than another appliance.
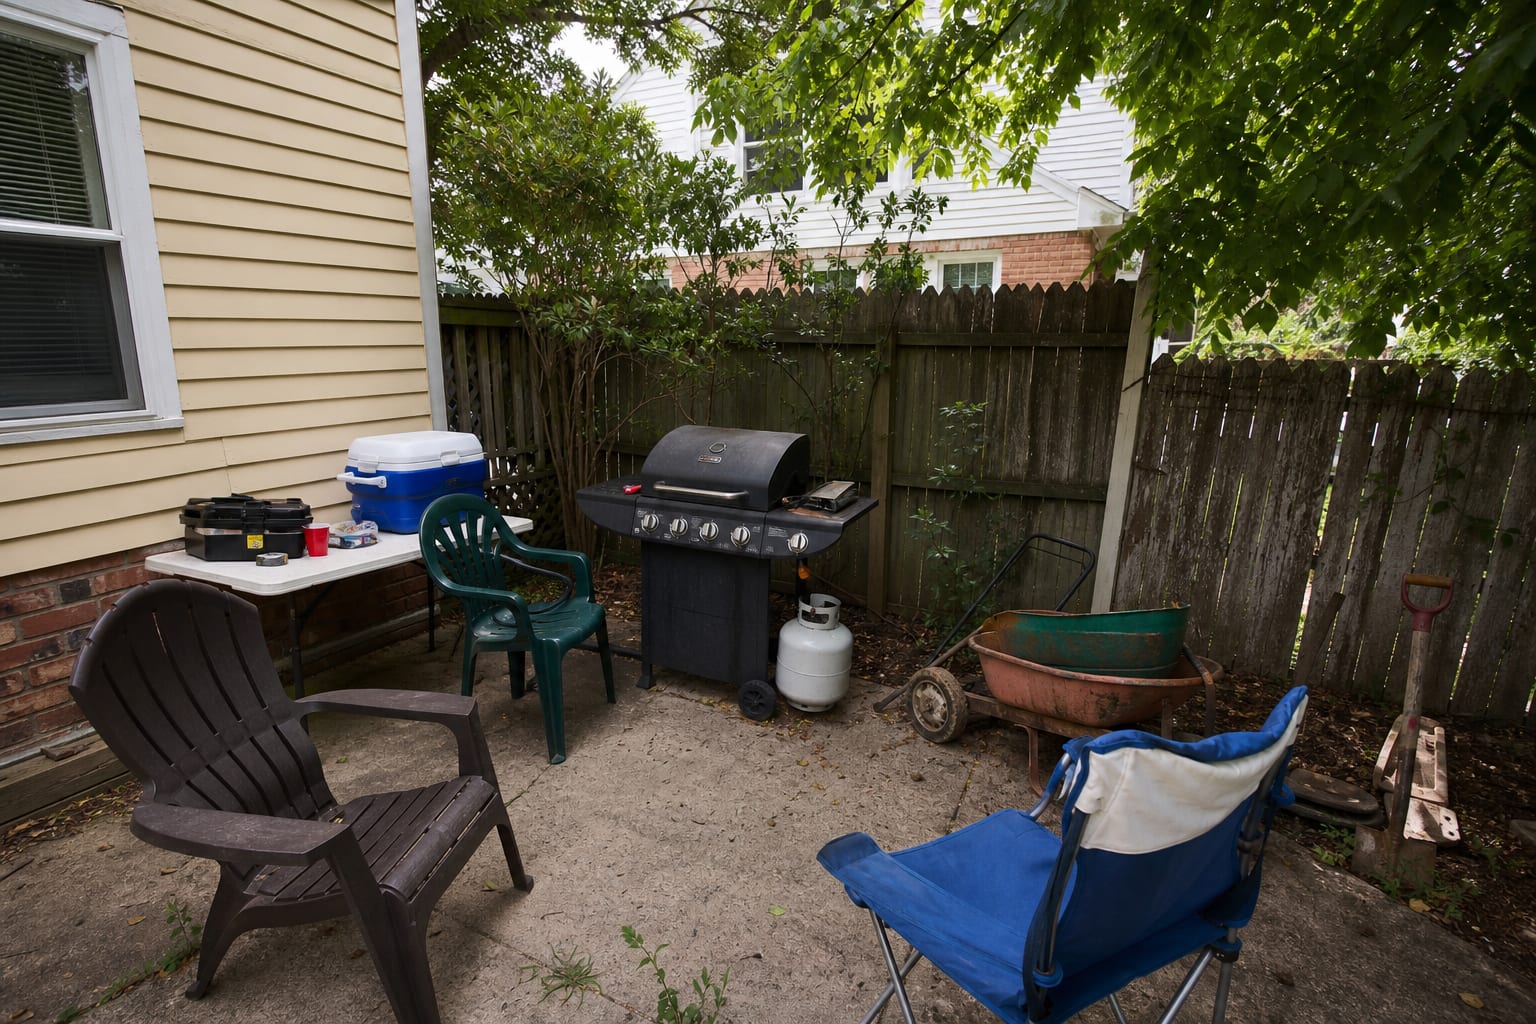
Test this on your own photo with ReDesign before you choose the final outdoor direction; keep the house edge, horizon line, hardscape, planting beds, and main path visible so the preview solves the space you actually have.
How do straight, L-shaped, and U-shaped outdoor kitchens compare?
The right shape is the one that preserves circulation after the doors open, the stools pull out, and someone stands at the grill with a tray. Outdoor kitchens fail when the footprint is designed as a cabinet diagram instead of a patio behavior plan.
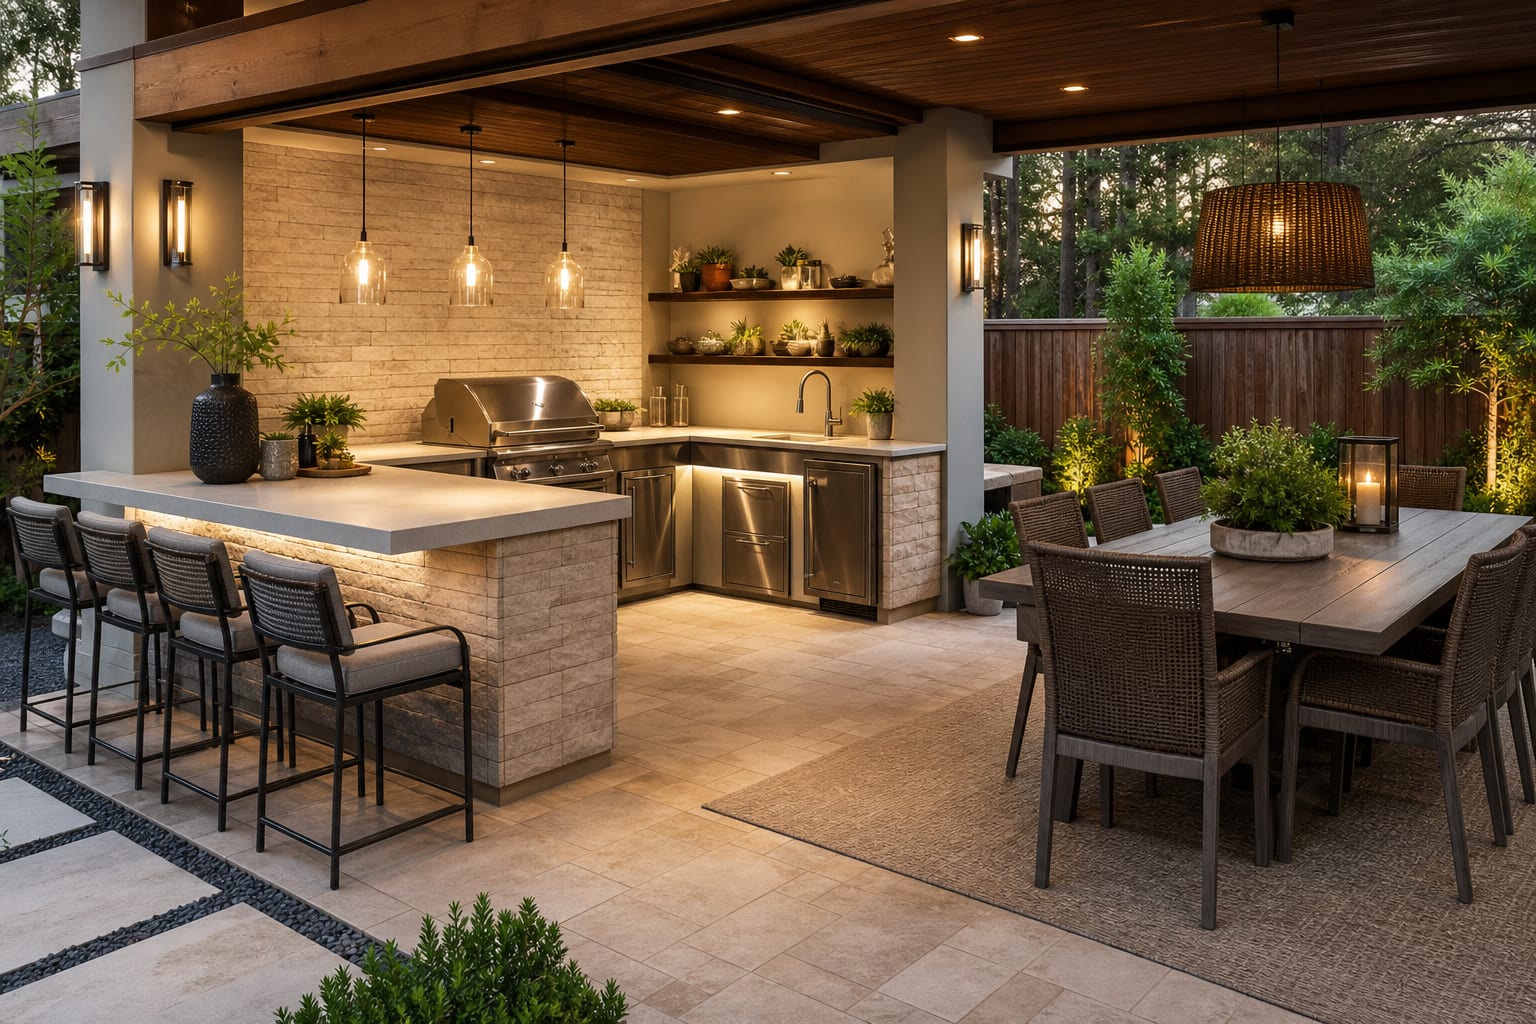
| Layout choice | Best fit | Spec that keeps it workable | | --- | --- | --- | | Straight run | Narrow patios, decks, side yards, and small balconies with one clear wall | Keep 48" clear in front when possible, because the cook and passing traffic share the same lane. | | L-shaped outdoor kitchen | Patio corners, pool edges, and spaces that need cooking plus serving | Put the grill on one leg and prep or serving on the other, with at least 42" inside the working corner. | | Galley layout | Covered patios with a wall run and an island or bar opposite it | Leave 48" between opposing counters so appliance doors and people do not collide. | | U-shaped layout | Large patios where the cook needs a protected command center | Use it only when the interior aisle can stay near 48" and exterior circulation still has a separate route. |
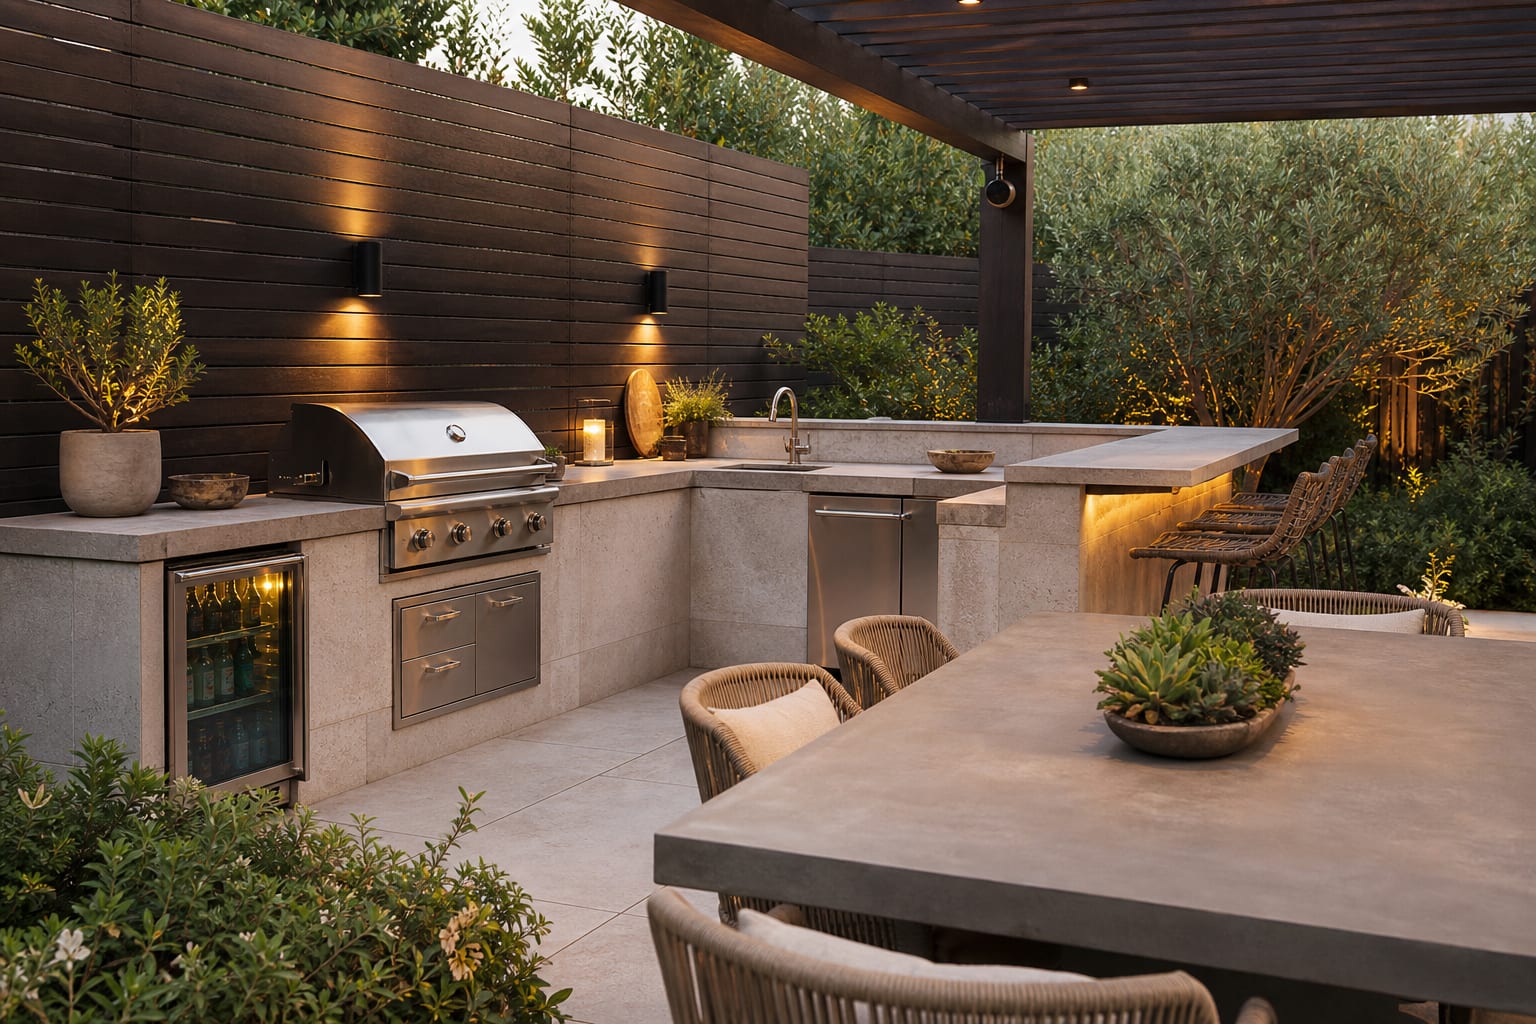
An L-shaped outdoor kitchen is often the safest upgrade for a real patio because it creates a natural corner without swallowing the whole outdoor room. Put the grill on the longer leg if smoke can vent away from seating, then use the shorter leg for serving or a sink. If bar stools sit at the outside of the L, allow 24" of width per stool and leave at least 36" behind the stools for people to pass.
A straight run can be excellent when the patio is slim. The trick is resisting the urge to include every appliance in one line. Grill, landing counter, trash, and a small fridge may beat grill, sink, pizza oven, side burner, drawers, and nowhere to put a platter.
Common outdoor kitchen layout mistakes
The most common mistake is centering the design on the largest appliance. A 42" built-in grill can look impressive, then steal the counter space that makes cooking comfortable. Choose the grill size after measuring the counter run, not before.
Another mistake is letting bar seating invade the work aisle. Stools need knee room, pull-back room, and a place for guests to stand, so a counter that looks generous in plan can become blocked during dinner. If the patio is less than 12' deep, prioritize a dining table or lounge nearby instead of forcing stools onto the cooking counter.
A third mistake is ignoring wind direction. Smoke, heat, and grease should move away from the main seating area and away from operable windows. If the only grill location sends smoke into the dining zone, shift seating, add a partial screen, or consider a different fuel setup before building masonry around the problem.
The fourth mistake is forgetting off-season storage. Cushions, covers, grill tools, propane tanks, and small appliances need a dry home, and exposed clutter makes even expensive stonework look temporary. Before specifying drawers everywhere, study winter patio storage ideas so the kitchen has a realistic place for covers, bins, and tools when the weather turns.
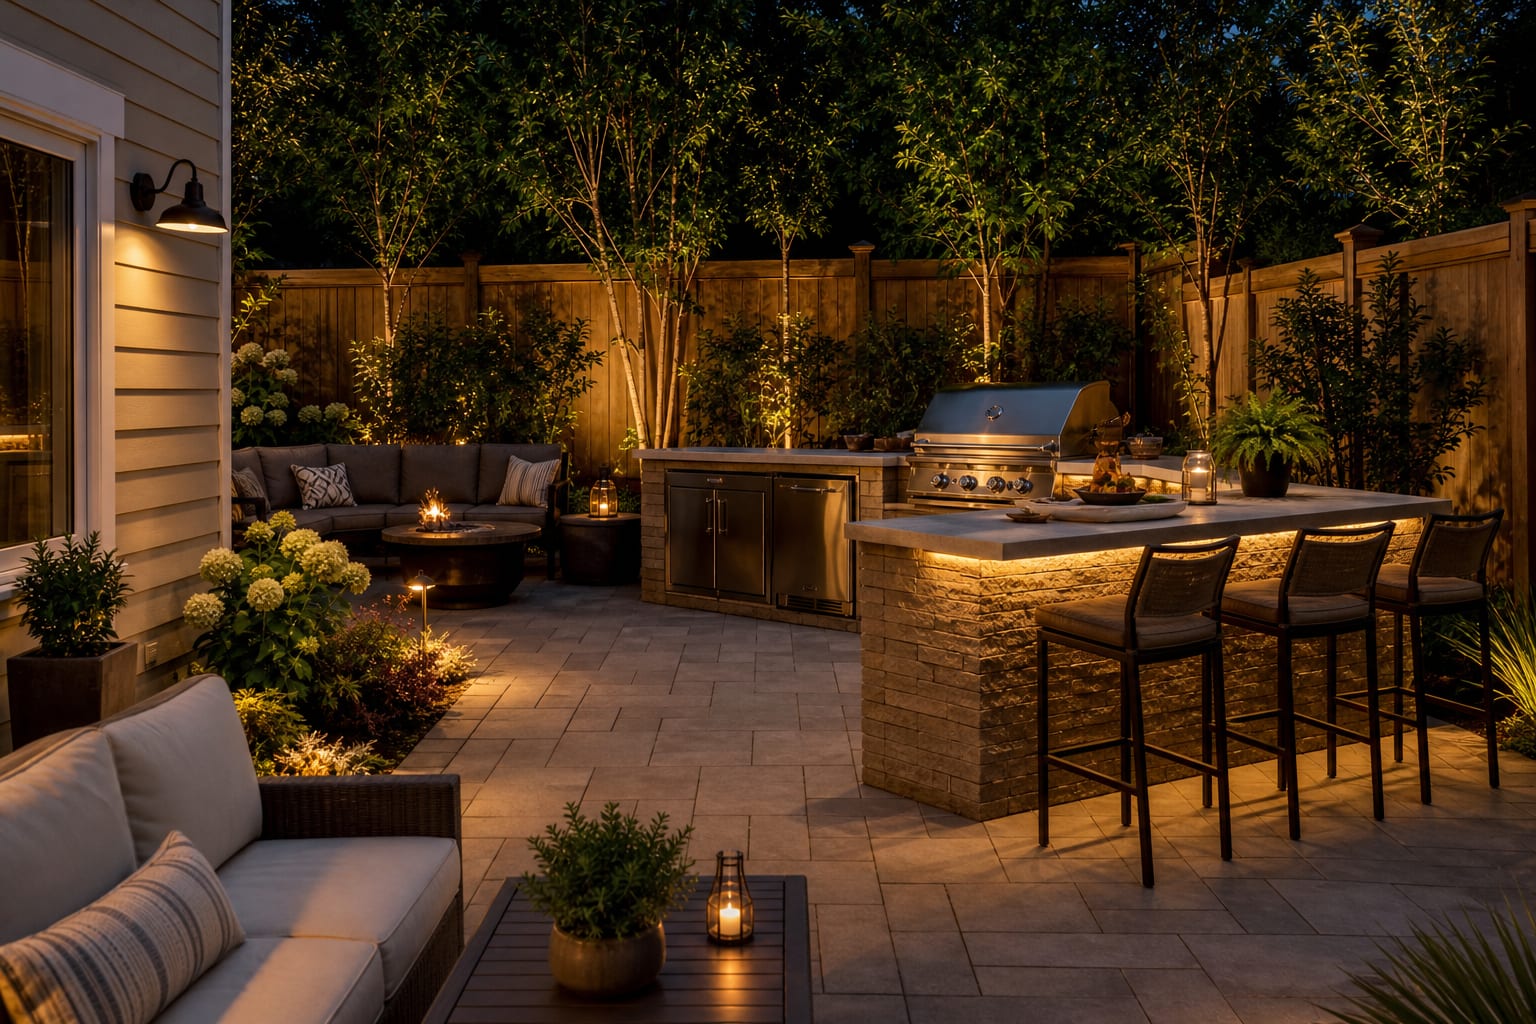
The fifth mistake is lighting only the dining table. The grill needs a focused task light, paths need low glare, and counters need enough visibility for knives and thermometers. Warm 2700K to 3000K outdoor-rated lighting usually feels better around food and faces than cold blue-white fixtures.
Use AI design to preview your outdoor kitchen before you commit
AI design is most helpful for outdoor kitchens when the layout is still flexible and the expensive decisions have not been poured, plumbed, or wired. Upload a straight photo from the patio door or the spot where guests enter, then test a straight run, an L-shaped outdoor kitchen, and a galley plan from the same camera angle.
Ask for versions that keep the grill landing zones visible, preserve a 42" aisle, and show the relationship between cooking, dining, shade, and lawn. The preview should not be judged by how glossy the countertop looks. Judge it by whether the cook can move, guests have somewhere to gather, and the patio still feels open after the kitchen arrives.
If one AI version makes the patio feel crowded, believe that warning. If another version shows a clearer path from house to table, better shade over the prep counter, and a serving edge that faces guests instead of a fence, that is the layout worth pricing with a contractor.
Frequently Asked Questions
What\'s the minimum size for an outdoor kitchen?
10ft of linear counter with a grill, 30-36in prep zone on each side, and a small fridge or cooler counts as a working outdoor kitchen; under 8ft it becomes a grill station. Use the outdoor photo to compare the visible layout and fixed constraints before committing, because slope, shade, drainage, doors, utilities, and traffic paths decide whether the idea survives daily use.
Straight, L-shaped, or U-shaped outdoor kitchen?
L-shaped delivers the strongest work triangle and a natural seating ledge; straight runs work on covered patios with limited depth; U-shaped suits larger footprints with three-cook setups. Keep the preview honest by leaving the problem area visible in the frame, then compare one conservative version against one bolder version before you buy plants, materials, or furniture.
How much landing space does the grill need?
24-36in of heat-tolerant counter on each side of the grill — granite, concrete, or stainless steel — never wood butting up against the grill. Check the result against ordinary movement first: chair pullout, walkway width, gate swing, glare, storage reach, and evening light matter more than a perfect catalog angle.
Where should the sink go in an outdoor kitchen?
Between the grill and the refrigerator if both are present; if only one accessory is included, place the sink farthest from the grill so cleanup doesn\'t collide with active cooking. Use the image to narrow priorities and measurements before ordering anything custom; final purchases still need real dimensions, code checks, utility locations, and product clearances.
Do outdoor kitchens need shelter?
Yes for serious use — a pergola, partial roof, or covered patio extends the season, protects appliances from rain, and keeps grills off the sun's UV damage; full sun grills last half as long. If the preview invents architecture or hides the awkward feature you need solved, rerun it with stricter instructions so the result remains tied to your actual outdoor space.
Three transformations to try