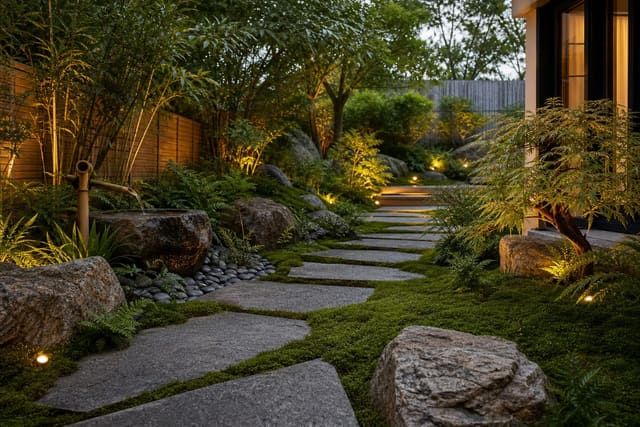
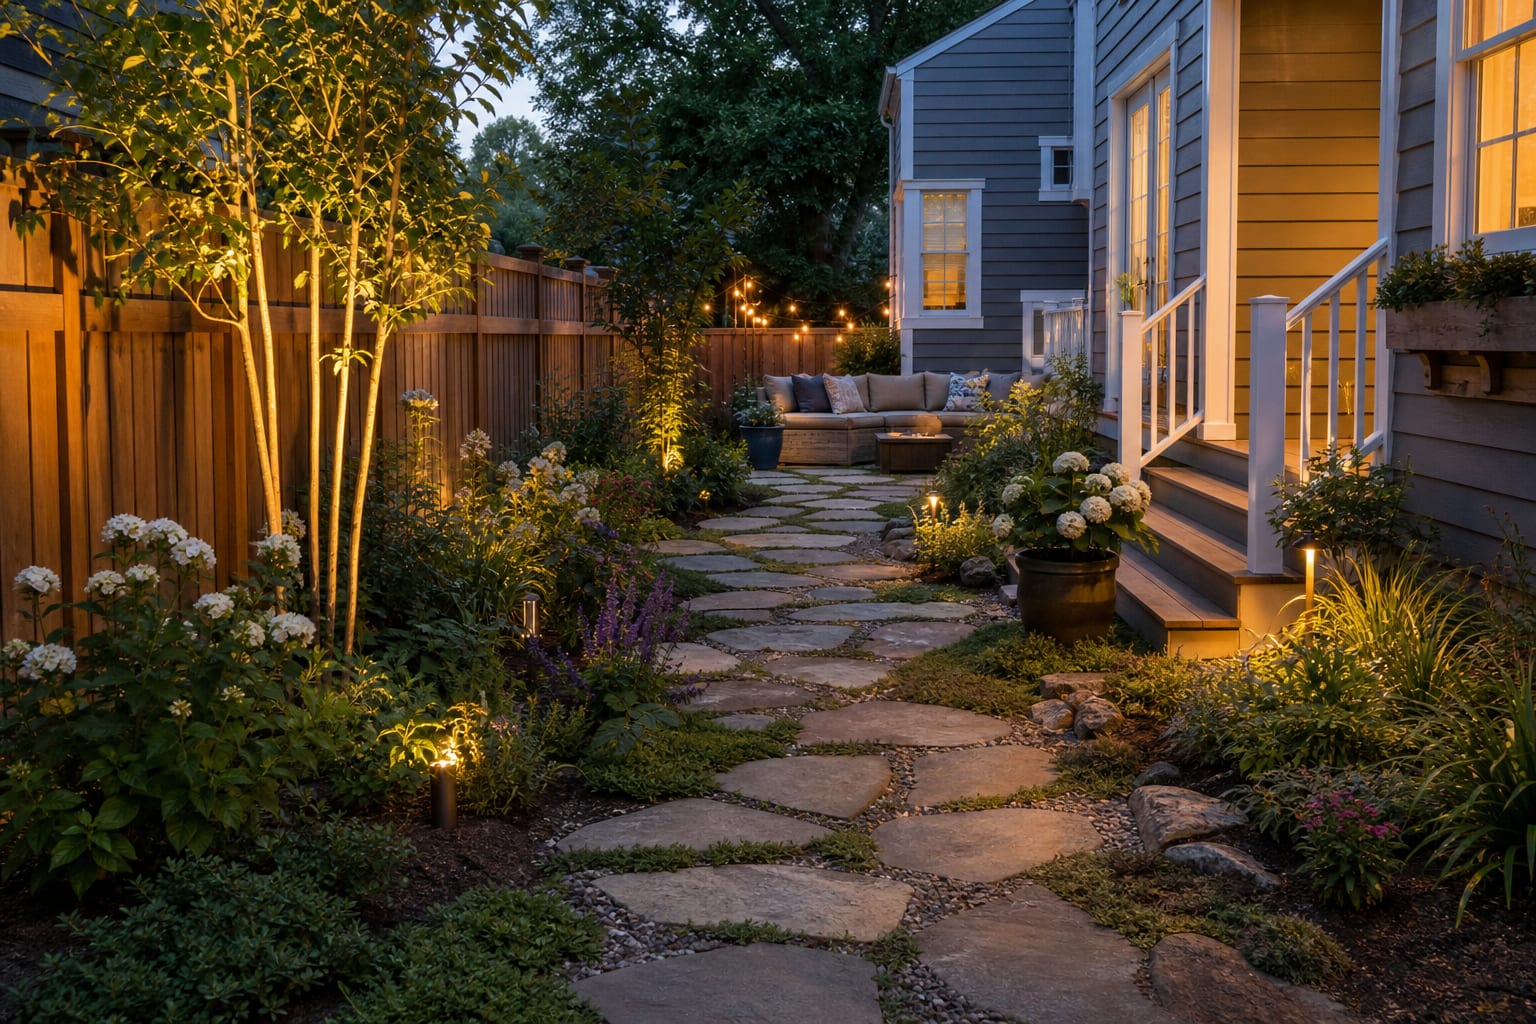
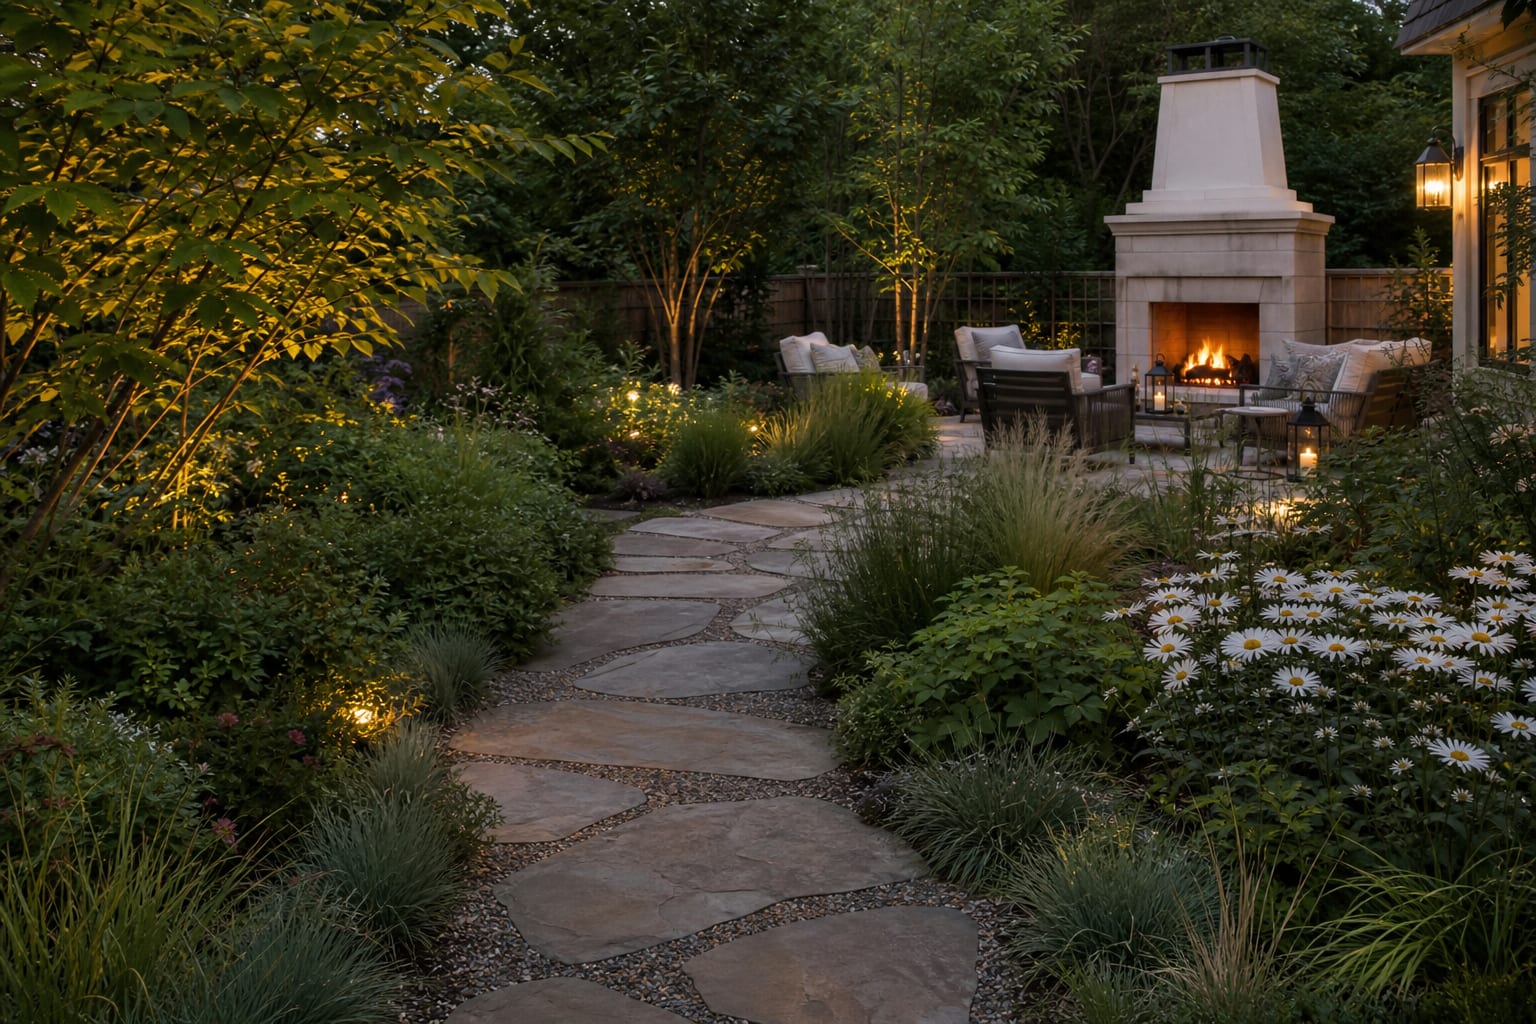
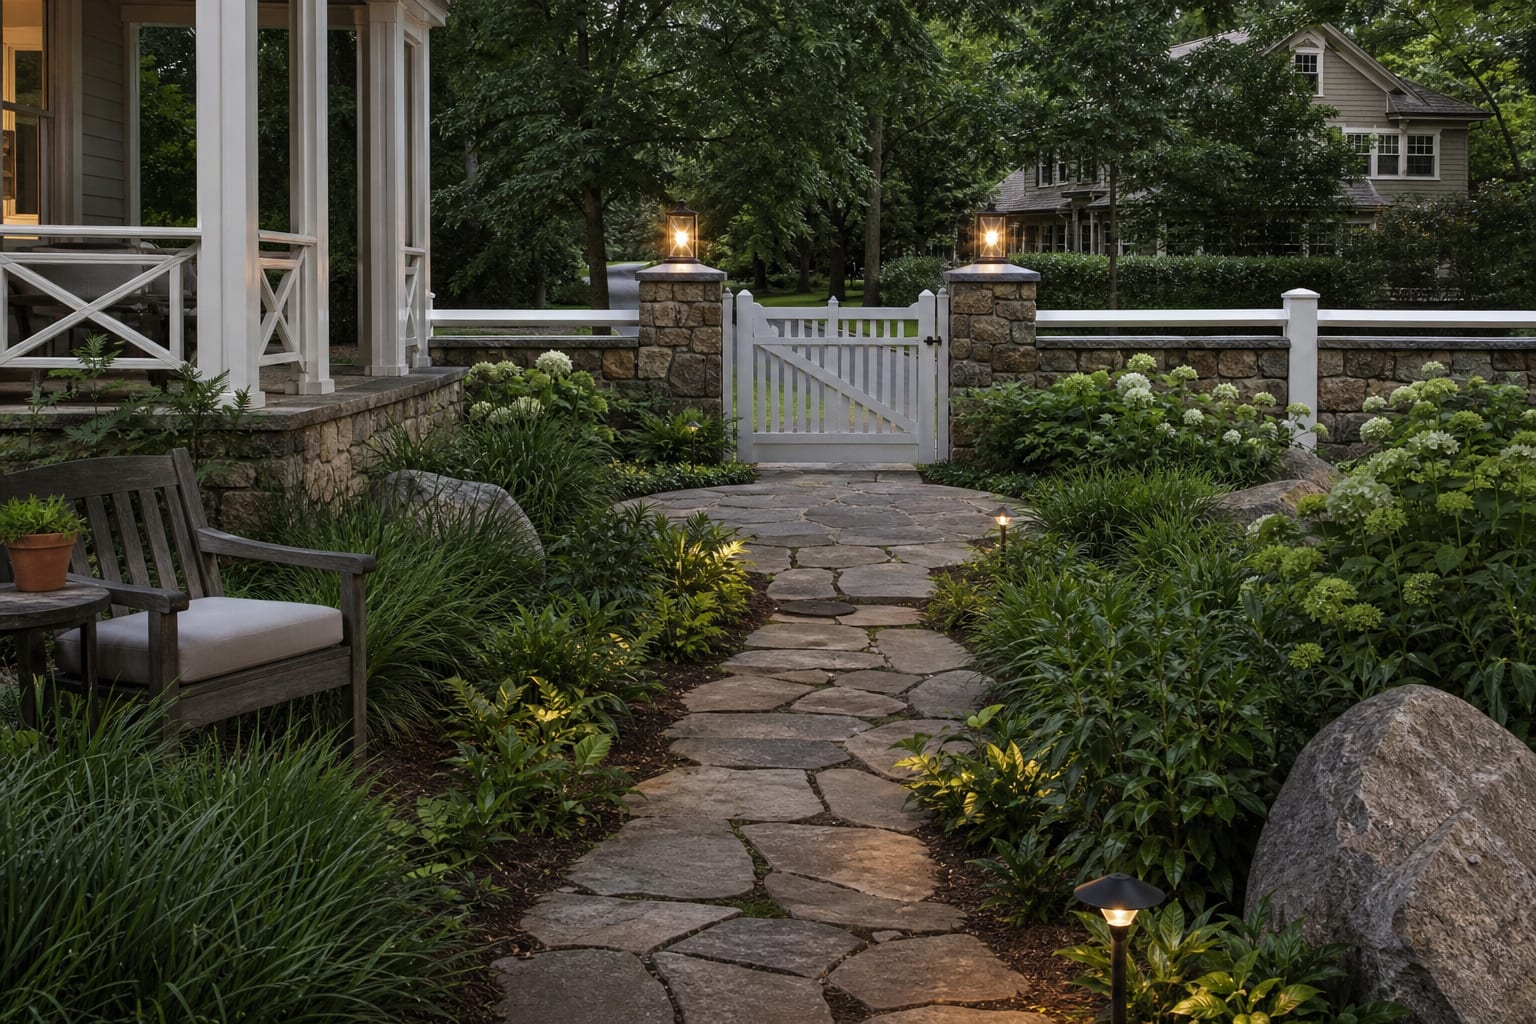
A flagstone path reads as designed when the stones are sized 16-24in across, set on a 4in compacted base with 1in of sand bedding, gapped 2-4in for stepping rhythm with planted joints, and routed in a gentle curve that follows where you actually walk. Flagstone path ideas go wrong when the stone is treated like tile. My firm opinion: a garden path should look found, not installed by someone chasing a perfect grid. The trick is not just choosing pretty slabs; it is getting the base, spacing, direction, and edge planting right enough that the path feels older than the house. Here is how to make a natural stone garden path feel settled without building a tripping hazard.
How do you lay a flagstone garden path?
Lay a flagstone garden path by excavating the route, compacting 4–6 inches of crushed stone base, adding 1–2 inches of bedding sand or screenings, setting 1.5–2 inch thick flagstone, and filling 2–3 inch joints with gravel, soil, or low groundcover. That order matters because flagstone is heavy but irregular; it needs a firm plane underneath, not blobs of mortar trying to correct every wobble.
Start with the route before you touch a shovel. A comfortable main garden path is usually 36–48 inches wide, while a secondary path can be 24–30 inches if it is meant for one person and a basket, not two people side by side. Lay out the curve with a hose, then walk it carrying a watering can or trash bin. If your hip clips a shrub or your foot cuts the corner, the path is too theatrical and not useful enough.
For a dry-laid flagstone walkway design, dig deep enough for the stone plus bedding plus base. In most gardens, that means roughly 7–10 inches below finished grade. Use compacted 3/4-inch minus crushed stone for the base, not round pea gravel, because angular material locks together and resists shifting. Add a slight crown or a 1/8 inch per foot pitch so water leaves the walking surface instead of sitting in the joints.
Field Checklist
- For flagstone path ideas, keep the main walking line through the garden at about 36 inches clear before adding decorative layers.
- Let flagstone path ideas start with 3 dominant finishes, then repeat the calmest one where the eye needs a pause.
- Use a flagstone path ideas spacing rule of roughly 24 inches between repeated accents so the design reads connected, not scattered.
Test this on your own photo with ReDesign before you choose the final outdoor direction; keep the house edge, horizon line, hardscape, planting beds, and main path visible so the preview solves the space you actually have.
What makes a natural stone garden path feel like it has always been there?
The most convincing natural stone garden path has imperfect stones set inside a very deliberate structure. That sounds contradictory, but it is the whole point. The surface should feel loose and garden-made; the route, grade, and joints should be controlled.
Choose flagstone with mixed shapes from the same stone family. Pennsylvania bluestone, sandstone, limestone, and slate can all work, but do not mix three colors unless the house already has that much variation. A simple range of gray-blue, buff, or warm tan gives the path depth without turning the garden into a sample board. If the house has red brick, warmer buff or gray-brown stone usually settles in more quietly than icy blue slabs.
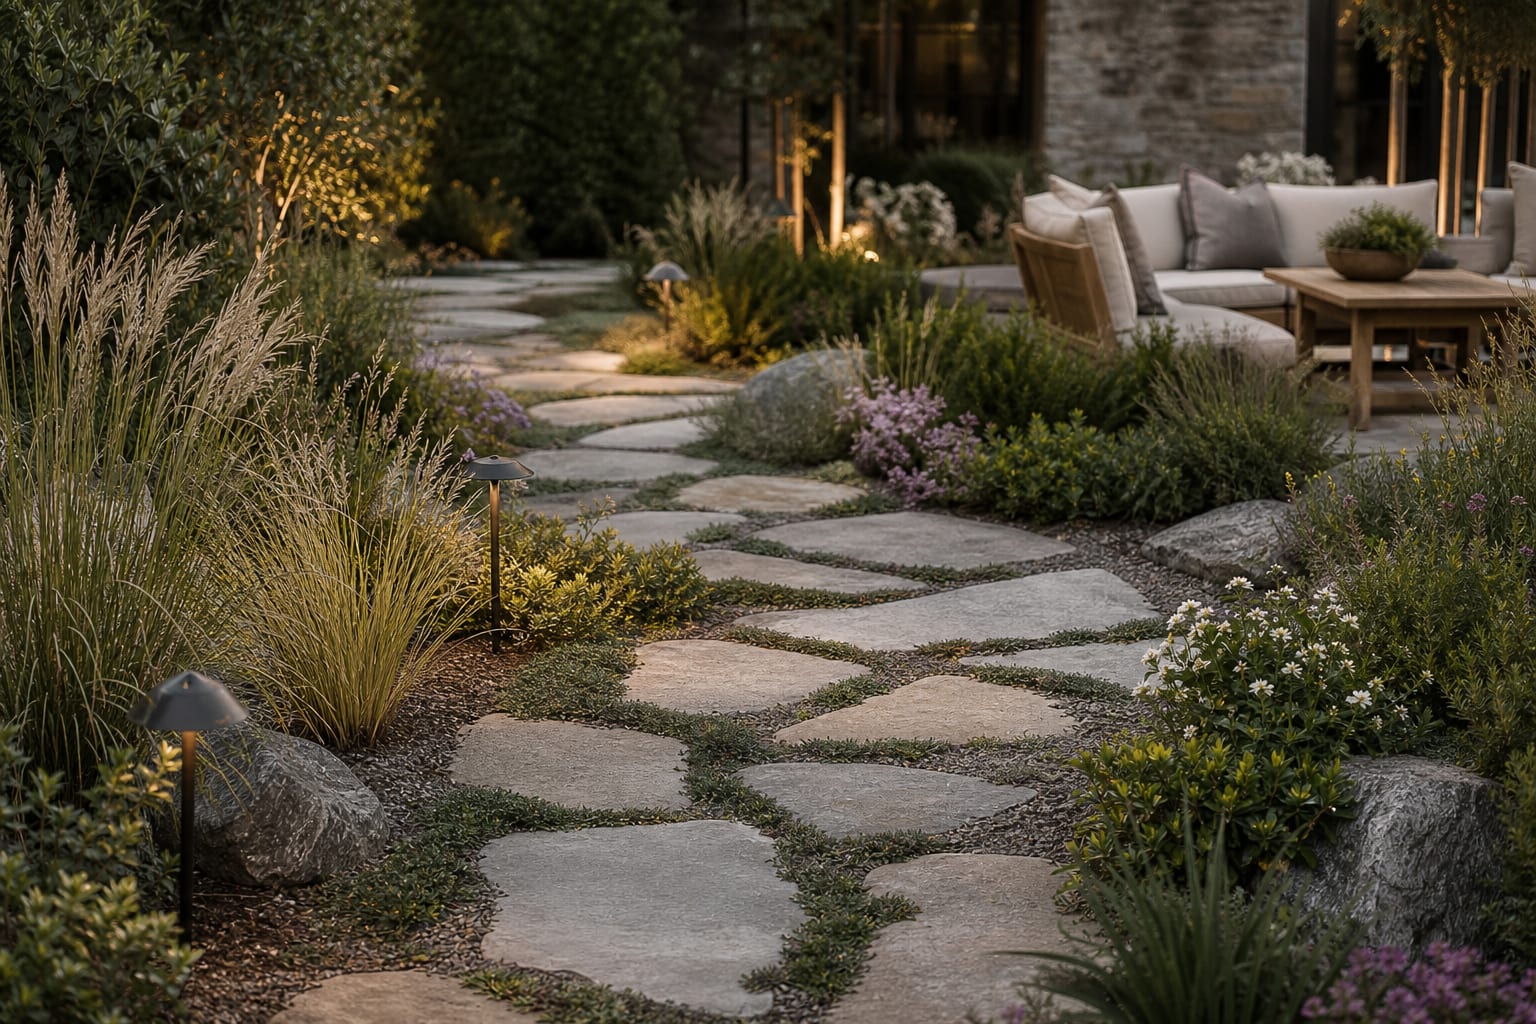
Set larger stones where the foot lands. A useful stepping rhythm is about 24 inches from center to center for flagstone stepping stones, but a continuous path can vary more. Try to keep the main walking stones at least 18 inches across in one direction, especially on curves, so the path does not force a careful little dance.
The edge is where most DIY flagstone paths expose themselves. Avoid a hard soldier course unless the garden is formal. Instead, let the stones stagger into the planting bed, then tuck low plants into the gaps. Creeping thyme, mazus, dwarf mondo grass, and Irish moss can soften joints, but use them only where foot traffic is moderate and irrigation is realistic. In hot, dry gardens, decomposed granite or 3/8-inch crushed gravel is often more honest and lower maintenance.
Lighting should also feel like part of the path, not a runway. If the route needs night use, read garden path lighting ideas that avoid glare before placing fixtures every few feet. Most paths look better with staggered low lights 8–10 feet apart than with paired fixtures marching down both sides.
Which flagstone walkway design fits your garden?
The best flagstone walkway design depends on how often the path is used, how formal the house feels, and how much maintenance you will tolerate. A front walk that handles guests, deliveries, and wet shoes needs a different build than a side garden path to a compost bin.
| Path type | Best use | Joint choice | Design caution | |---|---|---|---| | Tight-joint dry-laid flagstone | Front walks and frequent routes | 1/2–1 inch polymeric sand or stone dust | Needs careful stone fitting or it looks jagged | | Wide-joint garden flagstone | Borders, cottage gardens, informal yards | 2–3 inch gravel, soil, or low groundcover | Gaps over 4 inches become ankle traps | | Oversized stepping stones | Lawn crossings and light-use paths | Grass, mulch, or gravel between stones | Centers must match a natural stride | | Mortared flagstone | Porches, entries, and rigid terraces | Mortar over concrete slab | Cracking is likely if the slab or drainage is wrong |
A tight-joint path feels more architectural. It suits a front door, a brick house, or a narrow side yard where wheels and shoes need a reliable surface. Keep the stone thickness consistent and use a string line to manage the finished height, especially near thresholds. Leave at least 1/4 inch of fall per 2 feet away from the house where drainage is a concern.
A wide-joint path is better for a garden that wants softness. The joints become part of the planting design, so repeat the same joint material elsewhere: gravel around pots, decomposed granite under a bench, or mulch in adjacent beds. That repetition is what makes the path feel integrated rather than dropped on top of the lawn.
Stepping stones are the most forgiving choice for renters or cautious homeowners because they can often be set with less excavation. Bed each stone on compacted screenings rather than bare soil, and keep the top slightly proud of mulch but nearly flush with lawn so mower wheels do not catch. If you also plan subtle tree or wall lighting, coordinate the path with landscape uplighting ideas for garden structure so the nighttime view has depth beyond the stones.
Common mistakes to avoid
The first mistake is choosing stones that are too small. Tiny pieces create too many joints, and too many joints make the path visually busy and physically unstable. Use the small fragments at edges or in planting pockets; reserve the largest, flattest pieces for the walking line.
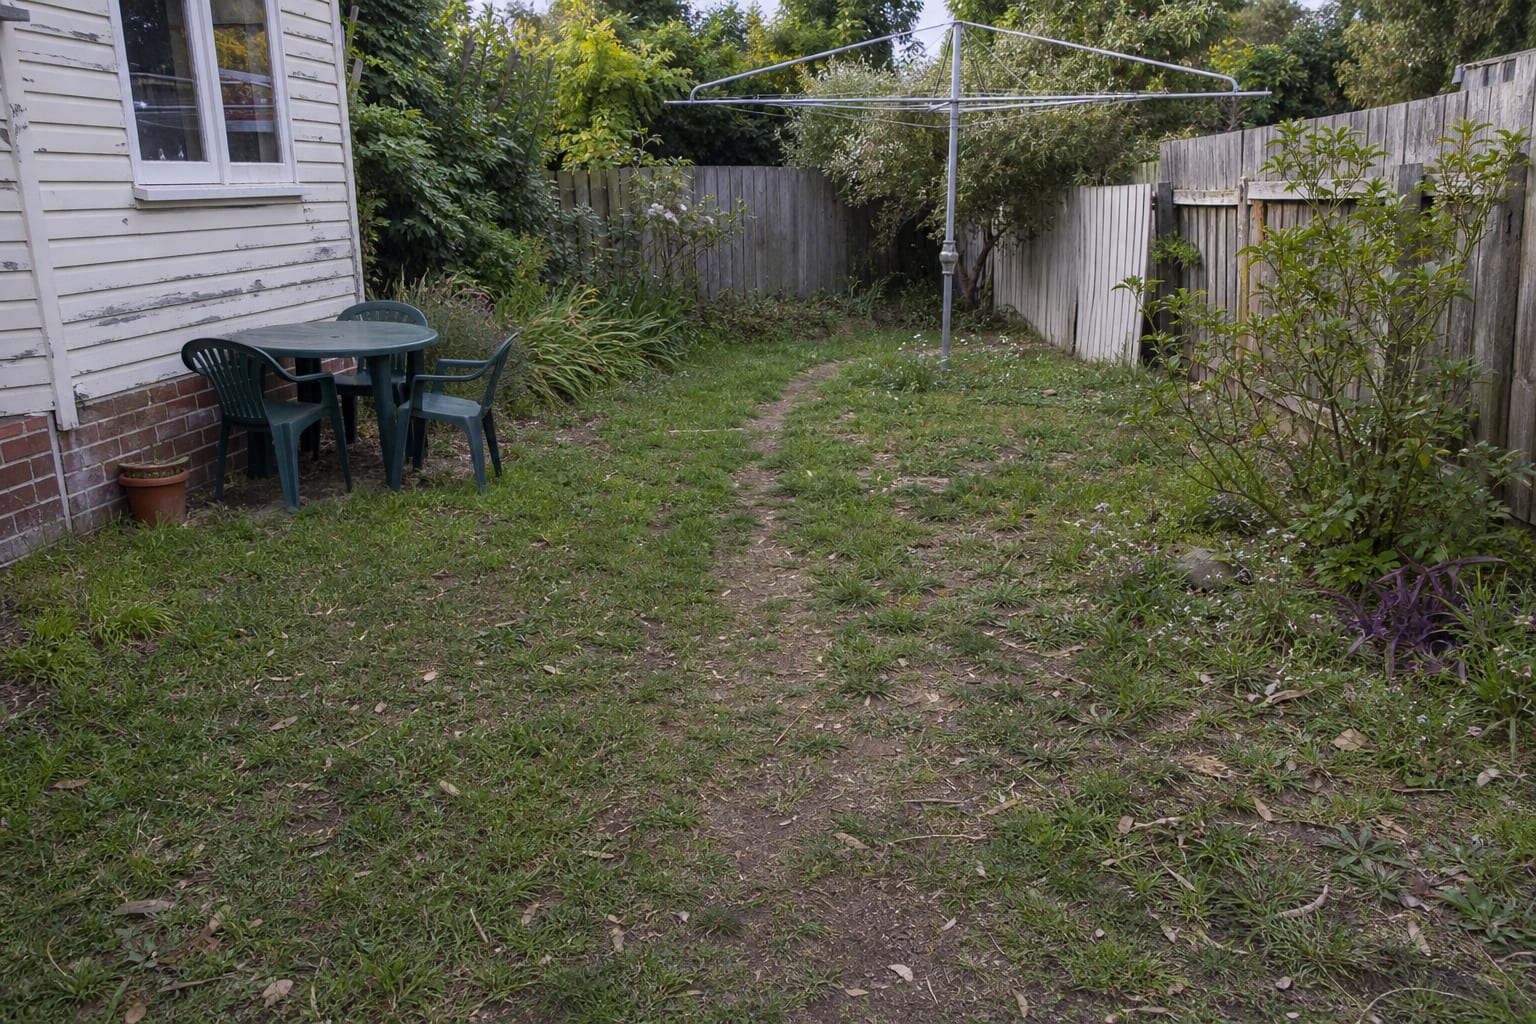
The second mistake is skipping excavation because the stones already look heavy. Flagstone set directly on soil will rock, sink, and collect water after a few freeze-thaw cycles or heavy rains. Even a modest garden path deserves a compacted base, and clay soil needs more base depth than sandy soil because it holds water longer.
The third mistake is making the curve too cute. A path should bend for a reason: a tree, a bed, a gate, a view, or a grade change. If the curve wiggles across open lawn with no obstacle, it reads fake. Use one or two long arcs rather than five nervous bends.
The fourth mistake is ignoring risers and level changes. If the path meets deck stairs, porch steps, or a sloped terrace, keep transitions obvious and well lit. A single unexpected 3 inch lip is worse than a full step because people do not register it. When steps are part of the route, study outdoor step lighting that marks each change in level before the stone is set.
The fifth mistake is letting plants swallow the walking surface. Soft edges are beautiful; wet foliage brushing ankles at night is not. Keep shrubs 12–18 inches back from the active walking line, and choose low joint plants that tolerate being clipped.
Use AI design to preview the path before you commit
AI previewing is most useful here before the heavy work begins. Upload a straight-on photo of the garden route, then test a tight-joint walk, a wide-joint cottage path, and a stepping-stone layout from the same camera angle. The goal is not to let software decide the base depth; it is to see which route, stone color, and planting edge actually suit your house.
For the clearest preview, photograph the path area at standing height with the gate, door, or destination visible. Include enough lawn or bed on both sides so the design can show width and edge planting. If the path will be used at night, generate one version with low warm lighting around 2700K–3000K and one without fixtures. That quick comparison usually reveals whether the garden needs lighting for safety, atmosphere, or both.
The best prompt is specific: ask for irregular natural flagstone, 2–3 inch gravel joints, low thyme at the edges, and a 36–42 inch walking width. If the first image looks too polished, push it toward fewer perfect rectangles and more varied slab sizes. A good preview should make the path feel inevitable, not decorative.
Frequently Asked Questions
What size flagstones work best for a path?
16-24in across for stepping stones, 24-36in for a continuous-feel path; smaller than 16in feels like garden art, larger than 36in is hard to move and may crack underfoot on a soft base. Use the outdoor photo to compare the visible layout and fixed constraints before committing, because slope, shade, drainage, doors, utilities, and traffic paths decide whether the idea survives daily use.
How do I install a flagstone path?
Excavate 6in, lay 4in of compacted crushed stone, top with 1in of leveling sand, place each stone with a slight 1/4in slope for drainage, and tap level with a rubber mallet. Keep the preview honest by leaving the problem area visible in the frame, then compare one conservative version against one bolder version before you buy plants, materials, or furniture.
What goes in the joints between flagstones?
Polymeric sand for low-maintenance, decomposed granite for a desert look, creeping thyme or Irish moss for planted joints, and pea gravel for a rustic feel — pick one and commit. Check the result against ordinary movement first: chair pullout, walkway width, gate swing, glare, storage reach, and evening light matter more than a perfect catalog angle.
How far apart should stepping stones be?
Center to center, 20-24in for a comfortable walking stride; closer than 18in feels cramped, wider than 26in forces a stretch step on most adults. Use the image to narrow priorities and measurements before ordering anything custom; final purchases still need real dimensions, code checks, utility locations, and product clearances.
Will a flagstone path get slippery?
Sandstone and limestone with a natural cleft finish stay grippy; polished granite and slate get slick when wet — specify a flamed or thermal finish for slick stone types. If the preview invents architecture or hides the awkward feature you need solved, rerun it with stricter instructions so the result remains tied to your actual outdoor space.
Three transformations to try